background image

I N S TA L L AT I O N,  O P E R AT I O N  A N D 

M A I N T E N A N C E   I N S T R U C T I O N S

Translation of the original document 80185, 09.2022

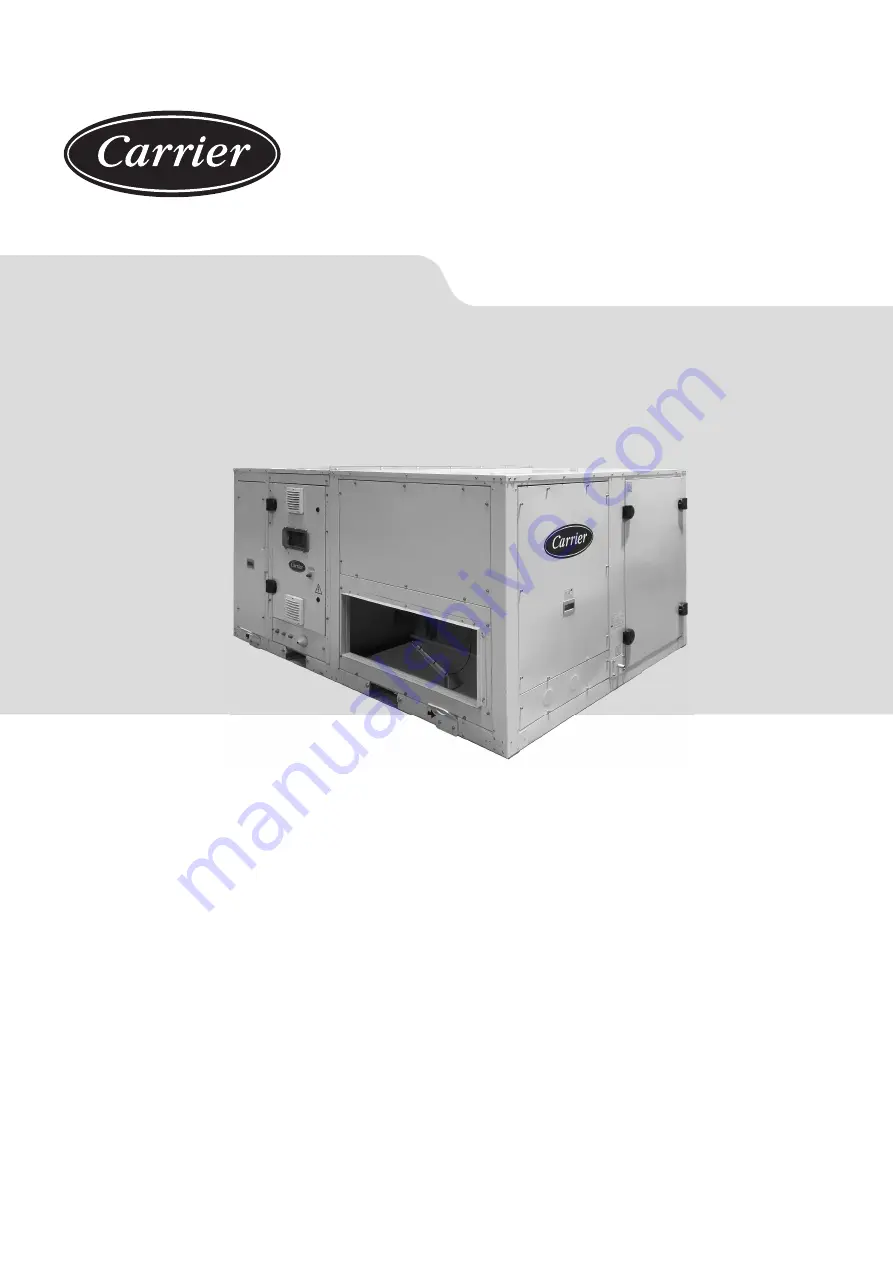
Packaged rooftop units

Nominal cooling capacity R-410A 22.3 - 97.0 kW 

Nominal heating capacity R-410A 21.9 - 99.6 kW

Nominal cooling capacity R-454B 36.0 - 90.4 kW 

Nominal heating capacity R-454B 35.9 - 89.6 kW

50FF 020-093

50FC 020-099

Summary of Contents for 50FC 020-099

Page 1: ...anslation of the original document 80185 09 2022 Packaged rooftop units Nominal cooling capacity R 410A 22 3 97 0 kW Nominal heating capacity R 410A 21 9 99 6 kW Nominal cooling capacity R 454B 36 0 90 4 kW Nominal heating capacity R 454B 35 9 89 6 kW 50FF 020 093 50FC 020 099 ...

Page 2: ...nal 33 9 4 Air ducts connections 34 10 CONDENSATE DRAIN 35 10 1 Siphon installation norms 35 11 SAFETY ELEMENTS 36 12 FACTORY OPTIONS AND ACCESSORIES 38 12 1 Dampers hoods 38 12 2 Droplet eliminator at the fresh air intake 38 12 3 Fresh air housing B3 BX BP BA BW RP 070 to 093 RW assemblies 39 12 4 Heat recovery wheel module BW and RW assemblies 40 12 5 Enclosure for lower return models 052 to 062...

Page 3: ... maximum operating pressures Verify the allowable maximum high side and low side test pressures by checking the instructions in this manual and the pressures given on the unit name plate The unit must be installed in a place that is not accessible to the public or protected against access by non authorized persons Do not modify or bypass any of the safety guards or switched in the system Risk of f...

Page 4: ...pen flames e g cigarettes as temperatures of over 300 C cause their vapours to break down and form phosgene hydrogen fluoride hydrogen chloride and other toxic compounds These compounds may produce severe physiological consequences if accidentally inhaled or swallowed In case of a leak To detect leaks an electronic leak detector an ultraviolet lamp or soapy water must be used Flame detectors do no...

Page 5: ...rn section BB assembly Return top box with plug fan or centrifugal fan Cooling recovery circuit active recovery Legend S Lower air supply R Lower air return S Lateral air supply R Lateral air return S Upper air supply R Upper air return F Fresh air intake E Exhaust air outlet Note only one of the three possible options lower lateral or upper can be selected for both supply and return R S S R R S R...

Page 6: ...r return E Exhaust air outlet RP assembly Direction 0 Lower return plug fan RW assembly Direction 0 Lower return plug fan Rotary heat exchanger passive recovery R1 assembly Direction 0 In line standard R1 assembly Direction 2 In line standard R2 assembly Direction 0 Economizer 2 dampers fresh air damper interlocked with return damper R2 assembly Direction 2 Economizer 2 dampers fresh air damper in...

Page 7: ...lectrical protection rating IP54 16 Operation weight kg empty weight fluid refrigerant 4 TRANSPORT 4 1 Transport Caution If the unit contains refrigerant R 454B A2L fluid specific transport safety standards must be complied with Road transport UN 3358 Refrigerating machines containing flammable non toxic liquefied gas Transport through the Eurotunnel and through tunnels with category D and E is no...

Page 8: ...re of gravity adjustment must also be used to separate the slings from the top of the unit Important slings must be attached to all the marked rigging points grips These points are clearly identified by labels The slings hooks should be fixed on top of the grips All models are provided with 2 lifting grips on each beam except the 052 to 099 models with BA and BB assemblies that are provided with t...

Page 9: ... 732 5 070 074 086 093 099 B1 B2 BF B3 BX BP BT BW 6 2 2200 3639 779 5 2130 729 5 070 074 086 093 R1 R2 RP RW 7 2 2200 3639 779 5 2130 729 5 070 074 086 093 099 BA BB 8 3 2200 3639 779 5 995 1135 729 5 Configurations 1 2 3 4 6 and 7 Configurations 5 and 8 After the placing of the unit it is recommended to remove the grips as they can be a hindrance for maintenance The grips are fixed to the beams ...

Page 10: ...the Recommended service clearance in section 7 6 Since the unit is designed to work outdoors some specific installation norms must be followed 1 With a condensation pressure control disabled operation up to 12ºC 2 When the outdoor temperature is usually below 5ºC WB the installation of a support element is recommended Inlet air conditions Cooling Heating 50FF 50FC 50FC Indoor coil Minimum temperat...

Page 11: ...65 5 65 8 65 6 67 5 67 9 Total dB A 77 5 82 0 82 5 82 5 83 0 84 0 85 0 50FF FC 058 062 070 074 086 093 099 63 Hz 64 5 64 9 64 8 64 6 64 6 65 3 66 8 125 Hz 69 9 71 5 72 4 71 3 71 4 74 0 75 5 250 Hz 77 7 78 9 79 7 78 4 77 9 79 3 80 8 500 Hz 80 1 80 4 79 9 80 1 80 2 80 9 82 4 1000 Hz 79 9 80 2 79 8 80 4 80 6 80 7 82 2 2000 Hz 77 4 77 8 77 7 78 3 78 1 77 7 79 2 4000 Hz 73 4 73 7 73 8 73 9 74 2 74 4 75...

Page 12: ... paragraph 7 5 All models will use M12 screws with a maximum length of 60 mm A hex key 19 or Allen wrench 10 will be used for this operation based on the type of screw used The optional silent blocks that can be supplied for these units must be placed perpendicular to the unit as shown in the following image Foresee appropriate damping devices in these fixings to ensure that noise and vibration tr...

Page 13: ...s burner For more information consult the paragraph 12 14 Gas burner Note units with In line assemblies have a wide range of adaptation roofcurbs that are ready for direct replacement on site of units from different manufacturers upon request Sealing upsweep Condensate evacuation Supply air duct Thermal insulation of ducts Steel pan Self tapping screw Building joist Reinforcing angle pieces Return ...

Page 14: ...dimensions and weight of the roofcurb must be used These slings will be hooked on the eyebolts fitted to the roofcurb Check that the eyebolts are perfectly screwed in before attaching the slings Reinforcing angle pieces Adjusting angle pieces 100 50 Joist Self tapping screw or spot weld Tightening bolts with blind rivet nuts M10 Adjustable angle piece After the above operation remove the four rein...

Page 15: ...e slope Position A Position B Position C Position D NO Supply Return Supply Return Supply Return Supply Return Note Position A is best suited for gas burner roofcurb In this position it is easier to access the burner register It is also the most optimal solution in areas where snow can accumulate Self adhesive rubber gasket of 9 mm Insulation of 9 mm on the ducts of supply and return Insulation of...

Page 16: ... Burner roofcurb 020 to 047 50 797 373 0 275 631 52 155 770 89 052 to 062 50 1229 470 376 207 619 85 155 1219 101 070 to 099 50 1570 470 373 126 704 85 155 1491 198 Standard roofcurb G E D C F A A I H B A A J Important Check that the roofcurb height is sufficient to respect the minimum sealing height required according to local regulations example 150 mm minimum sealing height in France according to...

Page 17: ...UÉS DE LA INSTALACIÓN HAY QUE REVISAR QUE TODAS LAS JUNTAS Y UNIONES ESTÉN EN PERFECTO ESTADO ES NECESARIO ASEGURAR LA ESTANQUEIDAD Y LA SUJECIÓN DEL EQUIPO Y LA BANCADA DESPUÉS DE MONTAR EL CONJUNTO IN ORDER TO GUARANTEE THE ROOFCURB TIGHTNESS AFTER THE INSTALLATION THE PERFECT CONDITION OF ALL SEAMS AND JOINTS SHOULD BE REVISED IT IS NECESSARY TO ENSURE THE TIGHTNESS AND FASTENING OF THE UNIT AN...

Page 18: ...5 84 195 113 040 1 177 787 779 882 117 228 145 84 195 113 045 1 176 788 787 882 117 228 145 84 195 113 047 1 176 787 782 884 118 228 146 85 195 113 50FF BB assembly Centre of gravity mm Weight kg Reactions in the supports kg X Y Z R1 R2 R3 R4 R5 R6 020 1 200 850 780 832 98 206 132 84 193 119 028 1 184 857 782 855 103 211 131 91 199 120 037 1 138 849 764 951 124 234 135 112 222 123 040 1 138 849 76...

Page 19: ...137 155 280 160 058 1 509 1 170 608 1 141 135 261 138 159 285 163 062 1 503 1 165 607 1 142 137 262 138 159 285 161 50FF BT assembly Centre of gravity mm Weight kg Reactions in the supports kg X Y Z R1 R2 R3 R4 R5 R6 052 1 565 1 047 796 1 213 154 302 184 132 280 162 058 1 565 1 047 796 1 228 156 305 186 134 283 163 062 1 556 1 042 792 1 236 161 309 186 136 284 161 50FF BB assembly Centre of gravit...

Page 20: ...78 086 1 798 1 172 616 1 309 162 299 150 191 328 179 093 1 795 1 171 615 1 310 163 300 150 191 328 179 50FF BB assembly Centre of gravity mm Weight kg Reactions in the supports kg X Y Z R1 R2 R3 R4 R5 R6 070 1 831 1 090 771 1 474 195 357 196 188 350 189 074 1 831 1 090 771 1 498 198 362 199 191 355 192 086 1 836 1 085 775 1 516 200 368 204 191 359 195 093 1 833 1 085 774 1 517 201 368 204 191 359 ...

Page 21: ... 615 1 294 161 310 176 161 310 176 074 1 866 1 103 615 1 318 164 316 180 164 315 179 086 1 866 1 104 620 1 336 167 320 182 166 320 181 093 1 863 1 103 619 1 337 167 321 181 167 320 181 50FF RW assembly machine recovery module Centre of gravity Machine mm Centre of gravity Module mm Weight Machine kg Weight Module kg X Y Z X Y Z 052 1 345 1 105 568 905 1 093 864 957 719 058 1 342 1 108 567 905 1 09...

Page 22: ...2 804 796 774 91 197 134 67 174 111 028 1 205 813 800 797 96 202 133 74 180 112 037 1 177 787 779 882 117 228 145 84 195 113 040 1 177 787 779 882 117 228 145 84 195 113 045 1 176 788 787 882 117 228 145 84 195 113 047 1 176 787 782 884 118 228 146 85 195 113 50FC BB assembly Centre of gravity mm Weight kg Reactions in the supports kg X Y Z R1 R2 R3 R4 R5 R6 020 1 200 850 780 832 98 206 132 84 193...

Page 23: ...ntre of gravity mm Weight kg Reactions in the supports kg X Y Z R1 R2 R3 R4 R5 R6 052 1 512 1 167 609 1 192 140 273 146 165 298 170 058 1 509 1 170 608 1 198 141 274 145 167 300 171 062 1 503 1 165 607 1 210 145 278 146 169 302 170 50FC BT assembly Centre of gravity mm Weight kg Reactions in the supports kg X Y Z R1 R2 R3 R4 R5 R6 052 1 565 1 047 796 1 285 164 320 195 140 296 171 058 1 565 1 047 7...

Page 24: ... 1 171 611 1 387 172 317 159 202 347 190 074 1 798 1 171 611 1 387 172 317 159 202 347 190 086 1 798 1 172 616 1 387 172 317 159 202 348 190 093 1 795 1 171 615 1 392 173 318 159 203 349 190 099 1 795 1 171 615 1 418 177 322 163 207 353 194 50FC BB assembly Centre of gravity mm Weight kg Reactions in the supports kg X Y Z R1 R2 R3 R4 R5 R6 070 1 831 1 090 771 1 585 209 384 211 202 376 203 074 1 83...

Page 25: ...1 728 1 105 534 1 258 210 300 115 212 302 117 062 1 720 1 101 535 1 270 215 304 115 215 305 116 070 1 866 1 103 615 1 405 175 337 191 175 336 191 074 1 866 1 103 615 1 405 175 337 191 175 336 191 086 1 866 1 104 620 1 414 176 339 192 176 339 192 093 1 863 1 103 619 1 419 178 340 193 177 340 192 50FC RW assembly machine recovery module Centre of gravity Machine mm Centre of gravity Module mm Weight...

Page 26: ...50FF FC 020 028 037 040 045 047 B3 BX BP and BA assemblies 50FF FC 020 028 037 040 045 047 BT and BB assemblies 50FF FC Overall dimension mm Service clearance mm Length Width Height A B C D 020 to 047 2 225 1 750 1 230 1 200 1 000 1 000 1 600 50FF FC Overall dimension mm Service clearance mm Length Width Height A B C D 020 to 047 2 230 1 755 1 905 1 200 1 000 1 000 1 600 50FF FC Overall dimension ...

Page 27: ...99 B3 BX BP and BA assemblies 50FF FC 052 058 062 070 074 086 093 099 BT and BB assemblies 50FF FC Overall dimension mm Service clearance mm Length Width Height A B C D 052 to 062 3 000 2 200 1 230 1 600 1 000 1 000 1 000 070 to 099 3 650 2 200 1 230 2 000 1 000 1 000 1 000 50FF FC Overall dimension mm Service clearance mm Length Width Height A B C D 052 to 062 3 000 2 205 1 905 1 600 1 000 1 000 ...

Page 28: ...bly 50FF FC 070 074 086 093 RP assembly 50FF FC Overall dimension mm Service clearance mm Length Width Height A B C D 052 to 062 3 000 2 200 1 230 1 000 1 000 1 300 2 200 070 to 093 3 650 2 200 1 230 1 000 1 000 1 600 2 200 A B C D 50FF FC Overall dimension mm Service clearance mm Length Width Height A B C D 052 to 062 3 865 2 200 1 230 1 000 1 000 1 300 2 200 50FF FC Overall dimension mm Service ...

Page 29: ...g The power cables can be routed into the electrical box for the units Via the panel located under the electrical cabinet Via the base of the unit It is important to check that the power cable bend radius is compatible with the connection space available inside the electrical cabinet 8 4 Electrical cabinet All units include a fully wired electrical cabinet with forced ventilation The access door i...

Page 30: ...al BOX8 Hot water coil or heat recovery coil or gas burner or gas boiler optionals The following image shows the location of boxes in a two circuit unit with Standard assembly Graphic terminal User terminal Touch panel These latches of stainless steel have triangular insert 8 mm supplied wrench The closing is done by rotating 90º anti clockwise it brings the latch to the locked position Dual locks...

Page 31: ...hermo enthalpic management of the economizer must be installed on site on the hood of the fresh air intake Open the case by turning the top cover anticlockwise fig1 Fasten the rear of the sensor case to the side panel of the hood use the screws supplied together with the probe placing the screws in the holes provided fig 2 Make sure that the screws that hold the board protective cover are fastened...

Page 32: ...es or shelves On walls covering heat sources such as a chimney In the radiation range of heat sources and lighting bodies e g spotlights In areas exposed to direct solar radiation Duct mounted This version can be connected to the air duct in these two ways M16x1 5 Ø 13mm Ø 0 51 19mm 0 75 90 0 3 mm 3 54 0 11 5mm 0 2 60 0 3 mm 2 36 0 11 Ø 16mm Ø 0 63 6mm 0 24 Electrical connection This probe S10 is ...

Page 33: ...fer to the 50FC control brochure 9 FANS AND AIR DUCTS Access to the outdoor unit from the fans For some maintenance tasks it may be convenient to access the outdoor unit by lifting the cover with the fan s depending on the model First the power supply to the fan must be disconnected Each fan features two quick release connectors power and control inside the compressor box Then the cover must be un...

Page 34: ...ation Belt tension After fixing the pulleys on the same plane the belt tension is made by tightening the tensor screw Excessive tension on the belt can lead to premature wear on the assembly Insufficient belt tension can cause slippage overheating and premature wear of the belt It is essential to tension the belts using the Deflection test described below The belt tension must be checked and correct...

Page 35: ...be made CONNECT SIPHON METTRE SIPHON PONER SIFON V220014 10 CONDENSATE DRAIN Important the water drain pipe must be provided with a siphon to avoid bad smell and water spills A Condensates pan in depression A Siphon drain Slight slope 5 1000 To drainage Some options are equipped with a separate drain 1 2 M gas threaded plastic Cooling recovery circuit BA and BB assemblies Heat recovery wheel modul...

Page 36: ...sure safety is done by the 50FC electronic control via the measure of the low pressure transducer Automatic switch in the control circuit Magnetothermal switch that protects the operation circuit against continuous surges as well as against high currents of short duration short circuits Safety valve All models include a safety valve in the high pressure line Valve tare value at 45 bar Note The act...

Page 37: ...uaranteeing the safety of any people in the vicinity This sensor is installed next to the supply fans In case of alarm it is reset manually Smoke detector optional Smoke detecting station in accordance with the NF S 61 961 standard 961 that uses a LED to indicate the installation status and if the probe detects the presence of smoke in the installation it stops the operation of the unit and gives ...

Page 38: ... Dampers hoods Depending on the assembly chosen the fresh air and exhaust air damper hoods are supplied folded down to be fitted on site by the installer The left side 2 and right side 3 closure parts are supplied screwed to the inside panel 4 The left side 2 and right side 3 closure parts will be screwed to the panel 4 using 3 screws and to the hood 1 using another 3 screws These screws are 4 8 s...

Page 39: ...st be connected Then part 3 is put in place This structure must be fitted on top of the unit before continuing with the assembly process Then the screen panel 4 is fitted to the cover and to the lower tab which incorporates the machine Before fitting the trim 6 the folded down hood 5 must be positioned so as to rest against the lower tab of the trim Next the trim is screwed onto the screen panel 4...

Page 40: ...front view is secured using M6 Allen screws while the left hand panel incorporates dual locks Note Check that the locks are not blocked Open the locks with a 4 mm Allen key anticlockwise The module is screwed to rest on the support bed using 8x40 hex screws on both sides Finally raise the hoods 5 and secure the side parts Follow the steps detailed in the preceding paragraph Note All the screws req...

Page 41: ...er of the unit and the cover of the module are joined using a seal This is supplied attached to the cover of the module and must be joined to the cover of the unit using 4 8 self tapping hex screws 12 FACTORY OPTIONS AND ACCESSORIES Then the recovery module is connected as described above 50FF FC unit RW 052 to 062 Return fans module Recovery module 50FF FC unit RW 052 to 062 Return fans module Re...

Page 42: ...required for this assembly are supplied with the unit Lateral return Lower return This enclosure is composed of the parts that appear in the following image The number of each part corresponds to the order of assembly First left 1 and right 2 side parts must be connected Then parts 3 and 4 are put in place 12 FACTORY OPTIONS AND ACCESSORIES All these parts are fitted to the unit using 4 8 self tap...

Page 43: ...1 Electric panel 10x30 hex screws Left hand panels These units include G4 gravimetric filters standard type which can be replaced by G4 gravimetric filters with low pressure drop G4 gravimetric filters standard type M6 F7 or F9 folded opacimetric filters G4 gravimetric filters with low pressure drop F7 or F9 folded opacimetric filters Double stage of folded opacimetric filters M6 F7 M6 F9 F7 F9 or...

Page 44: ... when it is time to close it Cut off the water supply and let the bubbles generated go up to the highest coil point and eliminate by opening the purger Pour more water into the circuit and repeat the previous steps Activate the water pump to be foreseen by the installer and repeat the previous steps until no air noises are heard in the piping which is when the filling of the installation will have ...

Page 45: ...cessed by removing the panels 1 and 2 and then the inside panel 3 all of them fixed with M6 Allen screws 1 3 2 To remove the frame with the electrical heaters it is necessary to disconnect the safety thermistors from the connection box and unscrew the frame attachment screw M4 Allen In line assemblies The heaters are accessed by removing the panel 4 and then the inside panel 5 both fixed with M6 A...

Page 46: ...5ºC the other one has manual reset and tare value at 120ºC After the module has been attached to the machine the module cover 3 will be fitted using 4 8 self tapping hex screws The hood 4 will then be raised and the side parts fixed To do this follow the steps described in paragraph 12 1 Two or three L shaped mounting brackets 4 depending on the model are supplied with the module to increase the i...

Page 47: ... with the supply temperature During the defrosting operation if selected as backup With the unit running or shut down if an anti freeze alarm is triggered With the unit stopped when the outdoor temperature drops below 4ºC In this case the circulation pump of the water circuit is connected As a backup in COOLING mode in accordance with the return and the outlet temperatures This option always incor...

Page 48: ...owing operations shall be necessary if the boiler is not used for a long period of time Switch the boiler OFF at the control panel Turn the magnetothermic switch off placed in the electrical cabinet of the 50FF FC unit Close the fuel cock and heating circuit water cock Drain the central heating circuit if there is any risk of freezing Maintenance must be performed on the boiler at least once a year...

Page 49: ...the manufacturer s manual must be kept with care If it is lost or damaged please contact the Technical Assistance Service for a new copy The thermal module before being connected to the hydraulic system the gas network and the electrical system may be exposed to temperatures ranging from 4 C to 40 C After it can activate the Frost Protection function Regularly check that the condensate drain is fr...

Page 50: ...st flue probe 17 Return probe 18 Control panel 19 Ignition detection electrode 20 Safety thermostat 21 Flow probe 22 Automatic bleed valve 23 Casing Installation of the boiler The boiler is supplied disassembled with the 50FF FC unit for installation on site The hydraulic circuit is assembled inside the 50FF FC unit The installer must connect the connecting piping with the boiler Note all this pip...

Page 51: ...ssary to remove the locking screw and then pull the front panel outwards and later to the top to decouple it from points A Step 4 Drop the boiler on the bracket 6 and screw on the four fixings of this panel to secure M4 Allen screws Then reassemble the casing Step 5 Finally join the boiler with the piping using elbows and accessories factory supplied Locking screw Clamps M4 Allen fixing screws for...

Page 52: ... temperatures If the gas distribution network contains solid particles install a filter on the fuel supply line When selecting it consider that pressure drops due to the filter should be as low as possible Once the boiler has been installed check the connections are sealed according to current installation regulations Connection at the flue The boiler is supplied as standard in B type configuratio...

Page 53: ...L A L I 10 1 255x80 point backlit display 106 4 x 39 0mm 2 RESET key Restores normal operations after a safety shut down 3 MENU key Switches on the main menu 4 ESC key In menu navigation it enables you to exit a menu item and go back to the previous one 5 navigation key Within a list of parameters if the cursor is located in the right column values column move the cursor in the left column descrip...

Page 54: ... Service menu password protected During this stage check that the air is correctly eliminated Restore the pressure if necessary Stop the pump and start up again Repeat the last three steps until the pressure is stabilised Excessive pressure fluctuations can cause stress and fatigue to the heat exchanger Keep the operating pressure constant 1 I I I I F I D F I D F F F I D F I D F I D F I D F I D F ...

Page 55: ...ng a very low level of pollutants The control located inside the burner housing allows the service centre to check and view the working phases and identify any faults that may have occurred The electronic control of the unit will only manage the burner connection as heating support depending on the ambient conditions Note the main technical characteristics of the burner can be found in the technic...

Page 56: ...xhaust duct do not wet the heater with water or other fluids do not place any object over the burner do not touch the moving parts of the burner General recommendations Maintenance Maintenance operations and combustion inspections must be carried out in compliance with current standards Before carrying out any cleaning and maintenance operations isolate the heater from the mains power supply from ...

Page 57: ...nnection of the outlet probe The connection of the outlet temperature probes must be performed on site This probe is supplied inside the electrical cabinet of the 50FF FC unit Make the electrical connection of the probe S3 to the connection box BOX8 QUE that is located inside of the 50FF FC unit using 2 x 1mm2 section cable Note this cable is not supplied with the probe Please refer to the wiring ...

Page 58: ...cline 1 3 towards the heater in order to prevent the build of condensation in the exhaust Pressure drop for terminals and exhaust ducting Type C53 Sealed combustion circuit type C connected by means of its own ducting split in two terminals which could end up in areas with different pressure such as a ducting connected to the roof and a second one connected to the wall Type C63 Sealed combustion ci...

Page 59: ...tion 15 C 1013mbar m3 h 0 51 2 01 0 80 3 69 0 90 4 44 1 31 6 88 1 74 8 68 2 22 10 58 Carbon dioxide CO2 content 8 8 9 1 8 7 9 1 8 7 9 1 8 7 9 1 8 7 9 1 8 5 9 1 Fumes temperature ºC 39 113 31 94 30 94 31 86 26 5 70 28 80 Fume mass flow rate max kg h 31 57 72 107 135 165 Gas butterfly valve mm 5 8 7 4 7 5 11 0 12 2 15 8 G25 Cat L LL Air supply pressure mbar 25 min 17 max 30 20 for Germany Ø pilot no...

Page 60: ...Conversion to gas G25 G25 1 G25 3 G27 Conversion for gasses from G20 to G25 or G25 1 or G25 3 or G27 is allowed only in countries of category II2ELL3B P Germany II2Esi3P France II2E3P Luxembourg and category II2HS3B P Hungary and category II2ELwLs3B P Poland For countries in category II2EK3B P Netherlands the unit is supplied already set up and regulated for G20 or G25 3 Conversion from one type o...

Page 61: ...oming 0 10 Vdc signal when is reaches the set point The probe monitors the ratio of heat capacity cooling air flow It is not advisable to change the ST1 value Fxx faults The modulation PCB can distinguish between 30 different types of faults This ensures accurate diagnostics Also codes and possible causes of faults are listed in this manual For more serious faults that require a manual reset use th...

Page 62: ...nfigure and diagnose all operating parameters of the equipment The instrument panel is fitted with a red 3 digit LCD display and four function keys ESC and ENTER the display allows the user to display the heater operating mode and its faults It allows our service centre to change the main operating parameters Changing parameters requires a password Navegating the menu The menu has three levels The...

Page 63: ...he minimum or the maximum for combustion tests it automatically returns to the previous position at the end of the preset time 10 minutes TIN allows the user to read the value of the 0 10 Vdc signal coming into the PCH Pra not used ABI used to enter the PWD to access menus of second and third level Entering the password 001 will provide access to the second level and make the Set Point and I O men...

Page 64: ...he communication panel between both circuits The charging valve schrader type must be used to adjust the refrigerant charge of the recovery circuit when this one is lower than required Characteristics of the recovery circuit Main circuit s draining Recovery circuit draining Charging valve Recovery compressor Access panel to compressors box on circuit 1 Access panel to compressors box on circuit 2 ...

Page 65: ... the ambient temperature current operating mode of the unit time and day of the week The following screen shows the temperature setpoint for this zone in the current operating mode This screen can also show the zone that corresponds to the terminal the regulation band associated with the temperature setpoint the active alarms by means of codes and the delay set for the opening closing of the dampe...

Page 66: ...TAZIONE ELETTRICA LASCIARE LA MACCINA SOTTO TENSIONE PER 24 ORE PRIMA DI AUTORIZZARE L AVVIAMENTO DEL DEI COMPRESSORE I ANTES DEL PRIMER ARRANQUE O DESPUÉS DE UNA AUSENCIA DE CORRIENTE POR UN LARGO PERIODO DE TIEMPO CONVIENE QUE LA UNIDAD ESTÉ CONECTADA UN MÍNIMO DE 24 HORAS BEIDER ERSTEN INBETRIEBSETRUNZ ORDER NACH EINER LANGEN STROMUNTER BRECHUNG BRINGEN SIE DIE MASCHINE UNTER SPANNUNG 24 STRUND...

Page 67: ...ng information the nominal voltage current absorbed by the compressors fans and other electrical components significant temperatures in the cooling circuit see attached table other aspects considered interesting such as alarms detected by the electronic control of the unit The recording of these parameters whilst the unit is running allows controlling the installation performance and it is the bes...

Page 68: ...esent and in good condition and that the doors and covers are properly closed Check the unit s alarm report see the control manual Check for any general signs of deterioration Check the anti corrosion coatings Level 2 maintenance This level requires specific expertise in electrical cooling and mechanical systems It is possible that this expertise may be available locally there may be a maintenance...

Page 69: ...ce the new compressor and check that it has a sufficient oil charge Warning when tightening the compressor screws please consult the maximum torque that can be applied Solder the suction and discharge piping Connect the compressor in accordance with the wiring diagram Make vacuum and next reload the gas into the unit according to charge data provided in the table of section Refrigerant and in the un...

Page 70: ...uit 2 Note this option is not available for 50FC 099 model Cooling recovery circuit optional 50FC 020 028 037 040 045 047 Volume l C1 2 5 C1 2 5 C1 2 5 C1 3 4 C1 3 4 C1 3 4 50FC 052 058 062 070 074 086 093 Volume l C1 2 5 C2 2 5 C1 2 5 C2 2 5 C1 2 5 C2 2 5 C1 2 5 C2 2 5 C1 3 4 C2 3 4 C1 3 4 C2 3 4 C1 3 4 C2 3 4 50FC 020 028 037 040 045 047 Volume l CR 1 24 CR 1 24 CR 1 24 CR 1 24 CR 1 24 CR 1 24 5...

Page 71: ...ability limit for alarm by default 50 percentage of the LFL from which the refrigerant leak failure occurs and the unit starts operating in PROTECTION MODE Concentration of LFL for alarm switch off by default 10 Percentage of LFL below which the refrigerant leak alarm ends and the unit stops operating in PROTECTION MODE Airflow by default to 100 Percentage of the airflow rate of the indoor fans sup...

Page 72: ...is the preserve the cooling circuit clean and without humidity neutralizing the acids that can be found in the cooling circuit Measure the difference in the temperature of the pipes at the dryer inlet and outlet If necessary replace Filter dryer Compressors in tandem Use safety gloves for this task Take care with the sharp parts of the coil Air coil Check that the coil is free from dust and grease ...

Page 73: ...ceeded depending on the combination of filters selected Gravimetric filters G4 Cleaning can be done with a household vacuum cleaner Replace them regularly Creased opacimetric filters M6 F7 F8 and F9 It is necessary to replace them The access panel to the filters features dual locks which can serve as a hinge or can be used to remove the panel Check that the locks are not blocked Open the locks wit...

Page 74: ...taken with the manufacturer s consent the replacement of a faulty component for another non compliant component could present a hazard for which CARRIER could not accept liability To keep the machine efficient and guarantee a long lifetime of the heater it is advisable to run some inspections every year before turning it on for the season 1 check the status of the start up electrodes detection elect...

Page 75: ...e safety thermostat s This procedure must be done with the heater on and the burner lit Open the thermostat series with an insulated tool 230 V remove the fast on from the safety thermostat wait for the F20 block signal to appear on the LCD display Reclose the thermostat series then reset the fault 1 Inspection of electrodes Dismantle the complete pilot flame and use a jet of compressed air to cle...

Page 76: ...element are open c Timing of anti cycle short does not allow the starting d Open contact e Contactor coil burnt f Indoor klixon open a Check differential fuses b Verify the safety chain of the electronic control c Verify electronic control d Replace e Replace f Wait for reactivation verify current absorbed Compressor does not start motor sounds intermittently a Electrical power supply very low b Po...

Page 77: ...ered for treatment Refrigerant Energy transfer fluid depending on the installation water glycol water mix Compressor oil Important In order to recycle these units follow the stipulations of Directive 2012 19 EU on Waste electrical and electronic equipment WEEE Materials to be recovered for recycling Steel Copper Aluminium Plastics Polyurethane foam insulation Waste electrical and electronic equipm...

Page 78: ...78 Notes ...

Page 79: ......

Page 80: ...5 09 2022 Supersedes order No 03 2022 Manufactured by CARRIER SCS Rte de Thil 01120 MONTLUEL France Published in the European Union Manufacturer reserves the right to change any product specifications without notice ...

Reviews: