background image

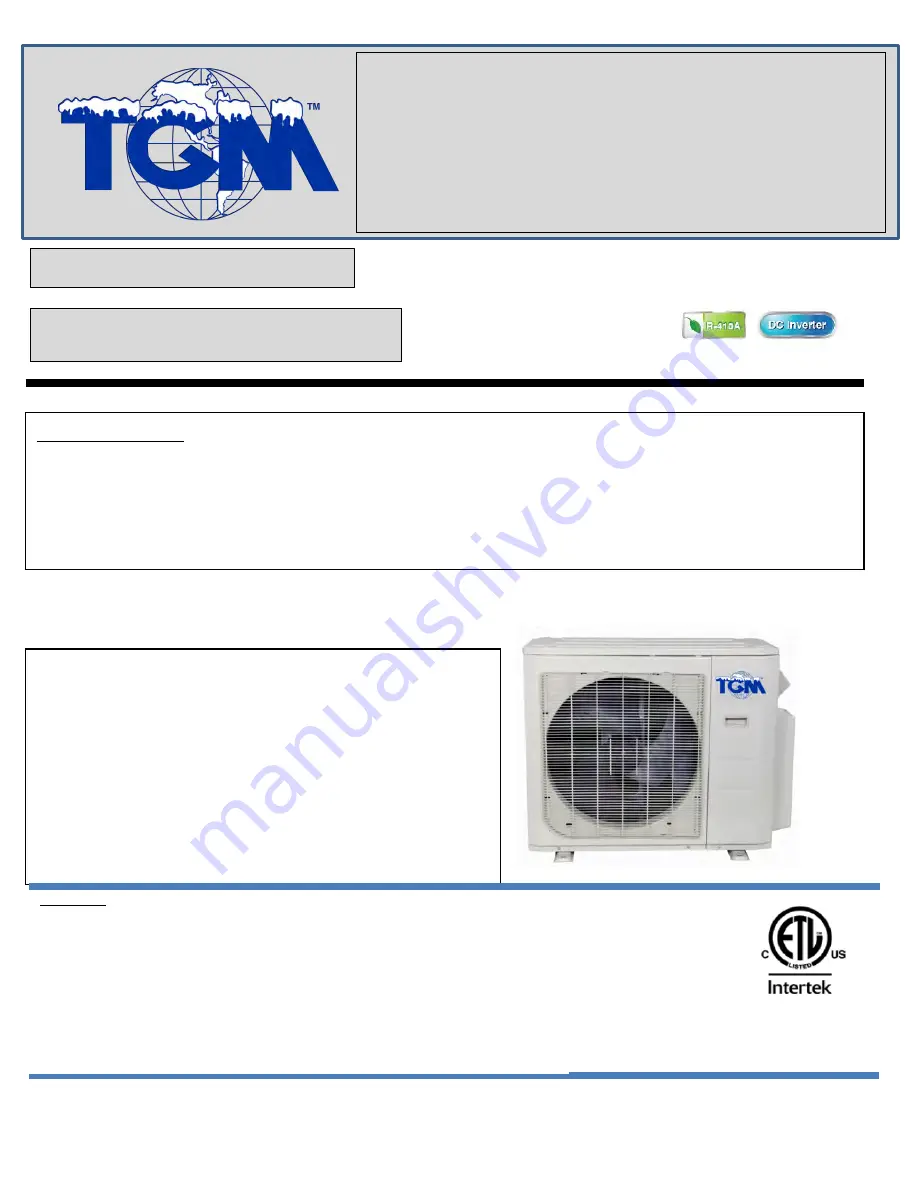
Multi outdoor units 

sErViCE MAnuAl


Multi zone 

CondEnsinG units 

Revision E: 

 ODMFI-E-1705 

Model Numbers: 

MMCUT18AS2


MMCUT27AS3


MMCUT36AS4


MMCUT48AS5


WARNING 

Installation MUST conform with local building codes or, in the absence of local
codes, with the National Electrical Code NFPA70/ANSI C1-1993 or current edition
and Canadian Electrical Code Part1 CSA C.22.1.

The information contained in the manual is intended for use by a qualified service
technician familiar with safety procedures and equipped with the proper tools and
test instruments

Installation or repairs made by unqualified persons can result in hazards to you
and others.

Failure to carefully read and follow all instructions in this manual can result in
equipment malfunction, property damage, personal injury and/or death.

Table of Contents 

1.

Indoor Unit Combination

2.

Dimension Of Outdoor Unit

3.

Refrigerant Cycle Diagram

4.

Installation Details

5.

Electronic Function

6.

Wiring Diagrams

7.

Trouble Shooting

8.

Disassembly Instructions

Summary of Contents for MMCUT18AS2

Page 1: ...al is intended for use by a qualified service technician familiar with safety procedures and equipped with the proper tools and test instruments Installation or repairs made by unqualified persons can...

Page 2: ...servicing the indoor unit refrigeration circuit 13 4 7 Evacuation after servicing the outdoor unit refrigeration circuit 14 5 Electronic Function 16 5 1 Abbreviation 16 5 2 Electric Control Working E...

Page 3: ...3 MMCUT36AS4 WD30 metal plate 114 MMCUT48AS5 WE30 metal plate 121...

Page 4: ...24 9 24 24 12 12 12 12 12 18 12 12 24 12 18 18 12 18 24 12 24 24 18 18 18 Multi DC Outdoor Unit Nominal capacity Suggested Combination Limit 1drive 3 7 8kW 9 9 None 9 12 9 18 12 12 12 18 18 18 9 9 9 9...

Page 5: ...24 9 9 18 18 9 9 18 24 9 12 12 12 9 12 12 18 9 12 12 24 9 12 18 18 9 18 18 18 12 12 12 12 12 12 12 18 12 12 12 24 12 12 18 18 9 9 9 9 9 9 9 9 9 12 9 9 9 9 18 9 9 9 9 24 9 9 9 12 12 9 9 9 12 18 9 9 9 1...

Page 6: ...el Unit W D H W1 A B MMCUT18AS2 mm 845 363 702 923 540 350 inch 33 3 14 3 27 6 36 0 21 3 13 8 MMCUT27AS3 mm 946 410 810 1034 673 403 inch 37 2 16 5 31 9 40 6 26 5 15 9 MMCUT36AS4 mm 946 410 810 1034 6...

Page 7: ...7 H W A D W1 B Model Unit W D H W1 A B MMCUT48AS5 mm 952 415 1333 1060 634 404 inch 37 5 16 3 52 5 41 7 25 0 15 9...

Page 8: ...ILLARY B LIQUID VALVE B GAS VALVE B Accumulator T2B A Evaporator temp sensor outlet T2B B 3 2 Refrigeration circuit drawing of inverter 1 drive 3 type LIQUID VALVE A GAS VALVE A HEAT EXCHANGE EVAPORAT...

Page 9: ...itch Low pressure switch T2B A Evaporator temp sensor outlet T2B B T2B C T2B D 3 4 Refrigeration circuit drawing of inverter 1 drive 5 type LIQUID VALVE A GAS VALVE A HEAT EXCHANGE EVAPORATOR HEAT EXC...

Page 10: ...10...

Page 11: ...for all rooms 98 4 0 161x le ngth for all rooms 123 Caution Refrigerant pipe diameter is different according to indoor unit to be connected When using the extension pipe refer to the tables below When...

Page 12: ...ure Then remove the charge hose from the 3 way valve 8 Fully open the 2 wayand 3 way valves and securely tighten the cap on the 3 way valve 2 Adding refrigerant if the pipe length exceeds chargeless p...

Page 13: ...wrench to tighten the service port cap to a torque of 18N m 13 27 ft lbs Be sure to check for gas leaks 4 6 Procedure when servicing the indoor unit refrigeration circuit 1 Collecting the refrigerant...

Page 14: ...e 3 way valves about 45 counterclockwise for 6 or 7seconds after the gas coming out then tighten the flare nut again Make sure the pressure display in the pressure indicator is a little higher than th...

Page 15: ...ime operating the air conditioner in the cooling cycle however one time is not sufficient wait approximately 1 minute and then repeat the procedure 5 When the electronic scale displays the proper weig...

Page 16: ...ent frequency If the temperature increase and T5 110 230 decrease the frequency to a lower level every 2 minutes till to F1 If T5 115 239 for 10 seconds the compressor stops and then restart untill T5...

Page 17: ...opI Heating stop protection current value 5 3 7 Indoor Outdoor Units Communication Protection If the indoor units do not receive the feedback signal from the outdoor units for 2 consecutive minutes th...

Page 18: ...el 9K 12K 18K 24K HP 1 0 1 2 1 5 2 5 Note The final result is an integer Use the following table and final capacity request to confirm the operating frequency Frequency Hz 0 COO L_F1 COO L_F2 COOL _F2...

Page 19: ...17 16 Fmax T4FREHEATMAX5 15 14 Fmax T4FREHEATMAX6 12 11 Fmax T4FREHEATMAX7 6 5 Fmax T4FREHEATMAX8 1 0 Fmax T4FREHEATMAX9 3 4 Fmax F21 7 8 Fmax F22 11 12 Fmax F23 15 16 Fmax F24 Fmax F25 5 4 2 Defrosti...

Page 20: ...e machine will turn to normal heating mode T3 TempQuitDefrost_ADD The defrosting time achieves 10min Turn to other modes or off 5 4 3 Outdoor Fan Control 5 4 3 1 Cooling Mode Under normal operating co...

Page 21: ...The adjustment range is 100 400p When the unit has been running for 3 minutes the outdoor receives indoor units capacity demand and T2B information and then calculates their average After comparing e...

Page 22: ...ting action In other modes a four way valve is closed When the unit is switched from heating to other modes the four way valve turns off after the compressor has been off for 2 consecutive minutes Fai...

Page 23: ...23 6 Wiring Diagrams 6 1 Wiring diagram of 1 drive 2 outdoor MMCUT18AS2...

Page 24: ...24 6 2 Wiring diagram of 1 drive 3 outdoor MMCUT27AS3...

Page 25: ...25 6 3 Wiring diagram of 1 drive 4 outdoor MMCUT36AS4...

Page 26: ...D C N 3 L I N R117 R118 D33 D32 D31 R64 R49 R40 R29 I C13 I C12 I C10 I C 8 I C 7 I C 5 I C 4 I C 2 C45 C36 C34 C29 C27 C19 C18 D34 C42 D14 CN 4 N I N power suppl y 208 230V AC CN 3 L I N connect t o...

Page 27: ...05 R 104 R 103 R 102 R 101 R 100 R 99 R 98 R 96 R 95 R 94 R 93 R 92 R 91 R 90 R 88 R 81 R 80 R 79 R 78 R 77 R 76 R 75 R 74 R 73 R 72 R 71 R 70 R 69 R 68 R 67 R 66 R 65 R 64 R 63 R 62 R 61 R 60 R 59 R...

Page 28: ...3 E27 E25 E24 E22 E21 E20 E17 E16 E15 E14 E13 E12 E10 E9 E8 E7 E6 E5 E4 E1 DZ9 DZ8 DZ7 DZ6 DZ1 D26 D14 D13 D12 D11 D10 D9 D8 D6 D5 D4 D3 D2 CN57 1 CN56 CN54 L IN2 CN53 N IN2 CN52 CN51 CN19 OUTFAN DC C...

Page 29: ...29...

Page 30: ...Do not forget to discharge the electricity in the capacitors The value of resistance is about 1500 ohm to 2000 ohm Electrolytic Capacitors HIGH VOLTAGE CAUTION Bulb 25 40W The voltage in P3 and P4 in...

Page 31: ...or T3 or ambient temperature sensor T4 malfunction or Outdoor unit EEPROM parameter error X Compressor top high temperature protection OLP X Compressor drive protection X Indoor units mode conflict In...

Page 32: ...Indoor unit EEPROM parameter error E0 Communication malfunction between indoor and outdoor units error E1 Zero crossing signal detection error E2 Indoor fan speed malfunction E3 X X Outdoor temperatur...

Page 33: ...X E1 Communication malfunction between indoor and outdoor units E2 4 times X E3 Indoor fan speed malfunction 5 times X E4 Indoor room temperature sensor T1 malfunction 6 times X E5 Evaporator coil tem...

Page 34: ...8 Cassette optional lift panel malfunction 10 times F9 Cassette optional lift panel not closed 1 times P0 Inverter module IPM malfunction P6 2 times P1 Over voltage or under voltage protection E5 3 ti...

Page 35: ...orse power If the indoor unit is not connected the digital display shows the following 9K 1HP 12K 1 2HP 18K 1 5HP 4 Indoor unit B capacity 5 Indoor unit C capacity 6 Indoor unit D capacity 7 Indoor un...

Page 36: ...lue is between 30 129 If the temperature is lower than 30 the digital display shows 30 If the temperature is higher than 99 the digital display shows single and double digits For example if the digita...

Page 37: ...ng PH or alternative displays between running frequency and PH each appears for 0 5s Oil return process RO or alternative displays between running frequency and RO each appears for 0 5s Low ambient co...

Page 38: ...6 PFC module protection E8 Outdoor fan speed malfunction F5 F1 No A Indoor unit coil outlet temp sensor malfunction F2 No B Indoor unit coil outlet temp sensor malfunction F3 No C Indoor unit coil out...

Page 39: ...or PCB main chip does not receive feedback from EEPROM chip Potential causes Installation mistake Faulty PCB Trouble shooting Yes Replace the indoor outdoor main PCB Power off then restart the unit 3...

Page 40: ...etween indoor and outdoor units diagnosis and solution Malfunction conditions If indoor unit does not receive the feedback from outdoor unit during 120 seconds Potential causes Wiring mistake Faulty i...

Page 41: ...y remote controller Is all indoor unit display Turn off the all indoor units Is IPM power LED or operating LED lamp On Refer PIC2 Yes A Is all the wiring between terminal and Indoor PCB connect ok No...

Page 42: ...tage between 2 old L2 port and S port of outdoor unit The red pin of multimeter connects with 2 old L2 port while the black pin is for S port When AC is normal running the voltage will move alternatel...

Page 43: ...43 Operating Standby Pic 2 IPM for 2 zone 3 zone...

Page 44: ...44 PIC3 Main board LED when power on and unit standby Pic 2 IPM for5 zone Power Standby Operating...

Page 45: ...o crossing signal time interval is abnormal Potential causes Connection mistake Faulty PCB Trouble shooting Check if the connections and power supply is normal Correct the connections Turn on the unit...

Page 46: ...or Faulty PCB Trouble shooting Power off then restart the unit after 3 minutes Does a problem remain Shut off the power supply Rotate the fan by hand Does it turn easily The unit is operating normally...

Page 47: ...nd need to be replaced 2 Indoor DC fan motor control chip is inside fan motor Power on and when the unit is in standby measure the voltage of pin1 pin3 pin4 pin3 in fan motor connector If the value of...

Page 48: ...the LED displays a failure Potential causes Wiring mistake Faulty sensor Faulty PCB Trouble shooting Check the connections between temperature sensor and PCB Are the connections good Correct the conne...

Page 49: ...ion conditions When the voltage signal that IPM send to compressor drive chip is abnormal the display LED will show P6 and AC will turn off Potential causes Wiring mistake IPM malfunction Faulty outdo...

Page 50: ...No Replace the compressor check whether the system can work normally Check whether the lines in E part box are connected tightly Yes Connect it tightly check ok or not No No Yes No Replace the bridge...

Page 51: ...about 187 253VAC Check the power supply Check whether the voltage of IPM board P and N is normal DC277 356V for 18 27KBtu h DC277 410V for 36KBtu h Replace bridge rectifiers and then check whether th...

Page 52: ...ell If the water level switch is inserted well No Insert the water level switch well Insert the water level switch well If the water level switch is broken If the water level switch is broken Yes Repl...

Page 53: ...in cooling mode or fan mode and indoor unit B is set to heating mode then A will change to off and B will work in heating mode Suppose Indoor unit A working in heating mode and indoor unit B is set t...

Page 54: ...lectronic control box is Installed good Check whether electronic control box is Installed good Check whether thermal grease is no coating or uneven coating Check whether thermal grease is no coating o...

Page 55: ...ential causes Installation mistake Faulty PCB Trouble shooting Yes Replace the outdoor main PCB Replace the outdoor main PCB Power off then restart the unit 3 minutes later Power off then restart the...

Page 56: ...ution Error Code E2 Malfunction conditions Indoor unit does not receive the feedback from outdoor unit during 120 seconds or outdoor unit does not receive the feedback from any one indoor unit during...

Page 57: ...or unit by remote controller Is all indoor unit display Turn off the all indoor units Is IPM power LED or operating LED lamp On Refer PIC2 Yes A Is all the wiring between terminal and Indoor PCB conne...

Page 58: ...tage between 2 old L2 port and 3 port of outdoor unit The red pin of multimeter connects with 2 old L2 port while the black pin is for 3 port When AC is normal running the voltage will move alternatel...

Page 59: ...59 Operating Standby Pic 2 IPM board for 2 zone 3 zone...

Page 60: ...60 PIC3 Main board LED when power on and unit standby Pic 2 IPM for5 zone Power Standby Operating...

Page 61: ...ntrol board diagnosis Error Code E3 Malfunction conditions PCB main chip does not receive feedback from IPM module during 60 seconds Potential causes Wiring mistake Faulty PCB Trouble shooting PIC 4 C...

Page 62: ...e between the IPM module and the main board is it connected good Reconnect and retry Is error still display Replace IPM board and then check whether the system can run normally Replace the electric co...

Page 63: ...o test the DC voltage between black pin and white pin of signal wire The normal value should be around 5V Use a multimeter to test the DC voltage between black pin and red pin of signal wire The norma...

Page 64: ...rror Code E4 F1 F2 F3 F4 F5 Malfunction conditions If the sampling voltage is lower than 0 06V or higher than 4 94V the LED will display the failure Potential causes Wiring mistake Faulty sensor Fault...

Page 65: ...Check the voltage of outdoor unit power supply whether the voltage between L L1 and N L2 is about 187 264VAC Check the power supply Check whether the voltage of IPM board P and N GND is normal DC277...

Page 66: ...66 IPM board for 2 zone 3 zone...

Page 67: ...2 E3 N GND for 2 zone 3 zone Bridge rectifier for 2 zone 3 zone Bridge rectifier for 2 zone 3 zone IPM Module for 2 zone 3 zone Remark Measure the DC voltage between and port The normal value should b...

Page 68: ...68 IPM board for 4 zone...

Page 69: ...69 IPM board for 5 zone Bridge rectifier for 5 zone Remark Measure the DC voltage between and port The normal value should be 190V 250V IPM Module for 5 zone...

Page 70: ...e shooting PFC module protection Check whether the connecting line between main board and the PFC module IPM module is connected tightly Yes Check whether the voltage range of P N on IPM module is nor...

Page 71: ...71 Two ports of the inductance Inductance...

Page 72: ...ate properly Shut off the power supply rotate the fan by hand Does it rotate properly The unit operates normally The unit operates normally Find out the cause and have it solved For example whether th...

Page 73: ...in1 pin3 pin4 pin3 in fan motor connector If the value of the voltage is not in the range showing in below table the PCB must have problems and need to be replaced DC motor voltage input and output NO...

Page 74: ...74 Vs Vcc Vsp FG...

Page 75: ...n diagnosis and solution Error Code P1 Malfunction conditions If the sampling voltage is not 5V the LED will display the failure Potential causes Wiring mistake Faulty over load protector System block...

Page 76: ...0 Check whether the outdoor ambient temperature is higher than 50 No Stop the unit Stop the unit Yes Check if the outdoor unit ventilation is good Check if the outdoor unit ventilation is good Yes Mak...

Page 77: ...77...

Page 78: ...n diagnosis and solution Error Code P2 Malfunction conditions If the sampling voltage is not 5V the LED will display the failure Potential causes Wiring mistake Faulty over load protector System block...

Page 79: ...e low pressure protector is broken Check whether the outdoor ambient temperature is too low Check whether the outdoor ambient temperature is too low No Stop the unit Stop the unit Yes Open fully valve...

Page 80: ...80...

Page 81: ...sis and solution Error Code P3 Malfunction conditions If the outdoor current exceeds the current limit value the LED will display the failure Potential causes Wiring mistake Faulty over load protector...

Page 82: ...r unit is bad ventilation Judge 3 Check whether the outdoor unit is bad ventilation No Make the outdoor unit ventilate well Make the outdoor unit ventilate well Yes Judge 5 The refrigerant pipe is blo...

Page 83: ...83...

Page 84: ...scharge temp sensor and PCB according to wiring diagrams Check whether the connection is right between compressor discharge temp sensor and PCB according to wiring diagrams Measure the resistance valu...

Page 85: ...temperature is higher than 50 No Stop the unit Stop the unit Yes Check if the outdoor unit ventilation is good Check if the outdoor unit ventilation is good Yes Make the outdoor unit ventilate well Ma...

Page 86: ...Malfunction conditions When the voltage signal that IPM send to compressor drive chip is abnormal the display LED will show P6 and AC will turn off Potential causes Wiring mistake IPM malfunction Fau...

Page 87: ...e the main board check whether the system can work normally No Replace the compressor check whether the system can work normally Check whether the lines in E part box are connected tightly Yes Connect...

Page 88: ...causes Faulty EXV Wire and tubing connected in reverse Check of EXV please refer to part 6 in 9 5 Trouble Criterion Of Main Parts 7 5 Trouble Criterion of Main Parts 1 Temperature sensor checking Dis...

Page 89: ...6 0 40060 3 41 5878 37 5 87359 77 1 29078 117 0 38991 2 39 8239 38 5 62961 78 1 25423 118 0 37956 1 37 1988 39 5 39689 79 1 21330 119 0 36954 0 35 2024 40 5 17519 80 1 17393 120 0 35982 1 33 3269 41 4...

Page 90: ...5 8 084 115 2 422 4 222 8 36 34 32 76 7 82 116 2 357 3 211 4 37 32 94 77 7 566 117 2 294 2 200 7 38 31 62 78 7 321 118 2 233 1 190 5 39 30 36 79 7 086 119 2 174 0 180 9 40 29 15 80 6 859 120 2 117 1 1...

Page 91: ...25 26 27 28 29 30 31 32 33 34 35 74 76 78 80 82 84 86 88 90 92 94 96 98 2 Compressor check Measure the resistance value of each winding by using the tester Position Resistance Value ATM150D23UFZ ATF2...

Page 92: ...l resistance value Red Black Several M Red Black Several M P N U N U V V W W Red 4 AC Fan Motor Measure the resistance value of each winding by using the tester Position Resistance Value RPG20B RPG28H...

Page 93: ...8 20 Yellow Blue 76 8 20 19 8 20 252 8 20 88 8 20 150 8 20 374 3 8 20 138 8 20 5 4 way valve 1 Power on use a digital tester to measure the voltage when the unit operates in cooling it is 0V When the...

Page 94: ...94 6 EXV check Disconnect the connectors...

Page 95: ...95 Resistance to EXV coil Color of lead wire Normal Value Red Blue About 50 Red Yellow Brown Orange Brown White...

Page 96: ...96 Red Blue Red Yellow...

Page 97: ...97 Brown Orange...

Page 98: ...98 Brown White...

Page 99: ...WCA30 metal plate No Part name Procedures Remarks 1 Fan assembly How to remove the fan assembly 1 Turn off the air conditioner and turn off the power breaker 2 Remove the screws of air outlet grille 4...

Page 100: ...the fan motor connector CN14 3p white from the IPM board 8 Remove the fan motor after unfastening four fixing screws 2 Panel plate How to remove the panel plate 1 Remove the screws of front panel and...

Page 101: ...e big handle 4 screws 3 Remove two screws of terminal board and seven screws of right rear panel and remove the right rear panel Screws of big handle Screws of terminal board Screws of right rear pane...

Page 102: ...onnector of the reactor 4 Unfasten the connector of the compressor 5 Disconnect following 3 pieces of connection wires and connectors between IPM and main control PCB CN1 5p white CN14 3p white CN4 re...

Page 103: ...xpansion valve A B 6p 6p red red CN25 CN23 S A S B 3p 3p white white Wires CN1 CN2 4 way valve blue blue CN5 CN6 Crankcase heating cable red red CN3 L IN red CN4 N IN black 8 Disconnect the grounding...

Page 104: ...s 4 Remove the sound insulation material and crankcase heating cable 5 Remove terminal cover of compressor and disconnect wires of crankcase electric heater and compressor from the terminal 6 Remove t...

Page 105: ...rews of reactor and remove the reactor 6 The 4 way valve How to remove the 4 way valve 1 Perform work of item 2 2 Extract refrigerant gas 3 Remove the electrical parts from item 3 4 Remove fixing scre...

Page 106: ...s Remarks 1 Panel plate How to remove the panel plate 1 Turn off the air conditioner Turn off the power breaker 2 Remove the screws of big handle and remove the big handle 4 screws 3 Remove the screws...

Page 107: ...ove two screws of terminal board screws of water collector and fifteen screws of right rear panel and remove the right rear panel Screws of front panel Screws of front panel Screws of right front side...

Page 108: ...108 Screws of right rear panel Screws of terminal board...

Page 109: ...t side panel and front panel from item 1 step 1 4 2 Remove the hex nut fixing the fan 3 Remove the fan 4 Remove the cover of electrical control box cover 5 Disconnect the fan motor connector CN14 5p w...

Page 110: ...four screws fixing the IPM board 3 Unfasten the connector of the reactor 4 Unfasten the connector of the compressor 5 Disconnect following 3 pieces of connection wires and connectors between IPM and P...

Page 111: ...nsor 2p 2p 2p white CN18 CN19 CN22 Electronic expansion valve A B C 6p 6p 6p red red red CN25 CN23 CN20 S A S B S C 3p 3p 3p white white white Wires CN1 CN2 4 way valve blue blue CN5 CN6 Crankcase hea...

Page 112: ...igerant gas 4 Remove the sound insulation material and crankcase heating cable 5 Remove terminal cover of compressor and disconnect wires of compressor thermo and compressor from the terminal 6 Remove...

Page 113: ...of wires connected from the cover of inductance 5 Remove four screws of reactor and remove the reactor 6 The 4 way valve How to remove the 4 way valve 1 Perform work of item 1 2 2 Extract refrigerant...

Page 114: ...dures Remarks 1 Panel plate How to remove the panel plate 1 Turn off the air conditioner Turn off the power breaker 2 Remove the screws of big handle and remove the big handle 4 screws 3 Remove the sc...

Page 115: ...ove two screws of terminal board screws of water collector and fifteen screws of right rear panel and remove the right rear panel Screws of front panel Screws of front panel Screws of right front side...

Page 116: ...assembly How to remove the fan assembly 1 Remove the top cover right front side panel and front panel from item 1 step 1 4 2 Remove the hex nut fixing the fan Screws of right rear panel Screws of term...

Page 117: ...hite from the driver board 6 Remove the fan motor after unfastening four fixing screws 3 Electrical parts How to remove the electrical parts 1 Perform work of item 1 2 2 Unfasten the connector of the...

Page 118: ...ectors CN8 T3 T4 temperature sensor 2p 2p white CN33 Discharge temperature sensor 2p white CN13 T2B A B C D temperature sensor 2p 2p 2p 2p white CN18 CN17 CN21 CN20 Electronic expansion valve A B C D...

Page 119: ...d 4 Compressor How to remove the compressor 1 Perform work of item 1 2 3 2 Remove the electrical control box and partition plate 3 Extract refrigerant gas 4 Remove the sound insulation material and cr...

Page 120: ...of item 1 2 2 Extract refrigerant gas 3 Remove the electrical parts from item 3 4 Remove fixing screw of the coil and remove the coil 5 Detach the welded parts of 4 way valve and pipe 6 The expansion...

Page 121: ...ly How to remove the fan assembly 1 Turn off the air conditioner Turn off the power breaker 2 Remove the screws of air outlet grille 8 screws 3 Remove the hex nut fixing the fan 4 Remove the fan 5 Rem...

Page 122: ...crews of front side panel and remove the front side panel 1 screw 7 Disconnect the fan motor connectors FAN1 3p white and FAN2 3p white from DC motor driver board 8 Remove the fan motor after unfasten...

Page 123: ...terminal board and 15 screws of right rear panel and remove the right rear panel 3 Electrical parts How to remove the electrical parts 1 Perform work of item 1 step 5 6 and item 2 IPM board PCB board...

Page 124: ...tion wires and connectors between IPM and other parts CN2 yellow CN1 red CN6 black CN3 yellow U V W black CN9 10p white 4 Remove the fixing screws then remove the IPM board 5 Disconnect the connectors...

Page 125: ...S B S C S D S E 3p 3p 3p 3p 3p white CN10 High and low pressure switch 2p 2p white Wires CN17 CN18 4 way valve blue blue CN19 CN20 connected to crankcase heating cable black red CN24 CN25 Electric he...

Page 126: ...sound insulation material and crankcase heating cable 4 Remove terminal cover of compressor and disconnect wires of crankcase electric heater and compressor from the terminal 5 Remove the discharge p...

Page 127: ...from item 3 9 Remove fixing screw of the coil and remove the coil 10 Detach the welded parts of 4 way valve and pipe 6 The expansion valve How to remove the expansion valve 5 Perform work of item 1 2...

Reviews: