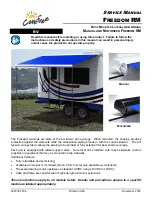


Carefree of Colorado
Service
Manual
F
REEDOM
RM
052978-351r8
5
C
ANOPY
R
EPLACEMENT
(O
RIGINAL
C
ONFIGURATION
)
This procedure requires two people.
1. Open the awning 18"-24".
2. Disconnect power to the awning.
3. Carefully push the lead rail toward the case so that the arms collapse and
the fabric is slack.
4. Hold the lead rail in this position and firmly tie the elbows of the spring arms
together. Use a minimum 1/2" rope - do not use bungee cords. When tying
the rope, use a non-slip knot such as a square knot or equivalent.
CAUTION
Failure to secure the lead rail as described will allow the spring arms to
unexpectedly extend out possibly causing personal injury and damage to the awning.
1. On the LH (drive) side of the awning:
1.1. Remove the fabric retaining screw from the
lead rail endplate.
1.2.
Manual awnings:
remove the outer end cap.
1.3. Remove the two cover screws.
2. On the RH (idler) side of the awning:
2.1. Remove the lead rail end
2.2. Remove the idler endcap and set aside.
2.3. Rotate the cover back and out of the way.
3. Pull the roller tube out the idler end of the case while pulling the fabric from the lead rail.
Pull the roller tube
straight, do not allow the roller tube to bend or twist.
4. Note the orientation of the old canopy then unwrap and remove from the roller tube.
5. Unfold the replacement fabric then slide the new fabric onto the roller tube and center.
NOTICE
While the awning fabric is fairly robust, care must be taken not to snag the fabric when
sliding into the roller tube or lead rail.
Tip: Lightly spraying the slots with a dry silicone lubricant will help the fabric slide into the slots without
staining the material.
6. Roll the fabric onto the roller tube leaving enough material to reach between the case and the lead rail.
7. Slide the fabric into the lead rail and the roller tube into the case.
8. Align the roller tube with the motor drive and bearing or gear crank for manual awnings.
9. Support the roller tube and attach the RH end cap while aligning the RH end of the roller tube with the
end cap bearing. It is not necessary to close and attach the cover at this time.
10. Open and close the awning to confirm that the fabric rolls and unrolls squarely. Adjust the fabric
position in the lead rail as required.
11. Attach the RH lead rail end plate.
NOTE:
The top screw secures the fabric in the lead rail. The screw
should be positioned to thread into the metal of the lead rail and the edge of the polycord.
12. Attach the fabric retaining screw into the LH lead rail end plate.
13. Close and secure the cover. There are two screws on each end of the awning.
14. For manual awnings, reattach the LH outer end cap.
15. It may be necessary to adjust the motor limits for motorized awnings. Refer to page 2.
RMF033
Leadrail
Endplate
Idler
Endcap
Cover
MOTORIZED
Fabric Retaining
Screw
Cover
Screws
Outer
Endcap
Cover
Screws
MANUAL
FRM007
Spring Arms
Firmly Tie Elbows Together