docs.carbide3d.com
8/31/2020
Version 4.0
61
2.
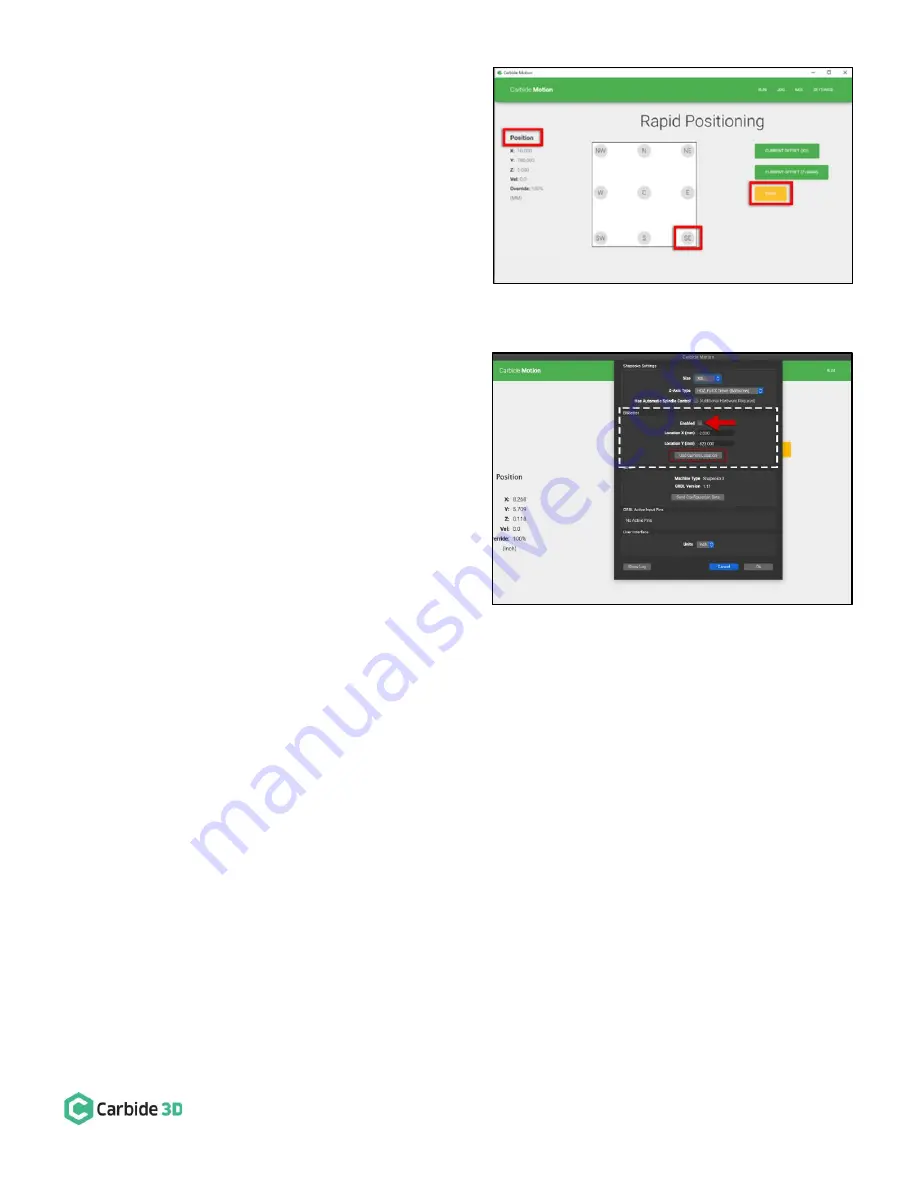
Position your spindle directly above the BitSetter.
a.
Click the Position label. This will toggle the
view to the machine coordinates. See
Fig. 25
.
b.
Click Rapid Position, then click the SE button
to move the spindle to the front-right of the
machine. Once in position, click
DONE
. See
Fig. 25
.
c.
From the Jog screen, use the arrows on the
screen (or the arrows on your keyboard) to
jog the gantry so the spindle is directly above
the BitSetter.
Once you have the spindle positioned directly above the
BitSetter, we need to permanently save this location:
1.
Click Settings in the top menu bar.
2.
Recalibrate your BitSetter. See
Fig. 26
.
a.
In the BitSetter box, select the Enabled
checkbox.
b.
With your spindle directly above the
BitSetter, click the Use Current Location
button to set the location. This will
permanently save the X/Y location of your
BitSetter.
3.
Click Ok to save and close the window.
Maintenance
4.
The HDZ is pretty much maintenance-free. We recommend keeping it as dust-free as possible. A quick coat of
synthetic oil (such as Mobil Vactra No. 2 Oil) on the rails and ball screw every 6 months. All the parts are
rubber-sealed. You can also inject oil by removing the central M4 screw from the end of a bearing block and
injecting machine grease through a syringe.
Figure 26
Figure 25
Summary of Contents for Shapeoko HDZ 4.0
Page 1: ...support carbide3d com docs carbide3d com 9 2 2020 Version 4 0 1 ASSEMBLY GUIDE HDZ 4 0...
Page 2: ...support carbide3d com docs carbide3d com 9 2 2020 Version 4 0 2...
Page 8: ...support carbide3d com docs carbide3d com 8 31 2020 Version 4 0 8 Figure 2...
Page 42: ...support carbide3d com docs carbide3d com 8 31 2020 Version 4 0 42 Figure 2...


