User Manual of HD-TVI Speed Dome
22
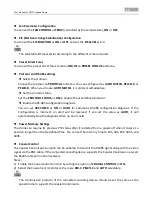
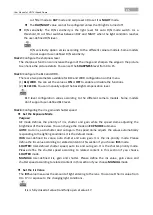
Park time and actions
Purpose:
This feature allows the speed dome to start a predefined action (park action: scan, preset, pattern,
etc.) automatically after a period of inactivity (park time).
You can set
PARK TIME
from 5 to 720 seconds and set the park action (
PARK ACT
) as preset 1-8,
pattern 1-5, patrol 1-10, pan scan, tilt scan, panoramic scan, day mode, night mode or none.
If no control signal is received after the park time under the following circumstances, no park
actions will be performed: in the process of performing dome actions by calling special presets;
or in the process of performing external alarm linkage actions.
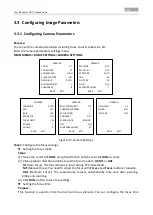
Preset freezing
This feature enables the live view to switch directly from the current scene to another scene that is
defined by a preset, without showing the middle areas between these two scenes. It reduces the
use of bandwidth in a digital network system and it also provides privacy protection for the middle
areas.
You can set
PRESET FREEZING
as
ON
or
OFF
to enable or disable this function.
The function varies according to the different camera models.
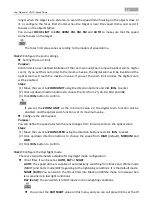
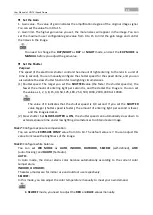
PTZ speed
Purpose:
You can define the speed of the dome movements.
(1)
DOME SPEED:
The manual movement speed of the dome can be set from level 1 to 10.
(2)
SCAN SPEED:
The scan speed defines the scan degree per second of pan scan, tilt scan, and
panoramic scan. The scan speed is adjustable from level 1 to level 40 and the higher the level is,
the faster the scan speed is.
(3)
PRESET SPEED:
The speed of calling a preset can be set from level 1 to 8. The higher level
corresponds to the faster speed to call a preset.
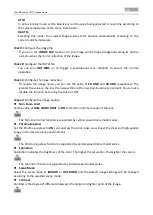
Setting Limits
Purpose:
The limits are user-configurable positions which limit the panning and tilting area of the speed
dome. There are left, right, up and down limits to define an area.
Steps:
1.
Move the cursor to
ENABLE LIMIT
and click
FOCUS+
to set it
ON
to enable this feature. Click
IRIS+
to confirm the new settings.
2.
Move the cursor to
LIMIT SETTING
and click
IRIS+
. You will see the message
SET LEFT LIMIT
on
the screen.
3.
Click the direction buttons in the PTZ panel to configure the left limit. Click
IRIS+
to confirm the
new settings.
4.
Follow the prompts to configure the right, up and down limits on the menu.


