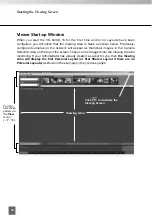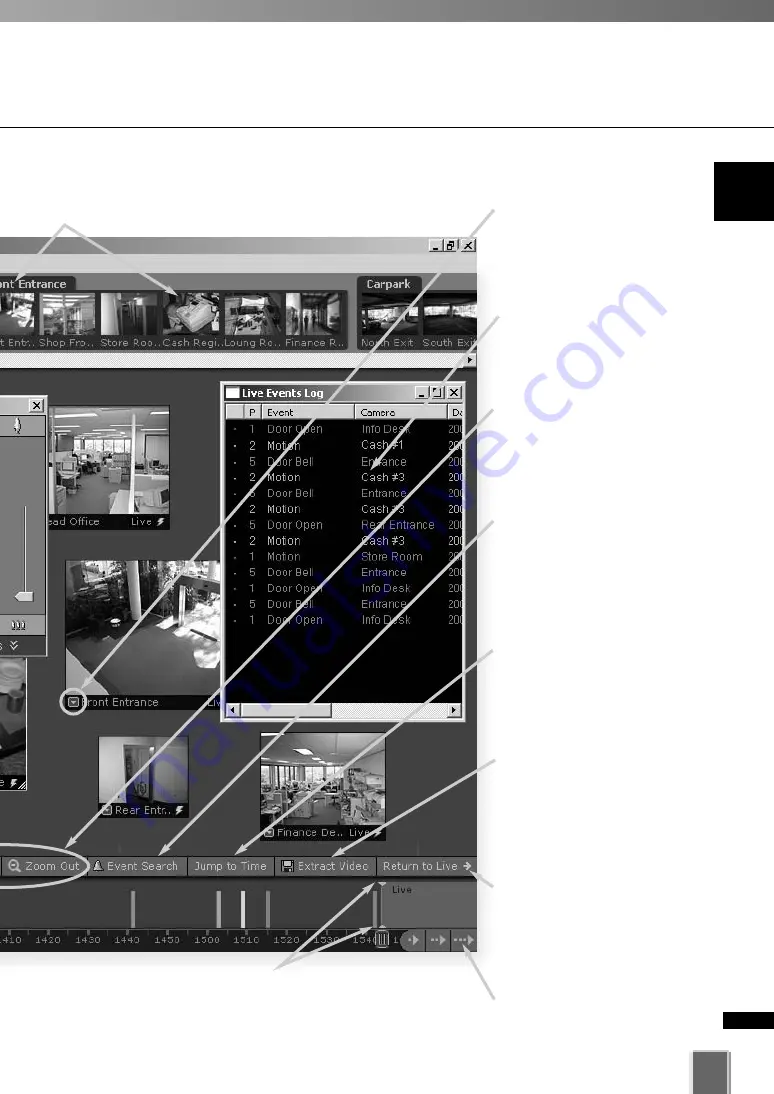
Viewing Screen Example
9
1
Using
the
Vie
w
er
-
Operator
Login
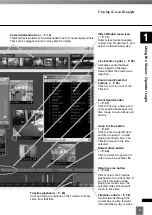
Timeline playhead (
➝
P. 40)
Click and drag to positions on the Timeline to show
video from that time.
Return to Live button
(
➝
P. 44)
Click to return the Timeline
playhead to the current time. If
you click this button while
playing recorded video, the
selected Video Window will
return to live video.
Jump to Time button
(
➝
P. 41)
Click to enter a specific date
and time to jump to, to start
playing recorded video. The
Timeline moves to the time
selected.
Extract Video button
(
➝
P. 44)
Click to extract a segment of
video to save as another file.
Zoom In and Zoom Out
buttons (
➝
P. 38)
Click to zoom in or out of the
Timeline.
Live Events Log list (
➝
P. 45)
Indicates events that have
been logged on Storage
Servers after the Viewer was
launched.
Video Window menu icon
(
➝
P. 31)
Select preset camera angles,
custom pan, tilt and zoom, and
select a Video Window size.
Camera Selection Area (
➝
P. 18)
Thumbnail representations of cameras added to each zone are displayed here.
These can be dragged onto the Viewing Area for viewing.
Event Search button
(
➝
P. 47)
Click to bring up a dialog and
enter search details based on
time range, Location/Zone and
priority.
Timeline control (
➝
P. 39)
Scroll forwards through the
current day or jump forward
incrementally by day or week.


