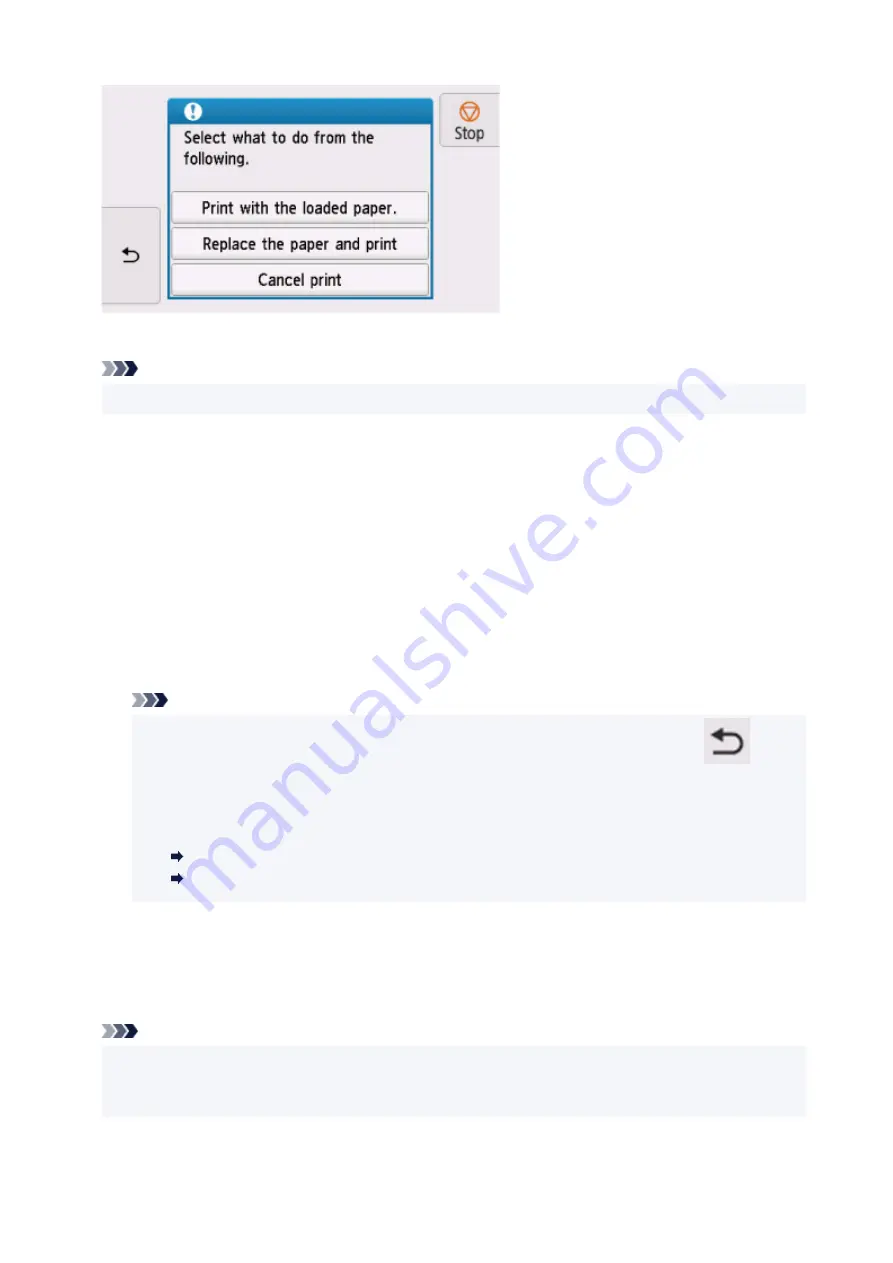
Select the appropriate action.
Note
• Depending on settings, some of the options below may not appear.
Print with the loaded paper.
Select this option to print or copy onto the paper in the rear tray without changing the paper settings.
For example, if the print or copy paper setting is A5, and rear tray paper information is set to A4, the
A5 size setting is used to print or copy onto the paper in the rear tray.
Replace the paper and print
Select this option to print after changing the paper in the rear tray.
For example, if the print or copy paper setting is A5, and rear tray paper information is set to A4,
change the paper in the rear tray to A5 paper and proceed with printing or copying.
After changing the paper and closing the feed slot cover, the paper information registration screen for
the rear tray appears. Register the paper information on the printer according to the loaded paper.
Note
• If you do not know the paper size and paper type to be loaded in the rear tray, tap
(
Back
)
on the touch screen. The paper size and paper type are displayed.
• See below for the correct correspondence between paper settings made on the printer driver or
on the printer.
Paper Settings on the Printer Driver and the Printer (Media Type) (Windows)
Paper Settings on the Printer Driver and the Printer (Paper Size) (Windows)
Cancel print
Cancels printing.
Select this option when you want to change the print or copy paper settings. Change the paper
settings and retry printing.
Note
• To suppress the misprint prevention message, change the setting as described below. When you
suppress the message, the printer uses the paper settings for printing or copying onto the paper in
the rear tray regardless of whether or not the paper matches these settings.
425
Summary of Contents for TS8350 Series
Page 1: ...TS8300 series Online Manual English ...
Page 9: ...5012 429 5100 430 5200 431 5B00 432 6000 433 C000 434 ...
Page 88: ...88 ...
Page 116: ...116 ...
Page 123: ...Replacing Ink Tanks Replacing Ink Tanks Checking Ink Status on the Touch Screen Ink Tips 123 ...
Page 134: ...Adjusting Print Head Position 134 ...
Page 136: ...7 Examine the nozzle check pattern 136 ...
Page 162: ...Safety Safety Precautions Regulatory Information WEEE EU EEA 162 ...
Page 186: ...Main Components and Their Use Main Components Power Supply Using the Operation Panel 186 ...
Page 187: ...Main Components Front View Rear View Inside View Operation Panel 187 ...
Page 200: ...The specification of the power cord differs depending on the country or region of use 200 ...
Page 212: ...For more on setting items on the operation panel Setting Items on Operation Panel 212 ...
Page 260: ...Printing Using Canon Application Software Easy PhotoPrint Editor Guide 260 ...
Page 275: ...Other device settings 275 ...
Page 298: ...Note To set the applications to integrate with see Settings Dialog 298 ...
Page 300: ...Scanning Multiple Documents at One Time from the ADF Auto Document Feeder 300 ...
Page 302: ...Scanning Tips Positioning Originals Scanning from Computer 302 ...
Page 338: ...Other Network Problems Checking Network Information Restoring to Factory Defaults 338 ...
Page 369: ...Scanning Problems macOS Scanning Problems 369 ...
Page 370: ...Scanning Problems Scanner Does Not Work Scanner Driver Does Not Start 370 ...
Page 386: ...Errors and Messages When Error Occurred Message Support Code Appears 386 ...


