background image

Maintenance

2754-016

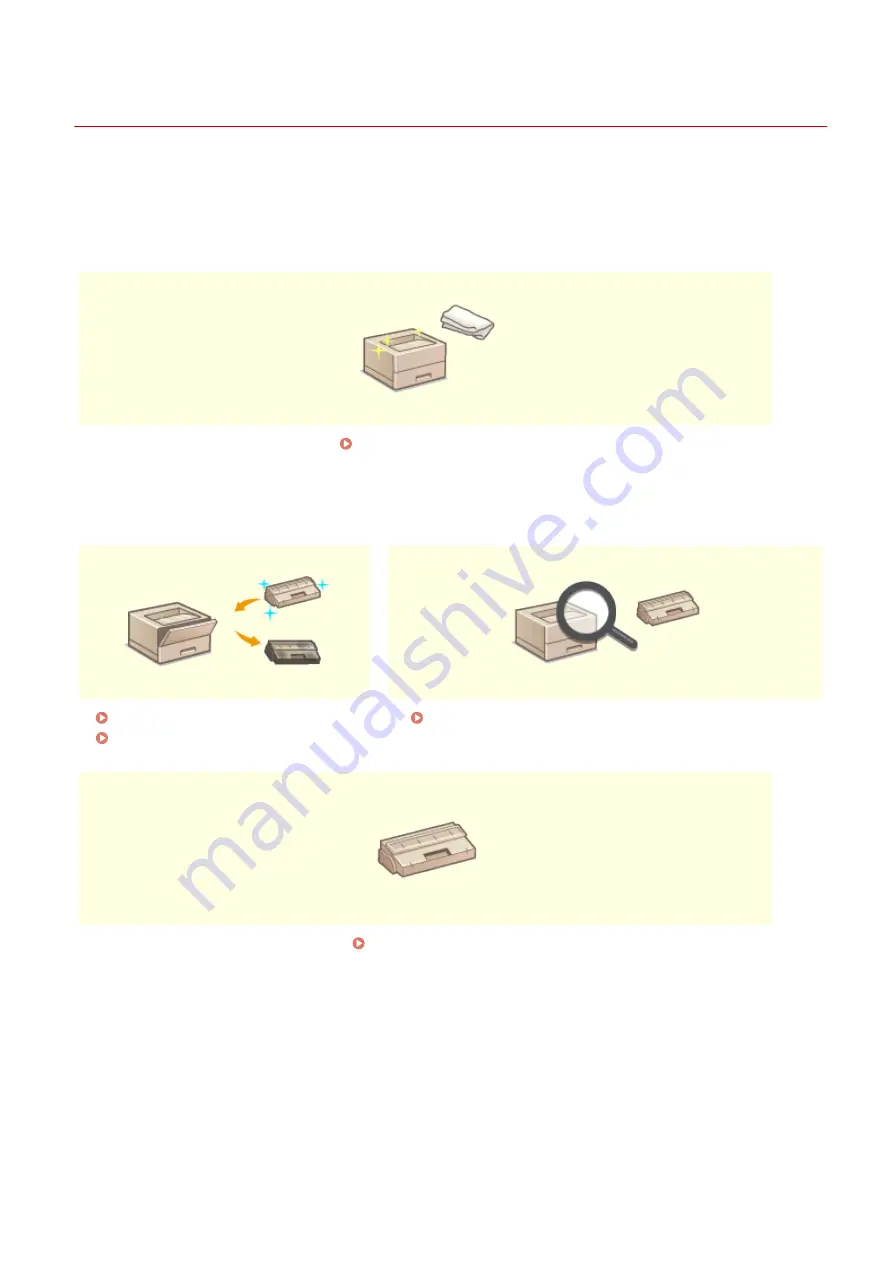
This chapter describes upkeep of the machine, including how to clean the machine and adjustment of print quality.

Basic Cleaning

Regular Cleaning(P. 56) 

Replacing Consumables

Replacing the Toner Cartridge(P. 59) 
Replacing the Drum Cartridge(P. 64) 

Checking the Remaining Amount of Consumables(P. 69) 

Consumables(P. 75) 

Maintenance

54

Summary of Contents for LBP112

Page 1: ...LBP112 User s Guide USRMA 2506 00 2018 08 en Copyright CANON INC 2018...

Page 2: ...Drawer 26 Printer Status Window 27 Turning ON the Machine 30 Turning OFF the Machine 31 Loading Paper 32 Loading Paper in the Drawer 34 Loading Envelopes 37 Loading Preprinted Paper 39 Entering Sleep...

Page 3: ...r Creases or Curls 96 Paper Is Fed Incorrectly 98 Countermeasures for Each Message 99 Clearing Paper Jams 105 Paper Jams inside the Machine 107 When a Problem Cannot Be Solved 112 Appendix 114 Third P...

Page 4: ...Important Safety Instructions Important Safety Instructions 2 Installation 3 Power Supply 5 Handling 6 Maintenance and Inspections 8 Consumables 9 Important Safety Instructions 1...

Page 5: ...ow the instructions to properly use this machine Do not perform any operations not described in this manual Canon will not be responsible for any damages resulting from use not described in this manua...

Page 6: ...parts inside the machine it may result in a fire or electrical shock If any foreign substance falls into this machine unplug the power plug from the AC power outlet and contact your local authorized C...

Page 7: ...he machine is liable to sink a carpet etc Do not install in a location where condensation occurs Water droplets condensation may form inside the machine when the room where the machine is installed is...

Page 8: ...esult in a fire or electrical shock Do not wrap the power cord or tie it in a knot as this may result in a fire or electrical shock Insert the power plug completely into the AC power outlet Failure to...

Page 9: ...rface cables resulting in a fire or electrical shock When plugging or unplugging a USB cable when the power plug is plugged into an AC power outlet do not touch the metal part of the connector as this...

Page 10: ...g mode if the operating noise is of concern it is recommended that the machine be installed in a place other than the office Other precautions Follow the caution instructions on labels and the like fo...

Page 11: ...se alcohol benzine paint thinner or other flammable substances Do not use tissue paper or paper towels If these substances come into contact with electrical parts inside the machine they may generate...

Page 12: ...e move away from the toner cartridge and consult your physician immediately Use caution not to inhale any toner If you should inhale toner consult a physician immediately Use caution so that toner doe...

Page 13: ...necessary do not take out the drum cartridge from the packing material or from this machine Storing the toner cartridge or the drum cartridge Store in the following environment to ensure safe and sat...

Page 14: ...drum cartridges in the marketplace Use of counterfeit toner cartridge or drum cartridge may result in poor print quality or machine performance Canon is not responsible for any malfunction accident or...

Page 15: ...Setting Up Setting Up 13 Preparations Required Before Use 14 Installing Drivers 15 Setting Up Print Server 16 Setting Up 12...

Page 16: ...unctions of the machine the environmental conditions must be set in advance To begin with check the sequences of flow required to complete the setup and then perform the actual settings Preparations R...

Page 17: ...ns Required Before Use 2754 007 Set up the machine using the following step For more information about this step click on the link to go to the corresponding section Step 1 Installing Drivers P 15 Set...

Page 18: ...hen new versions of drivers and software become available they will be uploaded to the Canon website You can download them as necessary after checking their system requirements Depending on your machi...

Page 19: ...and the bit architecture 32 bit or 64 bit of the print server and client computers When implementing a print server in a domain environment consult your Network Administrator 1 Open the printer folde...

Page 20: ...er that contains the drivers and then click OK If the print server runs a 32 bit operating system select UFRII uk_eng x64 Driver folders on the provided CD ROM DVD ROM If the print server runs a 64 bi...

Page 21: ...Printing from a Computer P 44 Setting Up 18...

Page 22: ...ide 23 Back Side 25 Drawer 26 Printer Status Window 27 Turning ON the Machine 30 Turning OFF the Machine 31 Loading Paper 32 Loading Paper in the Drawer 34 Loading Envelopes 37 Loading Preprinted Pape...

Page 23: ...arts and Their Functions P 22 Printer Status Window This section explains how to use the Printer Status Window utility to check the machine s status and make machine settings Printer Status Window P 2...

Page 24: ...Mode This section describes how to set the sleep mode Entering Sleep Mode P 40 Setting Auto Shutdown Time This section describes how to enable the auto shutdown function Setting Auto Shutdown P 41 Bas...

Page 25: ...scribing the parts of the machine used for such basic operations as loading paper and replacing the toner cartridges etc this section also describes the functions of the keys and meaning of indication...

Page 26: ...ng to be printed Flashes when a print job is canceled Cancel Job key Cancels a print job that is currently printing Canceling Prints P 46 Paper indicator key Flashes when the machine is out of paper w...

Page 27: ...ventilation slots prevents ventilation Toner cover Open the toner cover when replacing toner cartridges or drum cartridges Procedure for Replacing the Toner Cartridge P 61 Procedure for Replacing the...

Page 28: ...a USB cable when connecting the machine and a computer Power socket Connect the power cord Anti theft Security Slot This machine is provided with a security slot to which you can attach security wire...

Page 29: ...ve this cover to load paper in the drawer Paper guides Adjust the paper guides to exactly the size of the loaded paper to ensure that paper is fed straight into the machine LINKS Loading Paper in the...

Page 30: ...ing in the system tray Automatic Display of the Printer Status Window The Printer Status Window is displayed automatically when an error occurs during printing You can change the setting that determin...

Page 31: ...lso display the Printer Status Window Help by clicking the Help button in the various dialog boxes However some dialog boxes do not have a Help button Toolbar Print Queue Displays the print queue a Wi...

Page 32: ...Job Information Displays information about the document that is currently being printed Cancel Job Cancels the printing of the document currently being printed Continue Retry When an error has occurre...

Page 33: ...irmly inserted into a power outlet 2 Press the power switch The power indicator lights and the machine is ready for printing A blank sheet of paper may be output when you turn ON the power for the fir...

Page 34: ...or the machine to completely shut down Do not unplug the power cord until the power indicator goes out To restart the machine wait for at least 10 seconds after the machine is turned OFF Even when the...

Page 35: ...ransfer printer Back side of paper printed by a thermal transfer printer Highly textured paper Glossy paper Notes on use of paper Only use paper that has fully acclimatized to the environment in which...

Page 36: ...the following precautions How to Store the Printed Paper Store on a flat surface Do not store together with articles made of PVC polyvinyl chloride such as clear folders Toner may melt resulting in th...

Page 37: ...loaded in landscape orientation Be sure to load paper in portrait orientation as shown in the illustration below 1 Open the drawer When replenishing paper When the drawer is already opened and the pap...

Page 38: ...tack well and tap it on a flat surface to align the edges Keep the paper stack within the load limit guides Make sure that the paper stack does not exceed the load limit guides Loading too much paper...

Page 39: ...on press the Paper key to restart printing Printing on the Back Side of Printed Paper Manual 2 Sided Printing You can print on the back side of printed paper Flatten any curls on the printed paper and...

Page 40: ...es that you need to complete before loading envelopes For a description of the general procedure for loading envelopes in the drawer see Loading Paper in the Drawer P 34 Before Loading Envelopes Follo...

Page 41: ...in portrait orientation with the short edge toward the machine with the non glued side front side face up You cannot print on the reverse side of envelopes Load the envelopes so that the edge with th...

Page 42: ...Paper with Logos P 39 This section mainly describes how to load preprinted paper with the proper facing and orientation For a description of the general procedure for loading paper in the drawer see L...

Page 43: ...amount of time that elapses before the machine enters sleep mode follow the procedure below in the Printer Status Window Situations in which the machine does not enter sleep mode When the machine is...

Page 44: ...Device Settings Auto Shutdown Settings 3 Make auto shutdown settings and click OK Auto Shutdown after Fixed Period Select the check box to enable auto shutdown after the time specified with Auto Shut...

Page 45: ...Printing Printing 43 Printing from a Computer 44 Canceling Prints 46 Checking the Printing Status 49 Printing 42...

Page 46: ...011 You can print documents on your computer by using the printer driver Printing from a Computer You can print a document made on your computer by using the printer driver Printing from a Computer P...

Page 47: ...erations P 44 About the Printer Driver Help Clicking Help on the printer driver screen displays the Help screen On this screen you can see the detailed descriptions that are not in the User s Guide Ba...

Page 48: ...4 Click Print or OK Printing starts If you want to cancel printing see Canceling Prints P 46 LINKS Checking the Printing Status P 49 Printing 45...

Page 49: ...om a Computer You can cancel printing from the Printer Status Window 1 Select the machine by clicking in the system tray The Printer Status Window is displayed 2 Cancel the print job To cancel a print...

Page 50: ...led Several pages may be output after you cancel printing Canceling from an application On some applications a screen like shown below appears You can cancel printing by clicking Cancel From the Cance...

Page 51: ...LINKS Basic Printing Operations P 44 Checking the Printing Status P 49 Printing 48...

Page 52: ...inted for a long time you may want to see the waiting list of the documents waiting to be printed 1 Select the machine by clicking in the system tray 2 Select Job Job Status A list of documents appear...

Page 53: ...Managing the Machine Managing the Machine 51 Updating the Firmware 52 Managing the Machine 50...

Page 54: ...Managing the Machine 2754 02X This chapter describes how to update the machine s firmware Managing the System Configuration and Settings Updating the Firmware P 52 Managing the Machine 51...

Page 55: ...a computer For how to perform firmware update from a computer see the User Support Tool Operation Guide included with the firmware Checking the firmware version You can check the firmware version on t...

Page 56: ...or 57 Cleaning the Fixing Assembly 58 Replacing the Toner Cartridge 59 Replacing the Drum Cartridge 64 Checking the Remaining Amount of Consumables 69 Relocating the Machine 71 Viewing the Counter Val...

Page 57: ...ding how to clean the machine and adjustment of print quality Basic Cleaning Regular Cleaning P 56 Replacing Consumables Replacing the Toner Cartridge P 59 Replacing the Drum Cartridge P 64 Checking t...

Page 58: ...Adjusting and Managing the Machine Relocating the Machine P 71 Viewing the Counter Value P 73 Printing Lists of Settings P 74 Maintenance 55...

Page 59: ...to prevent deterioration in printing quality and to ensure that you use it safely and easily Where to Clean Exterior of the machine and ventilation slots Cleaning the Exterior P 57 Internal fixing ass...

Page 60: ...power outlet When you turn OFF the machine data that is waiting to be printed is deleted 2 Clean the exterior of the machine and the ventilation slots Use a soft well wrung out cloth dampened with wat...

Page 61: ...ing assembly you need plain A4 size paper Set the paper in the drawer before performing the following procedure Loading Paper P 32 Cleaning consumes the toner cartridge and the drum cartridge Make sur...

Page 62: ...s displayed prepare a new toner cartridge Consumables P 75 or replace the current toner cartridge with a new one Procedure for Replacing the Toner Cartridge P 61 The toner cartridge needs to be replac...

Page 63: ...splay You can disable display of the message The toner cartridge needs to be replaced soon by doing as follows Select Printer Status Window s Options menu Device Settings Clear the Display Cartridge R...

Page 64: ...over 3 Remove the toner cartridge Do not shake or tilt the toner cartridge Also make sure to avoid applying shocks to the toner cartridge such as by hitting it against something Doing so may cause the...

Page 65: ...e protective package on a flat place 2 Pull out the toner cartridge 5 Shake the toner cartridge 5 or 6 times as shown below to evenly distribute the toner inside the cartridge and then place it on a f...

Page 66: ...8 Replace the output cover LINKS Consumables P 75 Maintenance 63...

Page 67: ...is displayed prepare a new drum cartridge Consumables P 75 or replace the current drum cartridge with a new one Procedure for Replacing the Drum Cartridge P 66 The drum cartridge needs to be replaced...

Page 68: ...splay You can disable display of the message The drum cartridge needs to be replaced soon by doing as follows Select Printer Status Window s Options menu Device Settings Clear the Display Cartridge Re...

Page 69: ...ver 3 Remove the toner cartridge Do not shake or tilt the toner cartridge Also make sure to avoid applying shocks to the toner cartridge such as by hitting it against something Doing so may cause the...

Page 70: ...e drum cartridge such as by hitting it against something Doing so may cause the toner left in the drum cartridge to leak Remove the drum cartridge gently at the same angle as the slot 5 Remove the new...

Page 71: ...8 Close the toner cover 9 Replace the output cover LINKS Consumables P 75 Maintenance 68...

Page 72: ...he amount remaining in the toner cartridges Amount Remaining in Drum Cartridge Displays the amount remaining in the drum cartridges Information about Genuine Products Displays the model numbers of the...

Page 73: ...Consumables P 75 Maintenance 70...

Page 74: ...is waiting to be printed is deleted 2 Disconnect the cables and cord from the machine in numerical order as in the illustration below Power plug Power cord USB cable 3 When transporting the machine ac...

Page 75: ...heavy the machine is and carry it without straining Main Unit P 120 Hold the lift handles and lift up the machine 6 Carefully place the machine at the new installation site For information about how t...

Page 76: ...ges used for printouts The number of printouts includes printouts of the list as well as printouts of data from computers Display the Printer Status Window Displaying the Printer Status Window P 27 Op...

Page 77: ...drawer Loading Paper in the Drawer P 34 Display the Printer Status Window Displaying the Printer Status Window P 27 Options Utility User Data List OK You can also use the Paper key to print a User Dat...

Page 78: ...dges Supplied Toner Cartridge The average yield and the weight of the toner cartridge that comes with the machine are shown below Average yield 700 sheets Weight Approx 0 3 kg Replacement Toner Cartri...

Page 79: ...sheets Weight Approx 0 2 kg Replacement Drum Cartridges For optimum print quality using Canon genuine drum cartridges is recommended Canon Genuine Drum Cartridge Average yield and weight of drum cart...

Page 80: ...When replacing drum cartridges see Replacing the Drum Cartridge P 64 Maintenance 77...

Page 81: ...ing Problems 83 When You Cannot Print Properly 85 Printing Results Are Not Satisfactory 87 Paper Creases or Curls 96 Paper Is Fed Incorrectly 98 Countermeasures for Each Message 99 Clearing Paper Jams...

Page 82: ...rinting results are not satisfactory or the paper creases or curls When You Cannot Print Properly P 85 Countermeasures for Each Message This section describes how to take action when a message appears...

Page 83: ...Troubleshooting 80...

Page 84: ...anuals and Their Contents P 126 Is the machine connected via a USB cable Check whether the machine is connected correctly Problem with the USB Connection P 82 Is sleep mode activated If you leave the...

Page 85: ...ith the Print Server You cannot find the print server to connect to Are the print server and computer connected correctly Is the print server running Do you have user rights to connect to the print se...

Page 86: ...Communication P 137 Disable security software and other resident software Connect to another USB port on the computer Can you print from a USB connection to another computer If you also cannot print...

Page 87: ...you print to narrow width paper the machine may cool itself to maintain the print quality As a result it may take some time before the next job is printed Wait until the machine is ready to print Prin...

Page 88: ...blems with Image Quality Printing Results Are Not Satisfactory P 87 Smudge Marks Appear on the Edge of Printouts P 87 Smudges Appear on Printouts P 87 Afterimages Appear in Blank Areas P 88 Toner Smud...

Page 89: ...Cannot Be Read P 95 Problems with Printout Paper Paper Creases or Curls P 96 Paper Creases P 96 Paper Curls P 96 Problems with Paper Feed Paper Is Fed Incorrectly P 98 Printouts Are Skewed P 98 Paper...

Page 90: ...iver A margin of 5 mm or less around the edge of paper or 10 mm or less around the edge of envelopes is not printable with the machine Make sure to have margins around the document to print Finishing...

Page 91: ...lifetime depending on the use environment or the deterioration of materials inside the toner cartridge Replacing the Toner Cartridge P 59 Is the amount remaining in the drum cartridge running low Chec...

Page 92: ...the toner cartridge may reach the end of its lifetime depending on the use environment or the deterioration of materials inside the toner cartridge Replacing the Toner Cartridge P 59 Is the amount rem...

Page 93: ...installed in the appropriate environment Install the printer in an appropriate location The print quality may be faint light or faded depending on the installation environment Avoid placing the machi...

Page 94: ...of the paper If the paper guides are too loose or too tight part of a document may not be printed Loading Paper P 32 Streaks Appear Printing is Uneven Are you using appropriate paper Check usable pap...

Page 95: ...ying the Printer Status Window P 27 Options Device Settings Assisting Print Settings Select the Use Special Print Adjustment G check box Is the amount remaining in the toner cartridge running low Chec...

Page 96: ...may come out in grayish color depending on the installation environment Avoid placing the machine in a location exposed to wind Installation P 3 Relocating the Machine P 71 Store the toner cartridge i...

Page 97: ...n the drum cartridge running low Check how much the amount remaining in the drum cartridge is left and replace the drum cartridge as necessary Regardless of the amount remaining in the drum cartridge...

Page 98: ...nnot Be Read Are you trying to read a small barcode or one with thick lines Enlarge the barcode Changing the Select Line Width setting may solve the problem Displaying the Printer Status Window P 27 O...

Page 99: ...er Check usable paper and replace with appropriate paper Available Paper P 122 Loading Paper P 32 Paper Curls Are you using appropriate paper Check usable paper and replace with appropriate paper Also...

Page 100: ...back side In rare cases the symptom may become worse depending on the paper If this occurs change the side to print on back to the previous side Are you using paper that has absorbed moisture Replace...

Page 101: ...ogether Is paper loaded correctly Fan the paper stack thoroughly so that paper is not stuck together Check whether paper is loaded correctly Loading Paper P 32 Check whether the number of sheets of pa...

Page 102: ...or details contact your network administrator Cannot Communicate with Server Your computer is not connected to the print server Make the proper connection between your computer and the print server Th...

Page 103: ...y Problems resulting from the use of cartridges that are not Canon products are not covered under the warranty Cannot Retrieve Printer Information Canon LBP Bidi Service is not enabled on the computer...

Page 104: ...o remove paper Clearing Paper Jams P 105 Communication Error The USB cable is not properly connected Reconnecting the USB cable may solve the problem For more information see the manuals for the relev...

Page 105: ...ge is displayed you can continue printing by clicking though the print quality may deteriorate Doing so may also result in damage to the machine Now in Firmware Update Mode The machine has entered fir...

Page 106: ...idge with a new one is recommended Replacing the Drum Cartridge P 64 If is enabled you can click it to continue printing but the print quality may deteriorate Doing so may also result in damage to the...

Page 107: ...heck to make sure that the cartridges have been pushed all the way in Updating Firmware The firmware is being updated Printing is not possible while the firmware is being updated Print again after the...

Page 108: ...ed If paper jams repeatedly Tap the paper stack on a flat surface to even the edges of the paper before loading it into the machine Check that the paper is appropriate for the machine Available Paper...

Page 109: ...Troubleshooting 106...

Page 110: ...re below Do not forcibly remove jammed paper from the machine If the jammed paper cannot be removed easily proceed to the next step 1 Remove the output cover 2 Close the paper stopper and then open th...

Page 111: ...tilt the drum cartridge Also make sure to avoid applying shocks to the drum cartridge such as by hitting it against something Doing so may cause the toner left in the drum cartridge to leak Remove th...

Page 112: ...1 Remove the paper cover 2 Remove any loaded paper 3 Gently pull out the jammed paper 4 Load the paper 5 Replace the paper cover Troubleshooting 109...

Page 113: ...the cartridges 1 Insert the drum cartridge 2 Insert the toner cartridge 8 Close the toner cover The paper jam message disappears and the machine is ready to print 9 Replace the output cover Troublesho...

Page 114: ...Troubleshooting 111...

Page 115: ...pair the machine yourself If you disassemble or repair the machine yourself it may not be covered by warranty When Contacting Canon When contacting us have the following information ready Product name...

Page 116: ...ey 117 Improving Efficiency 118 Specifications 119 Main Unit 120 Available Paper 122 Printer Functions 124 System Environment 125 Manuals and Their Contents 126 Using User s Guide 127 Screen Layout of...

Page 117: ...Manual of This Machine See the first of the following sections when you want to be sure of the kinds of the manuals describing the functions of the machine and how to operate the machine When you want...

Page 118: ...Third Party Software 2754 026 For information related to third party software click the following icon s Appendix 115...

Page 119: ...describes tips for leveraging the features of the machine by category You can make use of the features according to your intended purposes and operating environment Going Green and Saving Money P 117...

Page 120: ...r by setting the machine to enter sleep mode automatically whenever it has not been used for a while You don t need to turn OFF the power each time but you can still have the machine minimize its powe...

Page 121: ...Settings Quickly with Intuitive Operation You can easily specify the page layout as well as binding position etc intuitively on the preview image in the printer driver The simple click operation allo...

Page 122: ...t to change without notice for product improvement or future release Machine Specifications Main Unit P 120 Available Paper P 122 Functional Specifications Printer Functions P 124 Environment To Use t...

Page 123: ...mber of Tones 256 Acceptable Paper Stock Paper Sizes Max 215 9 mm x 355 6 mm Min 76 2 mm x 127 0 mm Paper Weight 60 g m to 163 g m Paper Type Available Paper P 122 Warm Up Time 1 After Powering ON 15...

Page 124: ...the machine is being used 2Print speed is measured based on internal testing using A4 size paper printed with 100 print ratio to original on one sided paper Internal testing involved continuously prin...

Page 125: ...0 mm Oficio Mexico 215 9 mm x 341 0 mm Envelope Monarch 98 4 mm x 190 5 mm Envelope No 10 COM10 104 7 mm x 241 3 mm Envelope DL 110 0 mm x 220 0 mm Envelope C5 162 0 mm x 229 0 mm Letter Government 2...

Page 126: ...h 2 105 to 163 g m Labels 2 Envelope Envelope H 3 Index Card 121 to 163 g m 1When using paper of 121 to 163 g m with Heavy 2 specified select this paper type if toner is not fully fixed and the printo...

Page 127: ...ilable Paper P 122 Print Speed Same as Print Speed on Main Unit P 120 Resolution Data Processing 600 dpi x 400 dpi 600 dpi x 600 dpi Page Description Language PDL UFR II LT Resident Fonts None Interfa...

Page 128: ...equirements for the User s Guide Windows Internet Explorer 9 and later Microsoft Edge Firefox Firefox ESR Chrome macOS Safari Firefox Chrome Linux Firefox iOS Safari Android Chrome Only when viewing m...

Page 129: ...describes basic setup procedures from removing the packing materials to setting up the machine User s Guide This Manual This manual describes all the functions of the machine in a manual that is view...

Page 130: ...User s Guide Viewing User s Guide P 131 Specifying How the Appearance of the User s Guide Looks You can change the character size used in the User s Guide and switch the screen layout to fit to the d...

Page 131: ...table of contents is displayed each click on switches between hiding and showing the display When the search display is shown each click on switches between hiding and showing the display Click to se...

Page 132: ...the corresponding page To return to the previous page click Back on your Web browser Click to display the hidden detailed descriptions Click to close the detailed descriptions Click to return to the p...

Page 133: ...blank Also you can only search for pages containing an exact phrase by enclosing the keywords in double quotation marks Search result Displays the search results of the pages that contain the specifi...

Page 134: ...tes an operation that must not be performed Read these items carefully and make sure not to perform the described operations Indicates operational requirements and restrictions Be sure to read these i...

Page 135: ...w devices and printers Windows 8 1 Server 2012 R2 Right click Start select Control Panel View devices and printers Windows 10 select Windows System Control Panel Hardware and Sound Devices and Printer...

Page 136: ...lect Control Panel View network status and tasks Change advanced sharing settings select Turn on network discovery under Network discovery Displaying Shared Printers in the Print Server 1 Open Windows...

Page 137: ...the lower left corner of the screen Run Enter D MInst exe click OK Windows 8 1 Server 2012 R2 Right click Start Run Enter D MInst exe click OK Windows 10 Enter D MInst exe in the search box click D M...

Page 138: ...or 64 bit Windows follow the procedure below 1 Display Control Panel Windows Vista 7 Server 2008 Start select Control Panel Windows 8 Server 2012 Right click the lower left corner of the screen selec...

Page 139: ...rver 2008 Double click System 3 Check the bit architecture For 32 bit versions 32 bit Operating System is displayed For 64 bit versions 64 bit Operating System is displayed Checking the Printer Port 1...

Page 140: ...ort is selected correctly Checking Bidirectional Communication 1 Open the printer folder Displaying the Printer Folder P 132 2 Right click the printer driver icon for this machine and click Printer pr...

Page 141: ...irectional support check box is selected Checking the SSID to Which Your Computer is Connected If your computer is connected to a wireless LAN network click or in the system tray to display the SSID o...

Page 142: ...that you use Print Windows 10 Tap or click Print on the application The driver that you use Print If you print using this method only a limited number of print settings are available If the message T...

Page 143: ...ling waste electrical and electronic equipment EEE Improper handling of this type of waste could have a possible negative impact on the environment and human health due to potentially hazardous substa...

Page 144: ...EREIN INCLUDING WITHOUT LIMITATION THEREOF WARRANTIES AS TO MARKETABILITY MERCHANTABILITY FITNESS FOR A PARTICULAR PURPOSE OF USE OR NON INFRINGEMENT CANON INC SHALL NOT BE LIABLE FOR ANY DIRECT INCID...

Page 145: ...signias Internal Revenue Stamps canceled or uncanceled Selective Service or Draft Papers Bonds or Other Certificates of Indebtedness Checks or Drafts Issued by Governmental Agencies Stock Certificates...

Page 146: ...to remain under this license does not apply to any document created using the fonts or their derivatives DEFINITIONS Font Software refers to the set of files released by the Copyright Holder s under t...

Page 147: ...sion except to acknowledge the contribution s of the Copyright Holder s and the Author s or with their explicit written permission 5 The Font Software modified or unmodified in part or in whole must b...

Page 148: ...her License Conditions Please refer to Table of Software and respective License terms below for more detail and corresponding license conditions Table of Software Names of Software Terms and Condition...

Page 149: ...als mentioning features or use of this software must display the following acknowledgment This product includes software developed by the OpenSSL Project for use in the OpenSSL Toolkit http www openss...

Page 150: ...OF THIS SOFTWARE EVEN IF ADVISED OF THE POSSIBILITY OF SUCH DAMAGE This product includes cryptographic software written by Eric Young eay cryptsoft com This product includes software written by Tim H...

Page 151: ...yptographic software written by Eric Young eay cryptsoft com The word cryptographic can be left out if the rouines from the library being used are not cryptographic related 4 If you include any Window...

Page 152: ...5 derivative of this code cannot be changed i e this code cannot simply be copied and put under another distribution licence including the GNU Public Licence...

Reviews: