Chapter 2
2-24
F-2-70
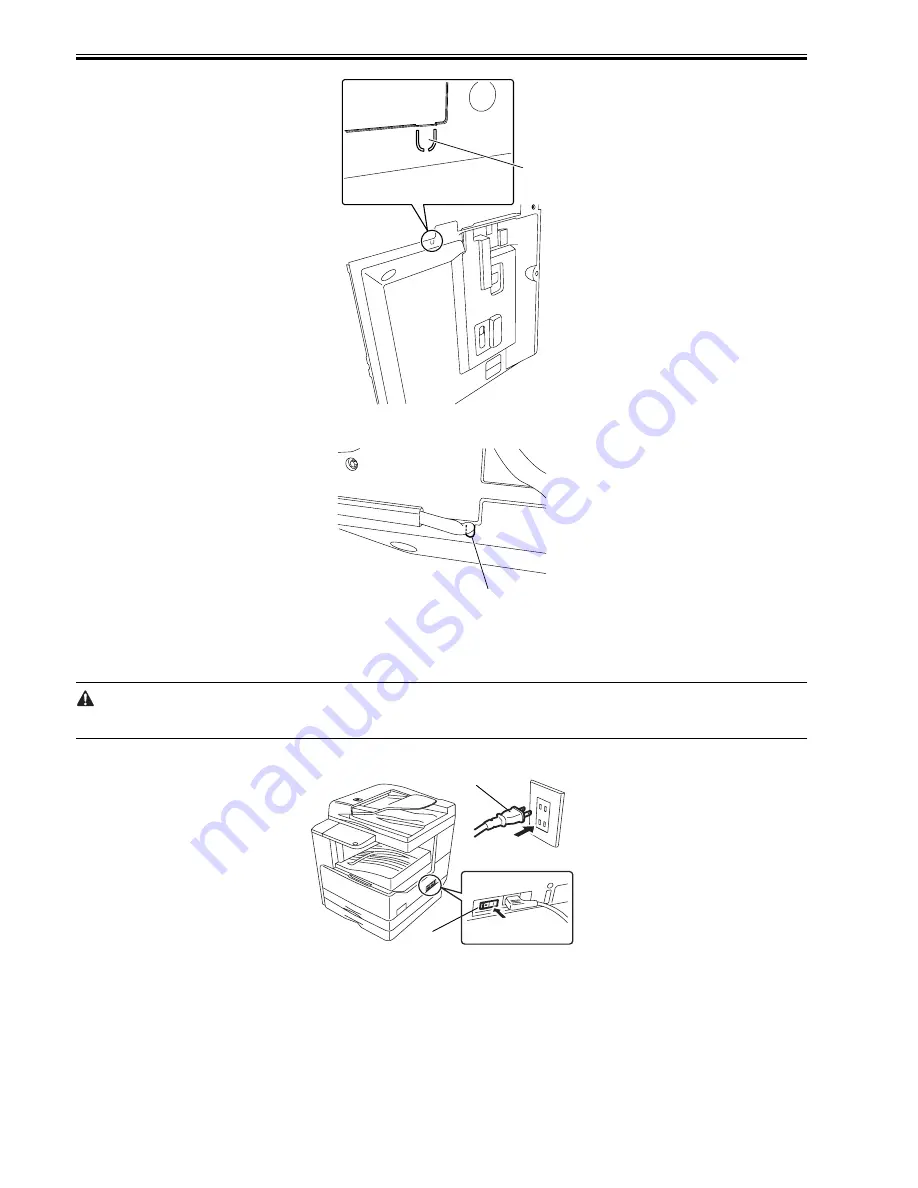
19) Attach the rear cover with the repeating harness B routed through the cut portion of the rear cover.
F-2-71
2.5.4 Registering the Card IDs
0011-1083
iR2016J / iR2016 / iR2020 /
After installing the card reader-E1, register the card numbers to be used in the service mode of the iR body. If they are not registered, cards will not be recognized
when inserted.
1) Plug the power cord [1] into the outlet, and then turn on the main power switch [2].
F-2-72
2) Press the following keys to display the service mode screen:
Additional Functions Key > 2 Key > 8 Key > Additional Functions Key
3) Select "# ACC" using the + and - key, and then press the OK key.
4) Select "CARD" using the + and - key, and then press the OK key.
5) Specify the first ID number of the card ID numbers to be registered, and then press the OK key.
Sequential Card ID numbers of 100 cards(*) are automatically registered in the department ID, starting with the specified card ID number.
* When an optional ROM is added, card ID numbers of 1000 cards are registered.
6) Press the Additional Functions key to enter the user mode.
7) Select "SYSTEM SETTINGS" using the + and - key, and then press the OK key.
8) Select "MANAGE DEPT. ID" using the + and - key, and then press the OK key.
9) Select "ON" using the + and - key, and then press the OK key.
10) Turn main power switch off and on again. Check that "INSERT CARD" appears.
[1]
[1]
[2]
[1]
Summary of Contents for iR2016 Series
Page 2: ...Download Free Service Manual And Resetter Printer at http printer1 blogspot com ...
Page 6: ...Download Free Service Manual And Resetter Printer at http printer1 blogspot com ...
Page 22: ...Contents Download Free Service Manual And Resetter Printer at http printer1 blogspot com ...
Page 24: ...Download Free Service Manual And Resetter Printer at http printer1 blogspot com ...
Page 43: ...Chapter 1 1 17 8 Pickup roller 17 Fixing film unit 9 Feed roller 18 Delivery roller ...
Page 70: ...Chapter 1 1 44 ...
Page 71: ...Chapter 2 Installation ...
Page 72: ......
Page 74: ......
Page 120: ...Chapter 2 2 46 ...
Page 121: ...Chapter 3 Main Controller ...
Page 122: ......
Page 124: ......
Page 137: ...Chapter 4 Original Exposure System ...
Page 138: ......
Page 171: ...Chapter 5 Laser Exposure ...
Page 172: ......
Page 174: ......
Page 182: ......
Page 183: ...Chapter 6 Image Formation ...
Page 184: ......
Page 186: ......
Page 197: ...Chapter 7 Pickup Feeding System ...
Page 198: ......
Page 218: ......
Page 219: ...Chapter 8 Fixing System ...
Page 220: ......
Page 222: ......
Page 244: ......
Page 245: ...Chapter 9 External and Controls ...
Page 246: ......
Page 270: ......
Page 271: ...Chapter 10 Maintenance and Inspection ...
Page 272: ......
Page 274: ......
Page 277: ...Chapter 11 Standards and Adjustments ...
Page 278: ......
Page 280: ......
Page 283: ...Chapter 11 11 3 ...
Page 284: ......
Page 285: ...Chapter 12 Correcting Faulty Images ...
Page 286: ......
Page 288: ......
Page 297: ...Chapter 12 12 9 F 12 11 F 12 12 1 2 3 4 5 6 7 8 9 10 11 12 13 14 15 16 17 ...
Page 298: ......
Page 299: ...Chapter 13 Self Diagnosis ...
Page 300: ......
Page 302: ......
Page 313: ...Chapter 14 Service Mode ...
Page 314: ......
Page 375: ...Chapter 15 Upgrading ...
Page 376: ......
Page 378: ......
Page 398: ......
Page 399: ...Chapter 16 Service Tools ...
Page 400: ......
Page 402: ......
Page 404: ......
Page 405: ...Jan 30 2006 ...
Page 406: ...Download Free Service Manual And Resetter Printer at http printer1 blogspot com ...


