


58
The
Printer could not
be connected to the
specified access
point
is displayed
during setup
This message is displayed when the printer could not connect to the target
access point. Clicking the
OK
button displays the
Access Points
dialog box.
For details, see “The target access point is not detected” on page 52.
The
Another access
point with the same
SSID exists
is
displayed during setup
Cancel the current setup and change the SSID of the access point, then start
the setup again.
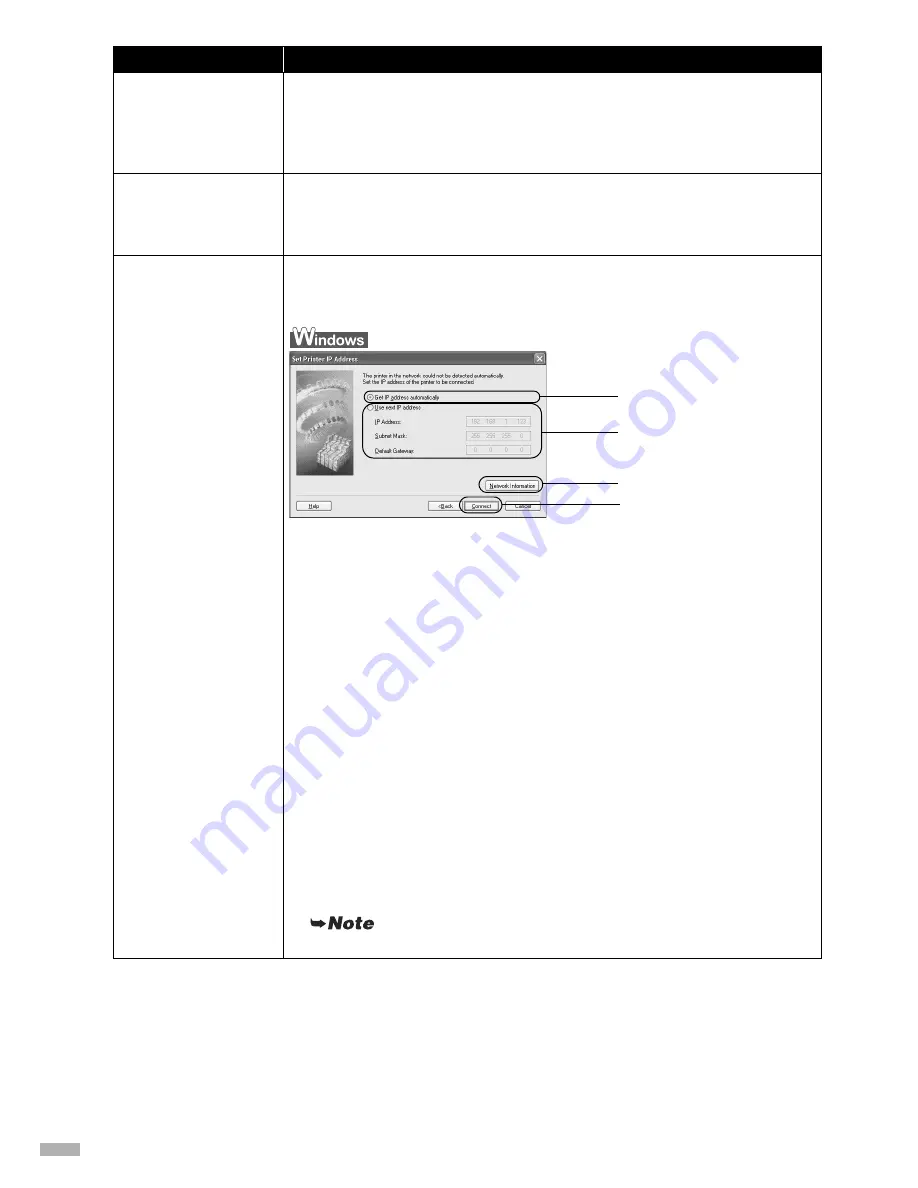
The
Set Printer IP
Address / Printer IP
Address Setup
dialog
box is displayed during
setup
The following dialog box is displayed if no printer was detected on the network.
Specify the IP address of the printer and click the
Connect
button to retry the
detection of the target printer.
(1) Get IP address automatically
Select to use an IP address provided by a DHCP server. This requires that
the DHCP function is enabled on the router or access point.
(2) Use next IP address
Select to manually specify an IP address, for example if there is no DHCP
server functionality in the network environment in which you are using the
printer.
IP Address/Subnet Mask/Default Gateway
Enter each value to specify a fixed IP address when
Use next IP Address
is selected.
(3) Network Information
Displays the
Network Information
dialog box. Click this button to confirm
network settings when your access point or your printer cannot be detected
automatically during setup for use over the network. This button is enabled
when an access point was not detected or could not be connected.
(4) Connect
Searches for the printer with the specified settings. If the printer is still not
be detected with a specified IP address, see “Cannot connect to the printer
(the printer is not detected)” on page 55.
Clicking the
Back
button displays the
Access Points
dialog box.
Problem
Possible Cause and Measures
(1)
(2)
(3)
(4)
Summary of Contents for iP5200R - PIXMA Color Inkjet Printer
Page 1: ...Setup Guide...


