4
4-28
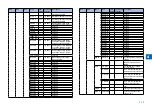
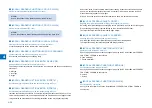
<053: Margin adjustment at the leading edge of the copy>
Adjust the margin at the leading edge of the copy. Increasing the value makes the margin at
the leading edge larger.
<054: Margin adjustment at the trailing edge of the copy>
Adjust the margin at the trailing edge of the copy. Increasing the value makes the margin at
the trailing edge larger.
<055: Margin adjustment at the right edge of the copy>
Adjust the margin at the right edge of the copy. Increasing the value makes the margin at the
right edge larger.
<056: Margin adjustment at the left edge of the copy>
Adjust the margin at the left edge of the copy. Increasing the value makes the margin at the
left edge larger.
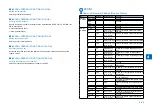
<058:: Adjustment of the registration loop volume (Manual feed tray)>
If there is a registration loop noise and abrasion while feeding the paper from the manual feed
tray, registration loop noise and abrasion could be reduced by adjusting the volume of the
registration loop. By making the value larger, loop volume will become bigger.
<059:Adjustment of the registration loop volume. (Cassette)>
If there is a registration loop noise and abrasion while feeding the paper from the cassette,
registration loop noise and abrasion could be reduced by adjusting the volume of the
registration loop. By making the value larger, loop volume will become bigger.
<061:Adjustment of the registration loop volume. (Duplex unit)>
If there is a registration loop noise and abrasion while feeding the paper from the duplex
unit, registration loop noise and abrasion could be reduced by adjusting the volume of the
registration loop. By making the value larger, loop volume will become bigger.
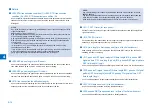
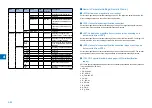
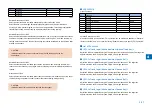
<062:Temperature adjustment UP/DOWN mode. (For plain paper)>
The temperature adjustment offset relative to the target fixing temperature of plain paper can
be changed in steps of 3˚C. Use this parameter when the fixing performance is low or when it
is necessary to prevent the paper from slipping or being curled.
Plain paper: Plain paper mode, thin paper mode, S thin paper mode, OHP mode
0 - 2: +15˚C
●
●
●
●
●
●
●
●
3 - 11:+12 to -15˚C (in steps of 3˚C)
12- 14: -15˚C
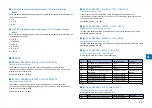
<063:Temperature adjustment UP/DOWN mode. (For rough paper)>
The temperature adjustment offset relative to the target fixing temperature of thick paper can
be changed in steps of 3˚C. Use this parameter when the fixing performance is low or when it
is necessary to prevent the paper from slipping or being curled.
Thick paper: Thick paper mode, thick paper H mode, bond mode
0 - 2˚C+15˚C
3 - 11˚C+12 to -15˚C (in steps of 3˚C)
12 - 14˚C-15˚C
<064:Mode for preventing the temperature rise of the end>
User this parameter to reduce the frequency of entering the throughput down mode, suppress
edge temperature rise, or prevent soiling due to the high temperature offset.
Add/subtract the threshold of the difference in detection temperature between the sub
thermistor 1 (2) that starts the full speed operation of the end cooling fan and the sub
thermistor 1 (2) that starts the down sequence to/from default threshold temperature.
0 - 4: +20 to -20˚C (in steps of 10˚C)
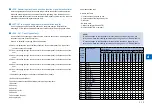
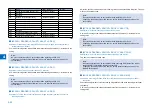
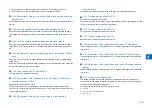
<065:Mode for reducing sand image>
Set when sand image *1 has occurred on the print image.
Restraining the scatter of the toner by increasing the electric current of the AC electrification;
the sand image could be reduced.
Sand image *1: Multiple black dots and white dots appear on half tone. Or multiple black dots
appear on white background.
0: Normal.
1 to 3: Reducing mode. (Same operation to set 1 to 3)
2: Make the print density lower. Set the initial rotation time for fixing to 3 seconds. Does not
do it if the initial rotation elongation time has been set to 3 seconds or longer in another
service mode.
<066:Temperature/ Humidity sensor fixed mode>
Changing to high-pressure environment by using the temperature/ humidity sensor. But when
there is an image trouble at the point of changing the environment,
fix the temperature and the humidity and do not allow the change of the high-pressure output.
0: Normal.
1: Fixed environment of LL. (Temperature of 18 deg C and humidity of 20%)
●
●
●
●
Summary of Contents for IMAGERUNNER 2530
Page 9: ...1 1 Periodical Service Consumable Parts and Cleaning Parts ...
Page 13: ...1 5 1 Cleaning Parts Fixing guide Transfer guide F 1 2 F 1 2 ...
Page 14: ...2 2 Adjustment Overview Adjustment when replacing parts image position adjustment ...
Page 20: ...3 3 Error Code Overview Error Code Jam Code Alarm Code ...
Page 34: ...4 4 Service Mode Overview Details of Service Mode ...
Page 85: ...5 5 Parts Replacement and Cleaning List of Parts ...
Page 98: ...6 6 Product Overview Specifications Product lineups Basic Configuration ...
Page 106: ...7 7 Version Upgrading Upgrading Targets and Procedure ...

