


14
4
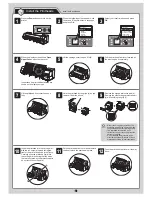
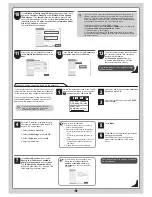
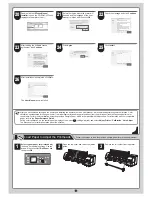
Raise the holder stopper lever (a) from the shaft side to unlock the
stopper. While holding the holder stopper in the position in the figure
indicated by (b), remove the holder stopper from the roll holder.
a
b
• We recommend wearing clean cotton gloves when handling rolls of
paper to protect the printable surface.
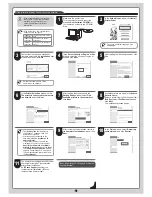
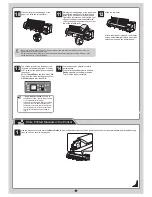
5
With the leading edge of the roll of paper towards the front as shown
in the figure, insert the roll holder from the right side of the roll of
paper. Insert the roll holder all the way until the paper is touching the
flange (a) of the roll holder.
a
• Insert the roll holder as far as it will go so there is no gap between
the paper and the roll holder flange. A gap can cause the paper to
feed irregularly.
• Do not place a roll of paper on a desk or other flat surface where it
may roll off. A falling paper roll creates the risk of personal injury.
• Do not allow the roll holder to be subjected to strong impact when
loading a roll of paper. Strong impact can damage the roll holder.
6
As shown in the figure, slide the holder stopper onto the roll holder
from the left. Holding the holder stopper at the position in the figure
marked (b), press until the holder stopper flange (a) is securely in
contact with the paper. Lower the holder stopper lever (c) to the shaft
side to lock it.
a
b
c
• Insert the roll holder as far as it will go so there is no gap between
the paper and the roll holder flange. A gap can cause the paper to
feed irregularly.
• Remove all wrinkles and curls from the paper, if any, before loading
it.
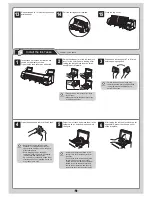
7
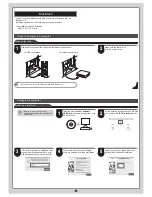
With the side of the roll holder with the white gear facing the same
direction as the roll holder slot with the white gear, set the roll holder
shaft (a) into the left and right guide grooves (b) of the roll holder
slots. Allow the shaft to slide into the guides as far as possible.
a
b
a
b
• When setting the shaft into the guides, take care so the roll of paper
does not fall and created the risk of personal injury.
• Be careful to not pinch your fingers between the shaft of the roll
holder shaft (a) and the guide grooves (b) when loading a roll of
paper.
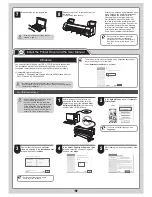
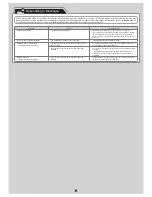
8
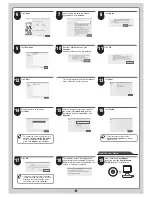
Pull out the paper so it is even on both
sides and insert it into the feed slot (b),
and feed it until it contacts the paper
retainer (a).
b
b
a
The paper feeds automatically until it contacts the
paper retainer.
• Take care to avoid soiling the printing
surface when removing rolls of paper. A
soiled printing surface can affect printing
quality.
• Remove all wrinkles and curls from the
paper, if any, before loading it.
• When loading paper, make sure there is no
gap between the right side of the roll and
the roll holder.
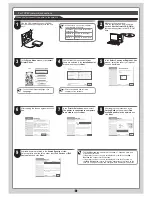
9
Lower the ejection guide.
Lower the ejection guide carefully, taking
care that the ejection supports (a) do not
touch the paper.
a