


13
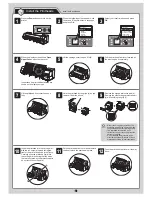
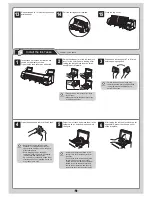
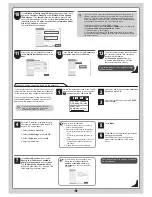
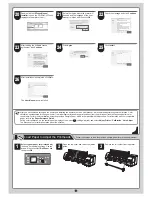
Follow these steps to load the provided sample paper for printhead adjustment.
Load Paper to Adjust the Printheads
20
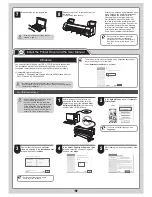
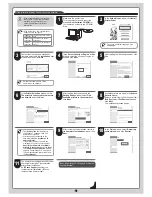
Double-click the
iPFxxxx Manual
Installer
icon on the CD-ROM. (iPFxxxx
represents the printer model.)
21
Select the region where the printer will
be used and the language of the user
manual to install, and then click
OK
.
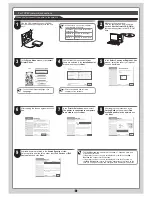
22
Check the message and click
Continue
.
23
After reading the software license
agreement, click
Continue
.
24
Click
Agree
.
25
Click
Install
.
26
After installation is completed, click
Quit
.
The
User Manua
l is now installed.
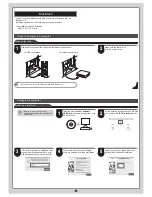
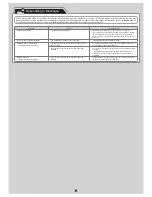
MEMO
After you have finished setting up the printer and installing the printer driver and User Manual, we recommend performing color calibration. Color
calibration compensates for changes in color from individual variation among printheads or from the printing environment, ensuring better color
consistency. Perform color calibration using the provided Sample Paper, which is compatible with this process. For information on other compatible
paper, refer to the
Paper Reference Guide
.
During color calibration, on the control panel's display screen, open
(settings/adj. tab) and select
Adjust Printer
-
Calibration
-
Auto Adjust
.
The process of color calibration takes about ten minutes.
1
Select type of paper for printhead adj.
is shown on the display screen. Use the
▲
and
▼
keys to select
Roll Paper
and
then press
OK
.
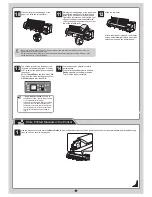
2
Open the top cover and raise the ejection
guide.
3
Remove the roll holder from the printer.