background image

19

En

Symbols Used in This Manual

  WARNING

Indicates a warning concerning operations that may lead to death or 

injury to persons if not performed correctly. To use the machine safely, 

always pay attention to these warnings.

  CAUTION

Indicates a caution concerning operations that may lead to injury to 

persons if not performed correctly. To use the machine safely, always pay 

attention to these cautions.

  IMPORTANT

Indicates operational requirements and restrictions. Be sure to read 

these items carefully to operate the machine correctly, and avoid 

damage to the machine or property.

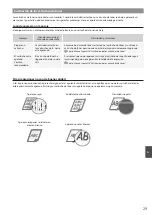
Keys and Buttons Used in This Manual

The following symbols and key names are a few examples of how keys to 

be pressed are expressed in this manual.

• 

Operation panel keys: [Key icon]  

Example: 

• 

Display: <Specify destination.>

• 

Buttons and items on the computer display: [Preferences]

Illustrations and Displays Used in This Manual

Illustrations and displays used in this manual are which of MF515x unless 

specified.

Important Safety Instructions

Please read the “Important Safety Instructions” in this manual and in the 

e-Manual thoroughly before operating the machine.
As these instructions are intended to prevent injury to the user and 

other persons or to prevent destruction of property, always pay 

attention to these instructions and operational requirements.
Please note that you are responsible for all damages caused by failure to 

follow the directions provided herein, using the device for any purpose 

for which it was not intended, or repairs or alterations made by anyone 

other than a Canon-approved technician.

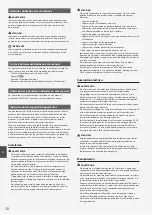
Installation

  WARNING

• 

Do not install the machine near flammable substances such as 

alcohol-based products or paint thinners. If these substances come in 

contact to the electrical parts inside the machine could ignite these 

substances and cause a fire or increase your risk of electric shock.

• 

Do not place necklaces and other metal objects or containers filled 

with liquid on the machine. If foreign substances come into contact 

with electrical parts inside the machine, this may result in a fire or 

electrical shock. 

If any of these substances falls into the machine, turn off the power to 

the machine immediately and contact your local Canon dealer.

• 

Do not use near any medical equipment. Radio wave emitted from 

this machine may interfere with medical equipments, which may 

result in serious accidents.

  CAUTION

• 

Do not install the machine in the following locations. Doing so may 

result in personal injury, fire or electrical shock.


− Unstable location


− A location subject to excessive vibrations


− A location where block the ventilation slots (too close to walls, bed, 

shaggy rug, and other similar objects)


− A damp or dusty location


− A location exposed to direct sunlight or an outside place


− A location subject to high temperatures


− A location near open flames


− A location with poor ventilation system

• 

Although ozone is generated from the machine during operation, 

it does not have any affect on the human body. However, if you 

intend to use the machine for long periods of time, ensure that the 

installation location is well ventilated.

• 

Do not connect unapproved cables to this machine. Doing so may 

result in a fire or an electric shock.

• 

Machines with a hard disk may not operate properly when used at 

high altitudes of about 3,000 meters above sea level, or higher.

Power Supply

  WARNING

• 

Do not use power cords other than the one provided, as this can 

result in a fire or electrical shock.

• 

Do not modify or bend the power cord and do not pull on it with 

great force. Do not place heavy objects on the power cord. Damaging 

the power cord may result in a fire or an electric shock.

• 

Do not plug or unplug the power plug with wet hands, as this can 

result in electrical shock.

• 

Do not use extension cords or multi-plug power strips with this 

machine. Doing so may result in a fire or electric shock.

• 

Do not bundle up or tie up the power cord in a knot, as this can result 

in a fire or electrical shock.

• 

Insert the power plug completely into the AC power outlet. Failure to 

do so can result in a fire or electrical shock.

• 

Remove the power plug completely from the power outlet during 

a thunder storm. Failure to do may result in a fire, electric shock, or 

malfunction.

  CAUTION

• 

Use only a power supply that meets the voltage requirements listed 

herein. Failure to do so may result in a fire or electric shock.

• 

Install this machine near the power outlet and leave sufficient space 

around the power plug so that it can be unplugged easily in an 

emergency.

Handling

  WARNING

• 

Do not disassemble or modify the machine. There are high-

temperature and high-voltage components inside the machine which 

may result in a fire or electrical shock.

• 

Do not allow children to touch or play with the power cord and 

cables or internal or electrical parts. Doing so may result in serious 

personal injury.

• 

Please contact an authorized Canon dealer if the machine makes an 

unusual noise, emits an unusual smell, or emits smoke or excessive 

heat. Continued use may result in a fire or electric shock. 

• 

Do not use flammable sprays near the machine. If flammable 

substances come into contact with electrical parts inside the 

machine, this may result in a fire or electric shock.

Summary of Contents for imageCLASS MF515x

Page 1: ...FT6 1380 010 Getting Started Getting Started IMPORTANT For Macintosh users please refer to P 15 En Introducción IMPORTANTE Para usuarios de Macintosh consulte la pág 26 Es ...

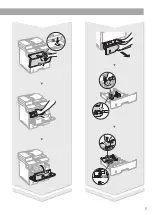
Page 2: ... Installing the Machine The USB cable may not be supplied depending on the country where you purchased the machine Installation Requirements 200 mm 470 mm 477 mm 453 mm 77 mm 500 mm 280 mm 141 mm 261 mm ...

Page 3: ...3 Remove all the tape ...

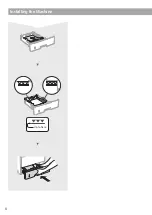
Page 4: ...4 Installing the Machine 1 2 1 2 ...

Page 5: ...5 1 2 ...

Page 6: ...6 Installing the Machine Up to here ...

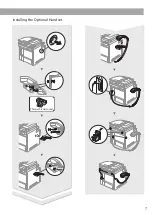
Page 7: ...7 Installing the Optional Handset This part is not used ...

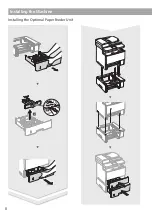
Page 8: ...8 Installing the Machine Installing the Optional Paper Feeder Unit 1 2 ...

Page 9: ...ams 17 Replacing Toner Cartridges 18 Acerca de los manuales suministrados 21 Navegación por el menú y método de introducción de texto 21 Conexión del cable de alimentación y encendido del interruptor de alimentación 21 Especificación de la configuración inicial 22 Selección del método para conectar el equipo al ordenador 22 Selección del método de conexión A través de LAN inalámbrica u otro método...

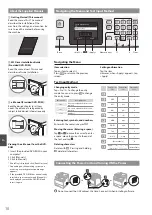
Page 10: ... Turning ON the Power OFF ON OFF ON 1 2 Do not connect the USB cable at this time Connect it when installing software Navigating the Menu and Text Input Method Navigating the Menu Item selection Tap an item to select it Press to return to the previous screen Setting confirmation Tap the item However when Apply appears tap Apply Text Input Method Changing entry mode Tap A a 12 to change the entry m...

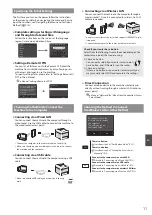
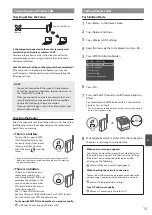
Page 11: ...computer Connecting via a USB cable You can connect the machine to the computer using a USB cable Make sure that the USB cable you use has the following mark Connecting via a Wireless LAN You can connect the machine to the computer through a wireless router Since it is connected to wireless no LAN cables are needed A wireless router access point which supports IEEE802 11b g n is required Connect t...

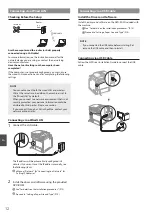
Page 12: ...d to third parties Please use caution If you connect through a LAN in the office contact your network administrator Connecting via a Wired LAN 1 Connect the LAN cable The IP address will be automatically configured in 2 minutes If you want to set the IP address manually see the following items e Manual Network Connecting to a Network Setting IP Addresses 2 Install the driver and software using the...

Page 13: ... button If there is no button on your router access point you may manually select SSID and complete the settings In this case you need to remember SSID and network key of your router access point See 1 Check SSID or Network Key for a Wireless LAN Router Access Point P 14 to learn how to find out your SSID and network key To set up with WPS PIN code method or setup manually e Manual Connecting to a...

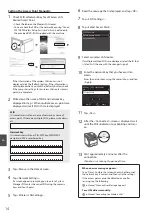
Page 14: ...reshared key 3 Tap Menu in the Home Screen 4 Tap Network Settings If a screen appears prompting you to enter a System Manager PIN enter the correct PIN using the numeric keys and tap Apply 5 Tap Wireless LAN Settings 6 Read the message that is displayed and tap OK 7 Tap SSID Settings 8 Tap Select Access Point SSID Settings Enter Manually Select Access Point 9 Select a wireless LAN router If multip...

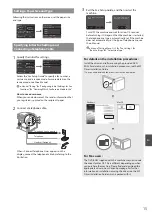
Page 15: ...l When Connect Telephone Line appears on the display connect the telephone cable by referring to the illustration 3 Exit the Fax Setup Guide and then restart the machine Yes No Do you want to end Fax Setup Guide OK Turn the main power OFF and ON to apply the settings Turn OFF the machine and wait for at least 10 seconds before turning it ON again When the machine is restarted the telephone line ty...

Page 16: ...ing using the dial buttons of the telephone during a phone call I Fax You can send and receive faxes over the Internet Documents are converted to TIFF images and sent as e mail attachments without using a telephone line Print Enlarged Reduced Printing 2 Sided Printing Reduced Layout You can reduce multiple documents to print them onto one sheet 2 on 1 4 on 1 Booklet Printing Poster Printing Waterm...

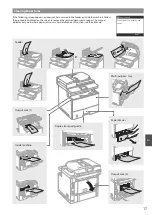
Page 17: ...rocedure displayed on the screen to remove the jammed document or paper This manual indicates only areas where paper jams occur For details on each function see the e Manual Paper jammed Next Press Next to display the steps Output area 1 Feeder Multi purpose tray Paper drawer Duplex transport guide Inside machine Output area 2 1 2 ...

Page 18: ...e toner cartridge and replace the toner cartridge with a new one before printing high volume documents e Manual Replacing Toner Cartridges Cartridge has reached end of lifetime Rplcmt recommended The toner cartridge has reached the end of its lifetime If this message does not disappear replace the toner cartridge You can continue printing but the print quality cannot be guaranteed e Manual Replaci...

Page 19: ...ectrical shock Unstable location A location subject to excessive vibrations A location where block the ventilation slots too close to walls bed shaggy rug and other similar objects A damp or dusty location A location exposed to direct sunlight or an outside place A location subject to high temperatures A location near open flames A location with poor ventilation system Although ozone is generated ...

Page 20: ...se toner Doing so may cause a malfunction in the vacuum cleaner or result in a dust explosion due to static discharge CAUTION Keep the toner cartridges and other consumables out of the reach of small children If toner is ingested consult a physician or poison control center immediately Do not attempt to disassemble the toner cartridge The toner may scatter and get into your eyes or mouth If toner ...

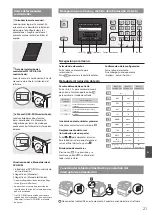
Page 21: ...ucido en el ordenador y no apareciera Manuales retire el DVD ROM e insértelo de nuevo Navegación por el menú Selección de elementos Pulse sobre un elemento para seleccionarlo Pulse para volver a la pantalla anterior Confirmación de la configuración Pulse sobre el elemento Sin embargo cuando aparezca Aplicar pulse Aplicar Método de introducción de texto Cambio del modo de entrada Pulse A a 12 para ...

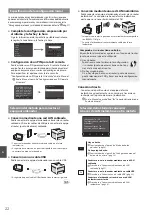
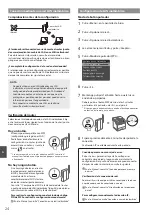
Page 22: ...y el ordenador Conexión con un cable USB Podrá conectar el equipo al ordenador con un cable USB Asegúrese de que el cable USB utilizado tiene la marca siguiente Conexión mediante una red LAN inalámbrica Podrá conectar el equipo al ordenador a través de un router inalámbrico La conexión se hace de forma inalámbrica por lo que no se necesitarán cables de LAN Se requiere un router o punto de acceso i...

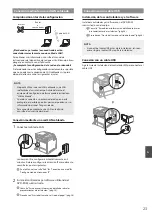
Page 23: ... Para conectarse mediante una LAN en la oficina consulte al administrador de red Conexión mediante una red LAN cableada 1 Conecte el cable de LAN La dirección IP se configurará automáticamente en 2 minutos Si desea configurar la dirección IP manualmente consulte los puntos siguientes En el e Manual consulte Red Conexión a una red Configuración de direcciones IP 2 Instale el controlador y el softwa...

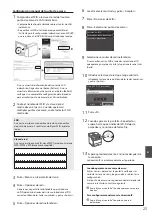
Page 24: ... llevar a cabo la configuración manualmente En este caso necesitará recordar el SSID y la clave de red de su router punto de acceso Consulte 1 Compruebe el SSID o la clave de red del router o punto de acceso de LAN inalámbrica pág 25 para obtener más información sobre el SSID y la clave de red Para realizar la configuración con el método de código PIN de WPS o realizar la configuración manualmente...

Page 25: ...Si aparece una pantalla solicitándole que introduzca un PIN del administrador del sistema introduzca el PIN correcto utilizando las teclas numéricas y pulse Aplicar 5 Pulse Opciones de red inalámbrica 6 Lea el mensaje mostrado y pulse Aceptar 7 Pulse Opciones de SSID 8 Pulse Seleccionar punto de acceso Opciones de SSID Introducir manualmente Seleccionar punto de acceso 9 Seleccione un router de re...

Page 26: ...ecte la línea telefónica conecte el cable de teléfono como se indica en la ilustración 3 Cierre la Guía de configuración de fax y reinicie el equipo Sí No Desea finalizar la Guía de configuración de fax Aceptar Apague y encienda la alimentación principal para aplicar las opciones Apague el equipo y espere 10 segundos como mínimo antes de volver a encenderlo Cuando se reinicie el equipo el tipo de ...

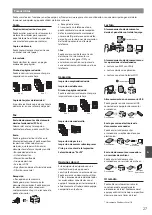
Page 27: ...ación del teléfono durante una llamada telefónica I Fax Podrá enviar o recibir faxes a través de Internet Los documentos se convertirán a imágenes TIFF y se enviarán como archivos adjuntos de correo electrónico utilizando una línea telefónica Impresión Impresión ampliada reducida Impresión a doble cara Diseño de página reducido Podrá reducir varios documentos para imprimirlos en una sola hoja 2 on...

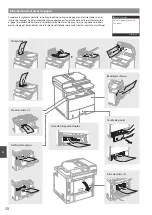
Page 28: ...para extraer el documento o el papel atascado En este manual se indican únicamente las áreas en las que se pueden producir atascos de papel Para obtener una información detallada sobre cada función consulte el e Manual Papel atascado Siguiente Pulse Siguiente para ver los pasos Área de salida 1 Alimentador Bandeja multiuso Casete de papel Guía de transporte dúplex Dentro del equipo Área de salida ...

Page 29: ...rtucho de tóner por uno nuevo antes de imprimir un documento grande En el e Manual consulte Sustitución de los cartuchos de tóner El cartucho se ha agotado Cambio recomendado El cartucho de tóner ha llegado al final de su vida útil Si este mensaje no desaparece sustituya el cartucho de tóner Puede seguir imprimiendo pero no se garantiza la calidad de la impresión En el e Manual consulte Sustitució...

Page 30: ...ivas Lugares en los que pudieran quedar bloqueadas las ranuras de ventilación demasiado cerca de la pared sobre una cama sobre una alfombra mullida u otros objetos similares Lugares húmedos o polvorientos Lugares al aire libre o en los que el equipo quede expuesto a la luz solar directa Lugares sometidos a altas temperaturas Lugares próximos a llamas abiertas Lugares con sistemas de ventilación in...

Page 31: ...ulas del mismo No utilice nunca un aspirador para limpiar el tóner suelto Esto podría provocar fallos de funcionamiento del aspirador o una explosión del polvo debido a las descargas de electricidad estática ATENCIÓN Mantenga los cartuchos de tóner y otros consumibles fuera del alcance de los niños Si ingiere tóner acuda inmediatamente al médico o a un centro de control toxicológico No intente des...

Page 32: ... 59 1185 XB Amstelveen The Netherlands CANON CHINA CO LTD 2F Jinbao Building No 89 Jinbao Street Dongcheng District Beijing 100005 PRC CANON SINGAPORE PTE LTD 1 Fusionopolis Place 15 10 Galaxis Singapore 138522 CANON AUSTRALIA PTY LTD Building A The Park Estate 5 Talavera Road Macquarie Park NSW 2113 Australia CANON GLOBAL WORLDWIDE SITES http www canon com FT6 1380 010 XXXXXXXXXX Copyright CANON ...

Reviews: