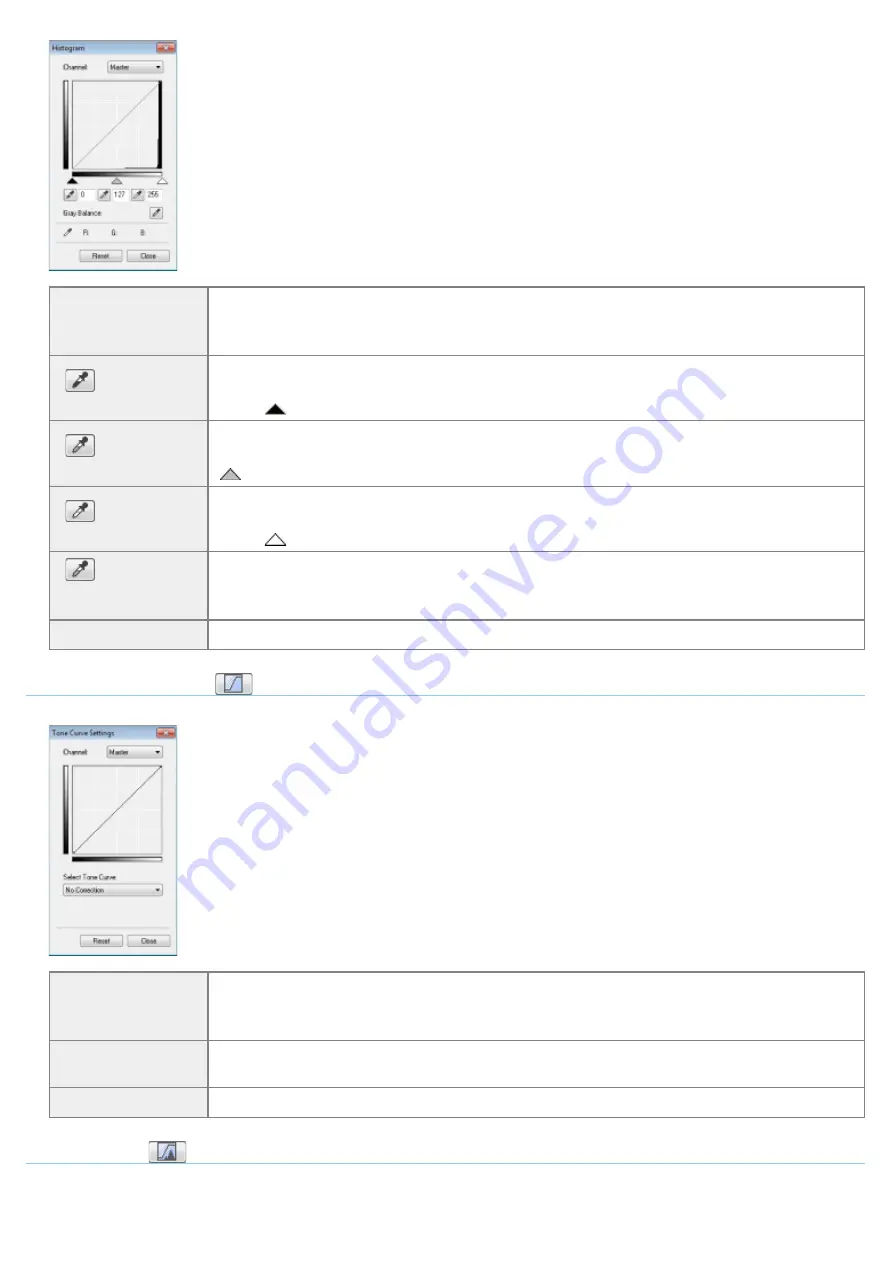
[Channel]
Select [Red], [Green], or [Blue] to adjust each color, or select [Master] to adjust all three colors
when [Color] or [Color (Documents)] is selected for [Color Mode].
Adjust gray when [Grayscale] is selected for [Color Mode].
[
] (Black-point
eyedropper tool)
Click to move the tool to the part of the image (or the selected scan area) in the preview area
that you want to be the darkest part. You can also manually enter a value from 0 up to 245 or
move [
] on the slider.
[
] (Mid-point
eyedropper tool)
Click to move the tool to the part of the image (or the selected scan area) in the preview area
that you want to be halftone. You can also manually enter a value from 5 up to 250 or move [
] on the slider.
[
] (White-point
eyedropper tool)
Click to move the tool to the part of the image (or the selected scan area) in the preview area
that you want to be the lightest part. You can also manually enter a value from 10 up to 255 or
move [
] on the slider.
[
] (Gray
Balance eyedropper
tool)
For color images, click to move the tool to the part of the image (or the selected scan area) in
the preview area that you want to adjust gray balance. Grays in the scanned image become
halftone, while other original colors are faithfully reproduced.
[Reset]
Restore all current settings to default settings.
Tone Curve Settings
You can adjust the brightness of a specific part of the image by selecting your choice of tone curve in this dialog box.
[Channel]
Select [Red], [Green], or [Blue] to adjust each color, or select [Master] to adjust all three colors
when [Color] or [Color (Documents)] is selected for [Color Mode].
Adjust gray when [Grayscale] is selected for [Color Mode].
[Select Tone Curve]
Select the tone curve type from [No Correction], [Over Exposure], [Under Exposure], [High
Contrast], and [Invert the Negative/Positive Image].
[Reset]
Restore all current settings to default settings.
Final Review
You can confirm all the specified color settings in this dialog box.
㻝㻠㻟㻌㻛㻌㻞㻟㻢
Summary of Contents for i-SENSYS MF3010
Page 1: ...㻝㻌㻛㻌㻞㻟㻢 ...
Page 8: ...to drop the machine resulting in personal injury Relocating the Machine 㻤㻌㻛㻌㻞㻟㻢 ...
Page 24: ...Paper Cassette 030E 00H 1 Paper Guides Adjust these guides to fit the document 㻞㻠㻌㻛㻌㻞㻟㻢 ...
Page 31: ...6 Press Menu setting key exit the menu operation The menu indicator turns off 㻟㻝㻌㻛㻌㻞㻟㻢 ...
Page 54: ...㻡㻠㻌㻛㻌㻞㻟㻢 ...
Page 58: ...6 Press Menu setting key to exit the menu operation The menu indicator turns off 㻡㻤㻌㻛㻌㻞㻟㻢 ...
Page 61: ...5 Press Menu setting key to exit the menu operation The menu indicator turns off 㻢㻝㻌㻛㻌㻞㻟㻢 ...
Page 69: ...Document Type 030E 01R Supported Document Types Scan Area 㻢㻥㻌㻛㻌㻞㻟㻢 ...
Page 72: ...Paper 030E 01W Supported Paper Types Printable Area 㻣㻞㻌㻛㻌㻞㻟㻢 ...
Page 82: ... Setting List 6 Press to start copying Canceling copy jobs Press 㻤㻞㻌㻛㻌㻞㻟㻢 ...
Page 90: ...8 Press to scan the second document After scanning printing starts 㻥㻜㻌㻛㻌㻞㻟㻢 ...
Page 157: ...3 Load paper in the paper cassette 㻝㻡㻣㻌㻛㻌㻞㻟㻢 ...
Page 170: ...Cameras in Windows See the Starter Guide 㻝㻣㻜㻌㻛㻌㻞㻟㻢 ...
Page 196: ...Connect the power cord and turn ON the power switch 㻝㻥㻢㻌㻛㻌㻞㻟㻢 ...
Page 217: ...Appendix 030E 05C Basic Windows Operations 㻞㻝㻣㻌㻛㻌㻞㻟㻢 ...


