04L9-09W
1
Start the Web browser.
2
Enter "http://<the IP address of the printer>/" in the address field, and then press the [ENTER] key on
your keyboard.
Input Example:
"http://192.168.0.215/"
If the host name of the printer is registered in the DNS server, you can enter ["host name"."domain name"] instead of
the IP address.
Input Example:
http://my_printer.xy_dept.company.com/
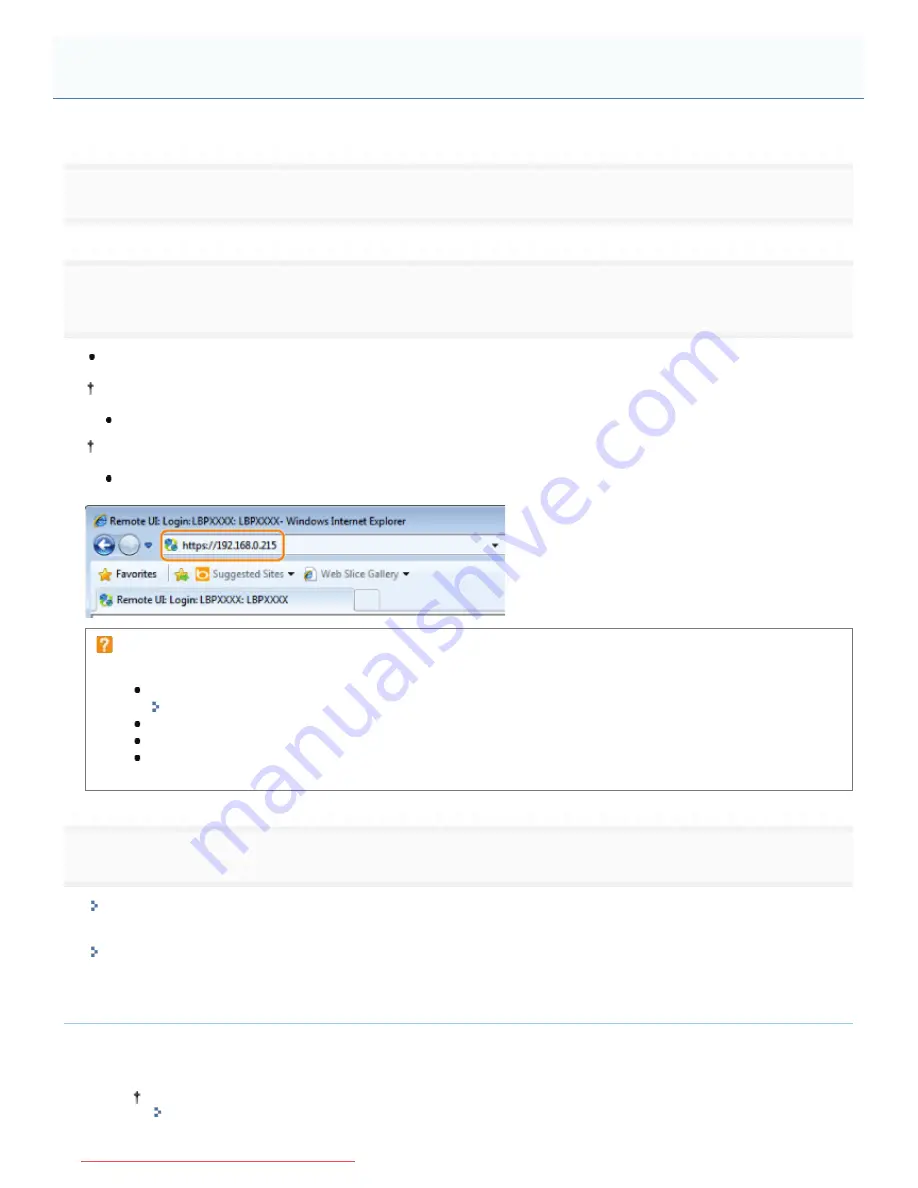
If you want to use SSL encrypted communication, enter "https://<the IP address or name of the printer>/". If the
[Security Alert] dialog box or other dialog box appears, follow the directions in the message.
Input Example:
https://192.168.0.215/
If the Remote UI top page is not displayed
Check the following points.
The Remote UI is enabled.
"
Enabling the Remote UI
"
The printer and computer are connected properly via a network.
The printer is turned ON.
The IP address or ["host name"."domain name"] is entered correctly.
3
Log in as Administrator or End-User.
Logging in as Administrator
By logging in as Administrator, you can perform all the operations and settings of the Remote UI.
Logging in as End-User
By logging in as End-User, you can check the device status, confirm the settings, and view the jobs.
Logging in as Administrator
(1) Select [Management Mode].
(2) Enter the password in [Password].
The default password is "7654321".
"Setting the Administrator Password"
Starting the Remote UI
㻡㻞㻡㻌㻛㻌㻥㻢㻟
Downloaded from ManualsPrinter.com Manuals
Summary of Contents for i-SENSYS LBP6670dn
Page 1: ...㻝㻌㻛㻌㻥㻢㻟 Downloaded from ManualsPrinter com Manuals ...
Page 53: ...㻡㻟㻌㻛㻌㻥㻢㻟 Downloaded from ManualsPrinter com Manuals ...
Page 94: ...㻥㻠㻌㻛㻌㻥㻢㻟 Downloaded from ManualsPrinter com Manuals ...
Page 151: ...㻝㻡㻝㻌㻛㻌㻥㻢㻟 Downloaded from ManualsPrinter com Manuals ...
Page 166: ...㻝㻢㻢㻌㻛㻌㻥㻢㻟 Downloaded from ManualsPrinter com Manuals ...
Page 275: ...㻞㻣㻡㻌㻛㻌㻥㻢㻟 Downloaded from ManualsPrinter com Manuals ...
Page 285: ...㻞㻤㻡㻌㻛㻌㻥㻢㻟 Downloaded from ManualsPrinter com Manuals ...
Page 291: ...㻞㻥㻝㻌㻛㻌㻥㻢㻟 Downloaded from ManualsPrinter com Manuals ...
Page 305: ...iso 8859 1 iso 8859 15 㻟㻜㻡㻌㻛㻌㻥㻢㻟 Downloaded from ManualsPrinter com Manuals ...
Page 310: ...Click OK 㻟㻝㻜㻌㻛㻌㻥㻢㻟 Downloaded from ManualsPrinter com Manuals ...
Page 312: ...Limit E Mail Print mail text 㻟㻝㻞㻌㻛㻌㻥㻢㻟 Downloaded from ManualsPrinter com Manuals ...
Page 315: ...㻟㻝㻡㻌㻛㻌㻥㻢㻟 Downloaded from ManualsPrinter com Manuals ...
Page 362: ...4 Click Spooler 5 Click Edit 㻟㻢㻞㻌㻛㻌㻥㻢㻟 Downloaded from ManualsPrinter com Manuals ...
Page 373: ...4 Click SNMP Settings 5 Click Edit 㻟㻣㻟㻌㻛㻌㻥㻢㻟 Downloaded from ManualsPrinter com Manuals ...
Page 386: ...4 Click IEEE802 1X Settings 5 Click Edit 㻟㻤㻢㻌㻛㻌㻥㻢㻟 Downloaded from ManualsPrinter com Manuals ...
Page 392: ...4 Click IEEE802 1X Settings 5 Click Edit 㻟㻥㻞㻌㻛㻌㻥㻢㻟 Downloaded from ManualsPrinter com Manuals ...
Page 505: ...㻡㻜㻡㻌㻛㻌㻥㻢㻟 Downloaded from ManualsPrinter com Manuals ...
Page 518: ...㻡㻝㻤㻌㻛㻌㻥㻢㻟 Downloaded from ManualsPrinter com Manuals ...
Page 599: ...on one side or both sides of the paper 㻡㻥㻥㻌㻛㻌㻥㻢㻟 Downloaded from ManualsPrinter com Manuals ...
Page 602: ...㻢㻜㻞㻌㻛㻌㻥㻢㻟 Downloaded from ManualsPrinter com Manuals ...
Page 606: ...See Canceling All the Jobs Hard Reset 㻢㻜㻢㻌㻛㻌㻥㻢㻟 Downloaded from ManualsPrinter com Manuals ...
Page 609: ...㻢㻜㻥㻌㻛㻌㻥㻢㻟 Downloaded from ManualsPrinter com Manuals ...
Page 611: ...㻢㻝㻝㻌㻛㻌㻥㻢㻟 Downloaded from ManualsPrinter com Manuals ...
Page 624: ...7 Click OK 㻢㻞㻠㻌㻛㻌㻥㻢㻟 Downloaded from ManualsPrinter com Manuals ...
Page 627: ...㻢㻞㻣㻌㻛㻌㻥㻢㻟 Downloaded from ManualsPrinter com Manuals ...
Page 649: ...4 Click Apply Firmware 5 㻢㻠㻥㻌㻛㻌㻥㻢㻟 Downloaded from ManualsPrinter com Manuals ...
Page 654: ...The scheduled delivery is deleted 㻢㻡㻠㻌㻛㻌㻥㻢㻟 Downloaded from ManualsPrinter com Manuals ...
Page 678: ...㻢㻣㻤㻌㻛㻌㻥㻢㻟 Downloaded from ManualsPrinter com Manuals ...
Page 680: ...4 Click Management Settings 5 Click Edit 㻢㻤㻜㻌㻛㻌㻥㻢㻟 Downloaded from ManualsPrinter com Manuals ...
Page 682: ...㻢㻤㻞㻌㻛㻌㻥㻢㻟 Downloaded from ManualsPrinter com Manuals ...
Page 684: ...4 Click Management Settings 5 Click Edit 㻢㻤㻠㻌㻛㻌㻥㻢㻟 Downloaded from ManualsPrinter com Manuals ...
Page 686: ...㻢㻤㻢㻌㻛㻌㻥㻢㻟 Downloaded from ManualsPrinter com Manuals ...
Page 688: ...4 Click Management Settings 5 Click Edit 㻢㻤㻤㻌㻛㻌㻥㻢㻟 Downloaded from ManualsPrinter com Manuals ...
Page 690: ...㻢㻥㻜㻌㻛㻌㻥㻢㻟 Downloaded from ManualsPrinter com Manuals ...
Page 693: ...4 Click Key and Certificate Settings 㻢㻥㻟㻌㻛㻌㻥㻢㻟 Downloaded from ManualsPrinter com Manuals ...
Page 699: ...㻢㻥㻥㻌㻛㻌㻥㻢㻟 Downloaded from ManualsPrinter com Manuals ...
Page 704: ...㻣㻜㻠㻌㻛㻌㻥㻢㻟 Downloaded from ManualsPrinter com Manuals ...
Page 709: ...4 Click CA Certificate Settings 㻣㻜㻥㻌㻛㻌㻥㻢㻟 Downloaded from ManualsPrinter com Manuals ...
Page 720: ...4 Click Remote UI Settings 5 Click Edit 㻣㻞㻜㻌㻛㻌㻥㻢㻟 Downloaded from ManualsPrinter com Manuals ...
Page 725: ...4 Click IPSec Settings 㻣㻞㻡㻌㻛㻌㻥㻢㻟 Downloaded from ManualsPrinter com Manuals ...
Page 739: ...4 Click Display Job History 5 Click Edit 㻣㻟㻥㻌㻛㻌㻥㻢㻟 Downloaded from ManualsPrinter com Manuals ...
Page 752: ...㻣㻡㻞㻌㻛㻌㻥㻢㻟 Downloaded from ManualsPrinter com Manuals ...
Page 790: ...㻣㻥㻜㻌㻛㻌㻥㻢㻟 Downloaded from ManualsPrinter com Manuals ...
Page 799: ...4 Click Yes ĺ The uninstall begins 㻣㻥㻥㻌㻛㻌㻥㻢㻟 Downloaded from ManualsPrinter com Manuals ...
Page 802: ...㻤㻜㻞㻌㻛㻌㻥㻢㻟 Downloaded from ManualsPrinter com Manuals ...
Page 813: ...4 Click Yes ĺ The log data is deleted 㻤㻝㻟㻌㻛㻌㻥㻢㻟 Downloaded from ManualsPrinter com Manuals ...
Page 870: ...㻤㻣㻜㻌㻛㻌㻥㻢㻟 Downloaded from ManualsPrinter com Manuals ...
Page 872: ...㻤㻣㻞㻌㻛㻌㻥㻢㻟 Downloaded from ManualsPrinter com Manuals ...
Page 951: ...㻥㻡㻝㻌㻛㻌㻥㻢㻟 Downloaded from ManualsPrinter com Manuals ...
Page 958: ...㻥㻡㻤㻌㻛㻌㻥㻢㻟 Downloaded from ManualsPrinter com Manuals ...
Page 959: ...㻥㻡㻥㻌㻛㻌㻥㻢㻟 Downloaded from ManualsPrinter com Manuals ...
Page 962: ...㻥㻢㻞㻌㻛㻌㻥㻢㻟 Downloaded from ManualsPrinter com Manuals ...


