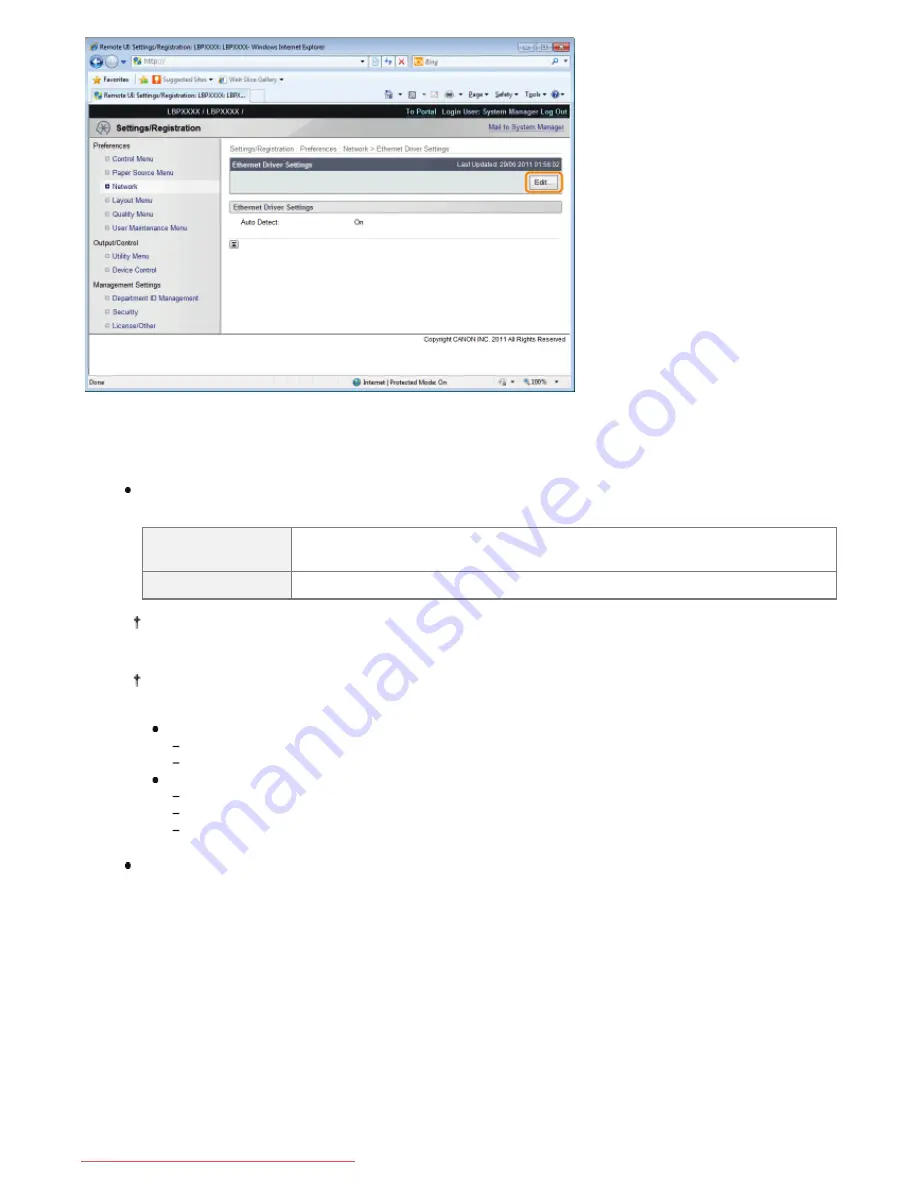
(1) Set the Ethernet driver.
If you want the communication method and Ethernet type to be set automatically, select the [Auto Detect] check box.
If you want to fix the settings for communication method and Ethernet type, clear the [Auto Detect] check box, and
set the following.
Using [Communication Mode], select the Ethernet communication method that matches the network
environment you are using.
[Half Duplex]
Sending and receiving are not performed simultaneously. They are performed
alternately.
[Full Duplex]
Sending and receiving are performed simultaneously.
If you select half duplex when fixing the Ethernet type, sending and receiving are not performed
simultaneously. They are performed alternately. If you select full duplex, sending and receiving are performed
simultaneously.
If you are using a hub, match the settings for the hub and the printer. For the settings of the hub you are
using, consult your network administrator.
(Example)
Hub settings
Communication mode: Full duplex
Ethernet type: 10 Base-T
Printer settings
[Auto Detect]: [Off]
[Communication Mode]: [Full Duplex]
[Ethernet Type]: [10 Base-T]
Using [Ethernet Type], Select the Ethernet type that matches the network environment you are using.
(2) Click [OK].
㻟㻡㻢㻌㻛㻌㻥㻢㻟
Downloaded from ManualsPrinter.com Manuals
Summary of Contents for i-SENSYS LBP6670dn
Page 1: ...㻝㻌㻛㻌㻥㻢㻟 Downloaded from ManualsPrinter com Manuals ...
Page 53: ...㻡㻟㻌㻛㻌㻥㻢㻟 Downloaded from ManualsPrinter com Manuals ...
Page 94: ...㻥㻠㻌㻛㻌㻥㻢㻟 Downloaded from ManualsPrinter com Manuals ...
Page 151: ...㻝㻡㻝㻌㻛㻌㻥㻢㻟 Downloaded from ManualsPrinter com Manuals ...
Page 166: ...㻝㻢㻢㻌㻛㻌㻥㻢㻟 Downloaded from ManualsPrinter com Manuals ...
Page 275: ...㻞㻣㻡㻌㻛㻌㻥㻢㻟 Downloaded from ManualsPrinter com Manuals ...
Page 285: ...㻞㻤㻡㻌㻛㻌㻥㻢㻟 Downloaded from ManualsPrinter com Manuals ...
Page 291: ...㻞㻥㻝㻌㻛㻌㻥㻢㻟 Downloaded from ManualsPrinter com Manuals ...
Page 305: ...iso 8859 1 iso 8859 15 㻟㻜㻡㻌㻛㻌㻥㻢㻟 Downloaded from ManualsPrinter com Manuals ...
Page 310: ...Click OK 㻟㻝㻜㻌㻛㻌㻥㻢㻟 Downloaded from ManualsPrinter com Manuals ...
Page 312: ...Limit E Mail Print mail text 㻟㻝㻞㻌㻛㻌㻥㻢㻟 Downloaded from ManualsPrinter com Manuals ...
Page 315: ...㻟㻝㻡㻌㻛㻌㻥㻢㻟 Downloaded from ManualsPrinter com Manuals ...
Page 362: ...4 Click Spooler 5 Click Edit 㻟㻢㻞㻌㻛㻌㻥㻢㻟 Downloaded from ManualsPrinter com Manuals ...
Page 373: ...4 Click SNMP Settings 5 Click Edit 㻟㻣㻟㻌㻛㻌㻥㻢㻟 Downloaded from ManualsPrinter com Manuals ...
Page 386: ...4 Click IEEE802 1X Settings 5 Click Edit 㻟㻤㻢㻌㻛㻌㻥㻢㻟 Downloaded from ManualsPrinter com Manuals ...
Page 392: ...4 Click IEEE802 1X Settings 5 Click Edit 㻟㻥㻞㻌㻛㻌㻥㻢㻟 Downloaded from ManualsPrinter com Manuals ...
Page 505: ...㻡㻜㻡㻌㻛㻌㻥㻢㻟 Downloaded from ManualsPrinter com Manuals ...
Page 518: ...㻡㻝㻤㻌㻛㻌㻥㻢㻟 Downloaded from ManualsPrinter com Manuals ...
Page 599: ...on one side or both sides of the paper 㻡㻥㻥㻌㻛㻌㻥㻢㻟 Downloaded from ManualsPrinter com Manuals ...
Page 602: ...㻢㻜㻞㻌㻛㻌㻥㻢㻟 Downloaded from ManualsPrinter com Manuals ...
Page 606: ...See Canceling All the Jobs Hard Reset 㻢㻜㻢㻌㻛㻌㻥㻢㻟 Downloaded from ManualsPrinter com Manuals ...
Page 609: ...㻢㻜㻥㻌㻛㻌㻥㻢㻟 Downloaded from ManualsPrinter com Manuals ...
Page 611: ...㻢㻝㻝㻌㻛㻌㻥㻢㻟 Downloaded from ManualsPrinter com Manuals ...
Page 624: ...7 Click OK 㻢㻞㻠㻌㻛㻌㻥㻢㻟 Downloaded from ManualsPrinter com Manuals ...
Page 627: ...㻢㻞㻣㻌㻛㻌㻥㻢㻟 Downloaded from ManualsPrinter com Manuals ...
Page 649: ...4 Click Apply Firmware 5 㻢㻠㻥㻌㻛㻌㻥㻢㻟 Downloaded from ManualsPrinter com Manuals ...
Page 654: ...The scheduled delivery is deleted 㻢㻡㻠㻌㻛㻌㻥㻢㻟 Downloaded from ManualsPrinter com Manuals ...
Page 678: ...㻢㻣㻤㻌㻛㻌㻥㻢㻟 Downloaded from ManualsPrinter com Manuals ...
Page 680: ...4 Click Management Settings 5 Click Edit 㻢㻤㻜㻌㻛㻌㻥㻢㻟 Downloaded from ManualsPrinter com Manuals ...
Page 682: ...㻢㻤㻞㻌㻛㻌㻥㻢㻟 Downloaded from ManualsPrinter com Manuals ...
Page 684: ...4 Click Management Settings 5 Click Edit 㻢㻤㻠㻌㻛㻌㻥㻢㻟 Downloaded from ManualsPrinter com Manuals ...
Page 686: ...㻢㻤㻢㻌㻛㻌㻥㻢㻟 Downloaded from ManualsPrinter com Manuals ...
Page 688: ...4 Click Management Settings 5 Click Edit 㻢㻤㻤㻌㻛㻌㻥㻢㻟 Downloaded from ManualsPrinter com Manuals ...
Page 690: ...㻢㻥㻜㻌㻛㻌㻥㻢㻟 Downloaded from ManualsPrinter com Manuals ...
Page 693: ...4 Click Key and Certificate Settings 㻢㻥㻟㻌㻛㻌㻥㻢㻟 Downloaded from ManualsPrinter com Manuals ...
Page 699: ...㻢㻥㻥㻌㻛㻌㻥㻢㻟 Downloaded from ManualsPrinter com Manuals ...
Page 704: ...㻣㻜㻠㻌㻛㻌㻥㻢㻟 Downloaded from ManualsPrinter com Manuals ...
Page 709: ...4 Click CA Certificate Settings 㻣㻜㻥㻌㻛㻌㻥㻢㻟 Downloaded from ManualsPrinter com Manuals ...
Page 720: ...4 Click Remote UI Settings 5 Click Edit 㻣㻞㻜㻌㻛㻌㻥㻢㻟 Downloaded from ManualsPrinter com Manuals ...
Page 725: ...4 Click IPSec Settings 㻣㻞㻡㻌㻛㻌㻥㻢㻟 Downloaded from ManualsPrinter com Manuals ...
Page 739: ...4 Click Display Job History 5 Click Edit 㻣㻟㻥㻌㻛㻌㻥㻢㻟 Downloaded from ManualsPrinter com Manuals ...
Page 752: ...㻣㻡㻞㻌㻛㻌㻥㻢㻟 Downloaded from ManualsPrinter com Manuals ...
Page 790: ...㻣㻥㻜㻌㻛㻌㻥㻢㻟 Downloaded from ManualsPrinter com Manuals ...
Page 799: ...4 Click Yes ĺ The uninstall begins 㻣㻥㻥㻌㻛㻌㻥㻢㻟 Downloaded from ManualsPrinter com Manuals ...
Page 802: ...㻤㻜㻞㻌㻛㻌㻥㻢㻟 Downloaded from ManualsPrinter com Manuals ...
Page 813: ...4 Click Yes ĺ The log data is deleted 㻤㻝㻟㻌㻛㻌㻥㻢㻟 Downloaded from ManualsPrinter com Manuals ...
Page 870: ...㻤㻣㻜㻌㻛㻌㻥㻢㻟 Downloaded from ManualsPrinter com Manuals ...
Page 872: ...㻤㻣㻞㻌㻛㻌㻥㻢㻟 Downloaded from ManualsPrinter com Manuals ...
Page 951: ...㻥㻡㻝㻌㻛㻌㻥㻢㻟 Downloaded from ManualsPrinter com Manuals ...
Page 958: ...㻥㻡㻤㻌㻛㻌㻥㻢㻟 Downloaded from ManualsPrinter com Manuals ...
Page 959: ...㻥㻡㻥㻌㻛㻌㻥㻢㻟 Downloaded from ManualsPrinter com Manuals ...
Page 962: ...㻥㻢㻞㻌㻛㻌㻥㻢㻟 Downloaded from ManualsPrinter com Manuals ...


