background image

74

Returning to a Pre-marked Position

If you wish to return to a particular scene

later, mark the point with the zero set

memory and the tape will stop at that point

when you rewind/fast forward the tape. 

This function is operated with the wireless

controller.

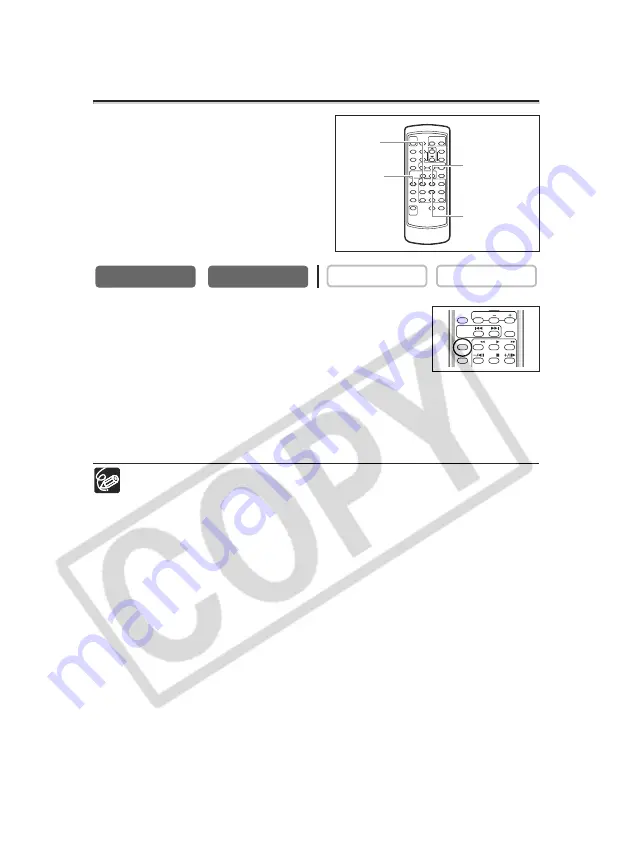
1. Press the ZERO SET MEMORY button at the point

you wish to return to later.

• “0:00:00

Â

” appears.

• To cancel, press the ZERO SET MEMORY button again.

2. When you have finished playback, rewind the tape.

• “

`

RTN” appears.

• The tape stops automatically at “0:00:00”.

• The tape counter changes to time code.

The zero set memory may not function correctly when the time code has not
been recorded consecutively.

CARD PLAY

CARD CAMERA

PLAY (VCR)

CAMERA

REW

PLAY

STOP

FF

ZERO SET

MEMORY

12bit

AUDIO OUT

DATE SEARCH

DATA CODE SLIDE SHOW

CARD

CARD

STILL/MOVIE

ZERO SET
MEMORY
button

REW

`

button

PLAY 

e

button

STOP

3

button

Summary of Contents for 9540A003 - Optura 400 Camcorder

Page 1: ...LUTION DISK For Macintosh Ce manuel d instruction explique comment installer le logiciel connecter le camescope a l ordinateur et telecharger des images a partir d une carte memoire sur un ordinateur Pour des instructions de fonctionnement plus detaillees reportez vous au manuel au format PDF fournie sur le disque DIGITAL VIDEO SOLUTION DISK For Windows ou DIGITAL VIDEO SOLUTION DISK For Macintosh...

Page 2: ...utlet on a circuit different from that to which the receiver is connected Consult the dealer or an experienced radio TV technician for help Use of shielded cable is required to comply with class B limits in Subpart B of Part 15 of FCC Rules Do not make any changes or modifications to the equipment unless otherwise specified in the manual If such changes or modifications should be made you could be...

Page 3: ...en surfaces may cause the product and cart combination to overturn 10 Power Sources The CA 570 Compact Power Adapter should be operated only from the type of power source indicated on the marking label If you are not sure of the type of power supply to your home consult your product dealer or local power company Regarding other power sources such as battery power refer to instructions in this manu...

Page 4: ...ols may result in damage and will often require extensive work by a qualified technician to restore the product to its normal operation e If the product has been dropped or the cabinet has been damaged f When the product exhibits a distinct change in performance This indicates a need for service 19 Replacement Parts When replacement parts are required be sure the service technician has used replac...

Page 5: ...a trademark is a trademark Windows is either a registered trademark or trademark of Microsoft Corporation in the United States and or other countries Macintosh and Mac OS are trademarks of Apple Computer Inc registered in the United States and other countries Other names and products not mentioned above may be registered trademarks or trademarks of their respective companies CAMERA CAMERA Operatin...

Page 6: ...ter Videos 29 Playback Playing Back a Tape 30 Adjusting the Volume 32 Playing Back on a TV Screen 33 Advanced Functions Menus and Settings 36 Recording Using the Recording Programs 44 Using the Night Modes 47 Using the Mini Video Light 48 Skin Detail Function 50 Adjusting Exposure Manually 51 Adjusting the Focus Manually 52 Setting the White Balance 54 Setting the Shutter Speed 56 Using the Self T...

Page 7: ...ing 103 Recording Movies on a Memory Card 104 Selecting the Focusing Point 106 Selecting the Drive Mode 107 Recording Panoramic Images Stitch Assist Mode 109 Playing Back a Memory Card 111 Protecting Images 114 Erasing Images 115 Combining Images Card Mix 116 Formatting a Memory Card 120 Creating a Start up Image 121 Direct Printing Printing Still Images 122 Selecting the Print Settings 125 Trimmi...

Page 8: ...d From Serial No Dealer Address Dealer Phone No WL D84 Wireless Controller Two AA R6 Batteries Lithium Button Battery CR2025 Ring Light Adapter CA 570 Compact Power Adapter incl power cord STV 250N Stereo Video Cable IFC 300PCU USB Cable SDC 8M SD Memory Card containing sample images DIGITAL VIDEO SOLUTION DISK For Windows For Macintosh Lens Cap and Lens Cap Cord NB 2LH Battery Pack WL D83 Wireles...

Page 9: ...35 NIGHT MODE button 47 OPEN button 23 Battery attachment unit 13 Serial number REC SEARCH button 26 record review button 26 rewind button 30 CARD button 111 DIGITAL EFFECTS button 63 DRIVE MODE button 107 stop button 30 Card access indicator 97 REC SEARCH button 26 fast forward button 30 CARD button 111 DIGITAL EFFECTS ON OFF button 63 BATT RELEASE button 13 Memory card slot 93 flash button 101 C...

Page 10: ... Program AE Easy recording Program selector 45 CAMERA OFF PLAY VCR NETWORK SET dial 36 b Using a memory card Using a tape TAPE CARD switch 5 MENU button 36 FOCUS button 52 DATA CODE button 71 EXP button 51 Cassette compartment 16 Cassette compartment cover 16 OPEN EJECT switch 16 POWER indicator AUDIO LEVEL button 60 LIGHT button 48 OPTURA500 only ...

Page 11: ...o terminal 34 AV terminal 33 phones terminal 32 61 USB terminal 122 133 Terminal cover MIC terminal 62 DC IN terminal 13 CHARGE indicator 13 Tripod socket 29 Backup battery compartment 17 Tally lamp 79 Flash 101 Mini video light assist lamp 47 48 Assist lamp 47 ...

Page 12: ...140 DATA CODE button 71 DATE SEARCH buttons 75 ZERO SET MEMORY button 74 12bit AUDIO OUT button 90 AUDIO DUB button 88 REC PAUSE button 84 AV DV button 87 REMOTE SET button 78 Transmitter MENU button 36 SET button 36 CARD buttons 111 SLIDE SHOW button 112 CARD STILL MOVIE button 111 REW button 30 PLAY button 30 FF button 30 button 31 STOP button 30 button 31 PAUSE button 31 SLOW button 31 2 button...

Page 13: ...1 Connect the power cord to the adapter 2 Plug the power cord into a power outlet 3 Connect the power adapter to the camcorder s DC IN terminal The CHARGE indicator starts flashing It glows steadily when charging is complete 4 When charging is complete disconnect the power adapter from the camcorder Unplug the power cord from the power outlet and disconnect it from the adapter 5 Remove the battery...

Page 14: ... power adapter You may hear some noise from the power adapter during use This is not a malfunction Do not disconnect and reconnect the power cord while charging a battery pack Charging may stop The battery pack may not be charged correctly even if the CHARGE indicator glows steady The battery pack may also not be charged correctly when a power outage occurs during charging Remove the battery pack ...

Page 15: ...n battery pack can be charged at any charge state Unlike conventional battery packs you do not need to completely use or discharge it before charging We recommend that you prepare battery packs 2 to 3 times longer than you think you might need To conserve battery charge turn off the camcorder instead of leaving it in record pause mode 15 Basic Functions Preparations E NB 2LH NB 2L BP 2L12 BP 2L14 ...

Page 16: ...on the cassette compartment until it clicks 4 Wait for the cassette compartment to retract automatically and close the cassette compartment cover Do not interfere with the cassette compartment while it is opening or closing automatically or attempt to close the cover before the cassette compartment has fully retracted Be careful not to get your fingers caught in the cassette compartment cover If t...

Page 17: ...present a fire or chemical burn hazard if mistreated Do not recharge disassemble heat above 212 F 100 C or incinerate the battery Replace the battery with a CR2025 made by Panasonic Hitachi Maxell Sony Sanyo or with Duracell2025 Use of other batteries may present a risk of fire or explosion Do not pick up the battery using tweezers or other metal tools as this will cause a short circuit Wipe the b...

Page 18: ...op on the cord Press the buttons on the lens cap when attaching removing it Hook the lens cap on the grip belt while you are recording and place it over the lens when you have finished Fastening the Grip Belt Hold the camcorder with your right hand and adjust the belt with your left You can rotate the grip belt for comfortable holding Adjust the grip belt so that you can reach the zoom lever with ...

Page 19: ...over Camcorder and wireless controller are equipped with 2 remote sensor modes 78 If the wireless controller does not work check if camcorder and wireless controller are set to the same mode When the camcorder cannot be operated with the wireless controller or when it can only be operated in very close range replace the batteries Make sure to replace both batteries at the same time The wireless co...

Page 20: ...fault setting is New York 4 Turn the SET dial to select the setting option that represents your time zone and press the SET dial To adjust for daylight saving time select the time zone with the U next to the area Setting the Date and Time 5 Turn the SET dial to select D TIME SET and press the SET dial The year display starts to flash 6 Turn the SET dial to select the year and press the SET dial Th...

Page 21: ...tination and the camcorder automatically adjusts the clock 1 24 1 2 3 4 5 6 7 8 9 10 11 12 13 14 15 16 17 18 19 20 21 22 23 2 3 5 6 7 9 8 10 4 12 11 13 24 19 20 18 17 21 23 22 15 14 16 Time zone LONDON PARIS CAIRO MOSCOW DUBAI KARACHI DACCA BANGKOK H KONG Hong Kong TOKYO SYDNEY SOLOMON WELLGTN Wellington SAMOA HONOLU Honolulu ANCHOR Anchorage L A Los Angeles DENVER CHICAGO N Y New York CARACAS RIO...

Page 22: ... 1 Press the MENU button to open the menu 2 Turn the SET dial to select DISPLAY SETUP and press the SET dial 3 Turn the SET dial to select D T DISPLAY and press the SET dial 4 Turn the SET dial to select ON 5 Press the MENU button to close the menu CARD PLAY CARD CAMERA PLAY VCR CAMERA D T DISPLAY OFF DISPLAY SETUP 36 ...

Page 23: ...he lens cap 2 Set the camcorder to CAMERA mode Set the POWER switch to CAMERA and the TAPE CARD switch to b 3 Push the OPEN button at the LCD panel and open the LCD panel 4 Press the start stop button to begin recording Press the start stop button again to pause recording When You Have Finished Recording 1 Turn the POWER switch to OFF 2 Close the LCD panel 3 Replace the lens cap 4 Unload the casse...

Page 24: ...d video heads AUTO POWER OFF appears 20 seconds before shutoff To continue recording turn the POWER switch to OFF and then back to CAMERA About the LCD and viewfinder screen The screens are produced with extremely high precision manufacturing techniques with more than 99 99 of the pixels operating to specification Less than 0 01 of the pixels may occasionally misfire or appear as black or green do...

Page 25: ...void scenes that are too short Indicates the recording time in hours minutes and seconds Indicates the remaining time of the tape in minutes b moves during recording b END flashes when the tape reaches the end When the time left is less than 15 seconds the remaining tape time may not appear Depending on the type of the tape the indication may not be displayed correctly j flashes in red when the li...

Page 26: ...onds and returns to record pause mode Record Search In record pause mode this function allows you to play back the tape forward or reverse to locate the point where you wish to begin recording Press and hold the REC SEARCH button forward or button reverse Release the button at the point you wish to begin recording The camcorder returns to record pause mode CARD PLAY CARD CAMERA PLAY VCR CAMERA CAR...

Page 27: ...ital zoom 10 Optical Zoom Move the zoom lever toward W to zoom out wide angle Move it toward T to zoom in telephoto Press the zoom lever slightly for a slow zoom Press harder for a faster zoom You can also use the T and W buttons on the wireless controller However you cannot control the zoom speed CARD PLAY CARD CAMERA PLAY VCR CAMERA T W Zoom in Zoom out Zoom lever ...

Page 28: ...close the menu Digital zoom cannot be used in the night modes Digital zoom cannot be used in Stitch Assist mode or when the multi image screen is selected A zoom indicator appears for 4 seconds It extends in light blue when the digital zoom is set to 40 and extends further in dark blue when set to 200 Keep at least 3 3 ft 1 m to the subject At wide angle you can focus on a subject as close as 0 39...

Page 29: ...gers do not touch the microphone or lens For More Stability Lighting When recording outdoors we recommend recording with the sun at your back When using a tripod do not leave the viewfinder exposed to direct sunlight as it may melt due to concentration of the light by the lens Do not use tripods with fastening screws longer than 0 2 inch 5 5 mm as it may damage the camcorder Lean against a wall Pu...

Page 30: ...D panel You can also close the LCD panel with the screen facing outward 3 Press the button to rewind the tape 4 Press the e a button to begin playback 5 Press the 3 button to stop playback To use the viewfinder close the LCD panel About the screen display During playback the time code gives the hours minutes seconds and frames The remaining tape time may not appear when the time left is less than ...

Page 31: ...y during playback pause Press and hold it to play back continuous frame advance frame reverse SLOW M Slow Forward Slow Reverse Plays back at about 1 3 normal speed Press the button on the wireless controller during normal or reverse playback Press the e play button to return to normal playback 2 Forward 2 Playback Reverse 2 Playback Plays back at 2 times normal speed Press the button on the wirele...

Page 32: ... Open the menu and select VCR SETUP Select AV PHONES H set it to PHONES H and close the menu The speaker does not sound when H is displayed Do not connect headphones unless H is displayed as it produces noise Adjusting the Volume Turn the SET dial up to increase the volume and down to lower the volume A volume bar appears for 2 seconds You can turn off the volume completely by turning the SET dial...

Page 33: ... off all devices before starting the connections 2 Connect the STV 250N Stereo Video Cable to the camcorder s AV terminal and the audio video terminals on the TV VCR Connect the white plug to the white audio terminal L left the red plug to the red audio terminal R right and the yellow plug to the yellow video terminal VIDEO 3 If connecting to a TV set the input selector to VIDEO If connecting to a...

Page 34: ...e red AUDIO terminal R right Do not connect the yellow plug 4 If connecting to a TV set the input selector to VIDEO If connecting to a VCR set the input selector to LINE We recommend powering the camcorder from a household power source The picture quality is higher when connecting to a TV with an S S1 terminal Optional S 150 S Video Cable required TVs with S1 terminal or Video ID 1 system Recordin...

Page 35: ...DIO SETUP and press the SET dial 3 Turn the SET dial to select OUTPUT CH and press the SET dial 4 Turn the SET dial to select a setting option L R Stereo L R channels Bilingual Main Sub L L Stereo L channel Bilingual Main R R Stereo R channel Bilingual Sub 5 Press the MENU button to close the menu The setting resets to the L R setting when you turn the camcorder off CARD PLAY CARD CAMERA PLAY VCR ...

Page 36: ...ing option 5 Press the MENU button to close the menu When setting the white balance shutter speed or language press the SET dial first before pressing the MENU button Pressing the MENU button at any time closes the menu Items that are not available appear in purple You may find it more convenient to use the wireless controller to operate the menu Press the MENU button on the wireless controller to...

Page 37: ... NIGHT MODE NIGHT NIGHT S NIGHT 47 SKIN DETAIL SOFT NORMAL 50 STILL I REC OFF FINE NORMAL 98 VCR SETUP REC MODE SP LP 59 AV PHONES H AV PHONES H 61 AUDIO SETUP WIND SCREEN AUTO OFF 62 MIC ATT ON OFF 61 MIC LEVEL AUTO MANUAL 60 AUDIO MODE 16bit 12bit 60 H VOLUME 61 DISPLAY SETUP BRIGHTNESS 79 BACKLIGHT NORMAL BRIGHT 80 LCD MIRROR ON OFF 24 TV SCREEN ON OFF 140 D T DISPLAY ON OFF 22 LANGUAGE DEUTSCH...

Page 38: ...tem Setting Options SYSTEM WL REMOTE A1 A2 OFF B 78 TALLY LAMP ON OFF 79 BEEP ON OFF 79 T ZONE DST See list of time zones 20 D TIME SET 20 MY CAMERA S UP SOUND OFF DEFAULT MY SOUND 76 SHTR SOUND OPER SOUND SELF T SOUND ...

Page 39: ...IX VARI 90 MIX BALANCE 90 AUDIO MODE 16bit 12bit 60 CARD SETUP IMG QUALITY SUPER FINE FINE NORMAL 94 MOVIE SIZE OPTURA500 OPTURA400 95 352 288 176 144 320 240 160 120 FILE NOS RESET CONTINUOUS 96 DISPLAY SETUP BRIGHTNESS 79 BACKLIGHT NORMAL BRIGHT 80 TV SCREEN ON OFF 140 DISPLAYS ON OFF PLAYBK 140 6SEC DATE ON OFF 72 DATA CODE DATE TIME CAMERA DATA CAM D T 71 D TIME SEL DATE TIME DATE TIME 71 LANG...

Page 40: ...40 Submenu Menu Item Setting Options MY CAMERA S UP SOUND OFF DEFAULT MY SOUND 76 SHTR SOUND OPER SOUND SELF T SOUND ...

Page 41: ...D SETUP IMG QUALITY SUPER FINE FINE NORMAL 94 IMAGE SIZE 1632 1224 1280 960 640 480 94 MOVIE SIZE OPTURA500 OPTURA400 95 352 288 176 144 320 240 160 120 FILE NOS RESET CONTINUOUS 96 VCR SETUP AV PHONES H AV PHONES H 61 AUDIO SETUP WIND SCREEN AUTO OFF 62 MIC ATT ON OFF 61 H VOLUME 61 DISPLAY SETUP BRIGHTNESS 79 BACKLIGHT NORMAL BRIGHT 80 LCD MIRROR ON OFF 24 TV SCREEN ON OFF 140 D T DISPLAY ON OFF...

Page 42: ...42 Submenu Menu Item Setting Options MY CAMERA S UP SOUND OFF DEFAULT MY SOUND 76 SHTR SOUND OPER SOUND SELF T SOUND ...

Page 43: ...HONES H 33 DISPLAY SETUP BRIGHTNESS 79 BACKLIGHT NORMAL BRIGHT 80 TV SCREEN ON OFF 140 DISPLAYS ON OFF PLAYBK 140 D TIME SEL DATE TIME DATE TIME 71 LANGUAGE DEUTSCH ENGLISH ESPAÑOL FRANÇAIS 77 ITALIANO DATE FORMAT 77 SYSTEM WL REMOTE A1 A2 OFF A 78 BEEP ON OFF 79 CONNECT STANDARD STORAGE 134 T ZONE DST See list of time zones 20 D TIME SET 20 MY CAMERA CREATE START UP IMAGE 121 SEL S UP IMG NO IMAG...

Page 44: ...anually Sports Use this mode to record sports scenes such as tennis or golf or moving objects such as roller coasters Portrait Use this mode to give accent to your subject by blurring the background or foreground The blur effect increases the more you zoom to telephoto Spotlight Use this mode to record spotlit scenes or fireworks Sand Snow Use this mode in bright places such as a sunny beach or sk...

Page 45: ... in CAMERA mode Selecting the Easy Recording Program Set the program selector to appears CARD PLAY CARD CAMERA PLAY VCR CAMERA Recording Program Image Stabilizer ON Focus A White Balance A Wind screen A Shutter Speed A Exposure Lock Digital Effects 16 9 Card Mix Microphone attenuator Microphone level A h A h h h h h h h h h h Program selector ...

Page 46: ...Do not change the mode during recording as the brightness of the image may change abruptly Sports Portrait mode The picture may not appear smooth when played back Sand Snow mode The subject may become overexposed in dark surroundings Check the image on the screen The picture may not appear smooth when played back Low Light mode Moving subjects may leave a trailing afterimage Picture quality may no...

Page 47: ...r modes In such case adjust the focus manually Digital zoom and multi image screen cannot be used while a night mode is activated The program AE mode cannot be changed while a night mode is activated CARD PLAY CARD CAMERA PLAY VCR CAMERA NIGHT Allows you to record in dark places where lights cannot be used without sacrificing color NIGHT The assist lamp lights up and stays on allowing you to recor...

Page 48: ...the mini video light for a long time Do not use the mini video light close to people s eyes In the Night mode you cannot turn off the assist lamp by pressing the LIGHT button Once the assist lamp lights up automatically in the Super Night mode you cannot turn it off by pressing the LIGHT button Using the Ring Light Adapter You can record close ups with almost no shadows by attaching the Ring Light...

Page 49: ... lever toward W 2 Press the LIGHT button to turn on the Mini Video Light For optimum results keep the distance to the subject between 1 2 to 11 8 in 3 to 30 cm When recording still images set the flash mode to flash off Optional filters cannot be used with the ring light adapter Removing the Ring Light Adapter 1 Move the LOCK lever in the opposite direction of the arrow 2 Remove the Ring Light Ada...

Page 50: ...ance Open the menu and select CAMERA SETUP Select SKIN DETAIL set it to SOFT and close the menu Skin detail function cannot be used when the program selector is set to To obtain the best effect use this function when recording a person in close up Note that areas similar to the skin color may lack in detail CARD PLAY CARD CAMERA PLAY VCR CAMERA SKIN DETAIL NORMAL CAMERA SETUP 36 ...

Page 51: ...he zoom during exposure lock the brightness of the image may change Exposure Adjustment When the exposure is locked you can adjust it manually to handle difficult lighting conditions The camcorder s iris can be set to any position from fully closed to fully open Turn the SET dial to adjust the brightness of the image The adjustment range depends on the brightness at the time you locked the exposur...

Page 52: ...djust the zoom before the focus 3 Press the FOCUS button MF appears 4 Turn the SET dial to adjust the focus Turn the SET dial up or down until the image appears focused Press the FOCUS button to return to autofocus CARD PLAY CARD CAMERA PLAY VCR CAMERA FOCUS DATACODE Through dirty or wet windows Subjects with low contrast or without vertical lines Night Scenes Reflective surfaces Fast Moving Subje...

Page 53: ...have turned off the camcorder Infinity Focus Use this function when you wish to focus on faraway subjects such as mountains or fireworks Press the FOCUS button more than 2 seconds after step 2 in Adjusting the Focus Manually MF appears When you operate the zoom or turn the SET dial disappears and the camcorder changes to manual focus ...

Page 54: ...ted 3 Open the menu and select CAMERA SETUP Select WHITE BAL select a setting option and close the menu When you have selected SET W W flashes and stops flashing when settings is complete CARD PLAY CARD CAMERA PLAY VCR CAMERA Zoom lever White sheet or paper Program selector SET dial MENU button WHITE BAL AUTO CAMERA SETUP 36 AUTO Auto white balance SET W Custom white balance setting INDOOR T Use t...

Page 55: ...tion of the TAPE CARD switch When you have set the custom white balance Depending on the light source W may keep flashing The result will still be better than with the auto setting Reset the white balance when the lighting condition changes Turn off the digital zoom Custom white balance may provide better results in the following cases Changing lighting conditions Close ups Subjects in a single co...

Page 56: ...gh shutter speeds Recording under fluorescent lights CAMERA mode In Easy Recording Auto mode or the night modes the camcorder automatically detects the flicker of fluorescent lighting and adjusts the shutter speed accordingly However if the screen starts to flicker select AUTO mode and set the shutter speed to 1 100 The setting resets to the auto setting when you switch the program selector to or ...

Page 57: ... Open the menu and select CAMERA SETUP Select A SL SHUTTER set it to OFF and close the menu In CARD CAMERA mode set the flash mode to flash off When set to ON moving subjects may leave a trailing afterimage The camcorder retains the setting separately in CAMERA and CARD CAMERA mode The setting cannot be changed when exposure is locked If camcorder shake warning appears in CARD CAMERA mode stabiliz...

Page 58: ...t down appears on the screen The tally lamp starts flashing To record a still image press the PHOTO button 97 To cancel the self timer press the self timer button Once the countdown has begun you can also press the start stop button when recording movies or the PHOTO button when recording still image to cancel the self timer The self timer will be canceled when you turn off the camcorder CARD PLAY...

Page 59: ...epending on the nature and usage condition of the tape picture and sound recorded in LP mode may be distorted We recommend using the SP mode for important recordings If you record in both SP and LP modes on the same tape the playback picture may become distorted and the time code may not be written correctly If you play back a tape that has been recorded in LP mode with another digital device on t...

Page 60: ... select AUDIO SETUP Select MIC LEVEL set it to MANUAL and close the menu The audio level indicator appears If a green bar showing the adjustment level is not displayed press the AUDIO LEVEL button 3 Adjust the level with the SET dial The maximum level should only slightly exceed 12 dB Sound may be distorted if the indicator for 0 dB lights up in red 4 Press the AUDIO LEVEL button The green bar dis...

Page 61: ...e menu Using Headphones during Recording The headphones terminal also serves as AV terminal Headphones can only be used when H is displayed on the screen If not change the setting following the procedure below Open the menu and select VCR SETUP Select AV PHONES H set it to PHONES H and close the menu Adjusting the Headphone Volume Open the menu and select AUDIO SETUP Select H VOLUME adjust the vol...

Page 62: ...instruction manual of the microphone 1 Attach the microphone to the adapter bracket 2 Attach the adapter bracket to the camcorder 3 Connect the microphone to the camcorder When recording in silent places the built in microphone may pick up the motor noise of the camcorder In such case we recommend using an external microphone When using a commercially available microphone Use a microphone with bui...

Page 63: ...l it fills the whole screen The image is wiped off from the sides of the screen Wipe WIPE The image appears from the corners until it fills the whole screen The image is wiped off from the corners Corner Wipe CORNER A small image appears from the left jumps into the center and enlarges until it fills the whole screen The image shrinks jumps from the center to the left and disappears Jump JUMP The ...

Page 64: ...ecomes thinner and the image appears A yellow beam appears in the center of the screen and expands until it covers the whole image Beam BEAM The image appears from both sides like tides The image disappears from both sides like tides Tide TIDE The image appears in 16 pieces The pieces move around until the puzzle is solved The image is divided into 16 pieces The pieces move around and disappear Pu...

Page 65: ...White BLK WHT The image becomes black and white Sepia SEPIA The image becomes monochrome with a brownish tint Mosaic MOSAIC The image is blurred through enlarging the size of some pixels Ball BALL The image becomes like a ball Cube CUBE The image becomes a cube and rotates Wave WAVE Both ends of the image sway in waves Color Masking COLOR M The image becomes a rhombus surrounded by a masking frame...

Page 66: ... pause recording by pressing the start stop button The fader can be activated deactivated by pressing the ON OFF button PLAY VCR mode 5 Fade in In playback pause mode press the ON OFF button and begin playback by pressing the e a button Fade out During playback press the ON OFF button and pause playback by pressing the e a button The fader can be activated deactivated by pressing the ON OFF button...

Page 67: ...n Effect In CAMERA mode set the program selector to Q 1 Press the DIGITAL EFFECTS button D EFFECT FADER EFFECT and MULTI S appear 2 Select EFFECT 3 Select the effect A preview of the selected effect is shown as an animation 4 Press the DIGITAL EFFECTS button The name of the selected effect flashes 5 Press the ON OFF button The name of the selected effect stops flashing The effect can be activated ...

Page 68: ...ry 8 frames slow every 12 frames 5 Select MULTI S again S SPEED and S SPLIT appears 6 Select S SPLIT 4 9 16 settings appear 7 Select the number of sequences 8 Press the DIGITAL EFFECTS button MULTI S flashes 9 Press the ON OFF button MANUAL Images will be captured each time you press the ON OFF button The blue frame indicating the next sequence disappears after the last image To cancel the last ca...

Page 69: ...y be slightly lower with digital effects Digital effects cannot be used in the following cases When the program selector is set to During DV dubbing Faders cannot be used when Card Mix is activated About the multi image screen The multi image screen cannot be used in the following cases In the night modes When the 16 9 format is selected When Card Mix is activated In PLAY VCR mode Pressing any tap...

Page 70: ...ard T To shrink the image below 2 times magnification move the zoom lever toward W 2 Select the magnified area with the SET dial Turn the SET dial to move the image to the right and left or up and down Pressing the SET dial switches between the directions To cancel the magnification move the zoom lever toward W until the frame disappears Movies played back from a memory card cannot be magnified CA...

Page 71: ... to display Selecting the Date Time Display Combination Open the menu and select DISPLAY SETUP Select D TIME SEL set it to DATE or TIME and close the menu Selecting the Data Code Display Combination Open the menu and select DISPLAY SETUP Select DATA CODE set it to CAMERA DATA or CAM D T and close the menu CARD PLAY CARD CAMERA PLAY VCR CAMERA CARD PLAY CARD CAMERA PLAY VCR CAMERA DATA CODE button ...

Page 72: ...ppear in CARD PLAY mode Six Second Auto Date Date and time appear for 6 seconds when you begin playback or to indicate that date or time zone has changed Open the menu and select DISPLAY SETUP Select 6SEC DATE set it to ON and close the menu CARD PLAY CARD CAMERA PLAY VCR CAMERA CARD PLAY CARD CAMERA PLAY VCR CAMERA 6SEC DATE OFF DISPLAY SETUP 36 ...

Page 73: ... The camcorder rewinds fast forwards the tape plays back the last few seconds of the recording and stops the tape Pressing the button again cancels the search End search cannot be used once you unload the cassette End search may not work properly if a blank section exists on the tape You cannot use end search to locate the editing end of audio dubbing CARD PLAY CARD CAMERA PLAY VCR CAMERA END SEAR...

Page 74: ...turn to later 0 00 00 Â appears To cancel press the ZERO SET MEMORY button again 2 When you have finished playback rewind the tape RTN appears The tape stops automatically at 0 00 00 The tape counter changes to time code The zero set memory may not function correctly when the time code has not been recorded consecutively CARD PLAY CARD CAMERA PLAY VCR CAMERA REW PLAY STOP FF ZEROSET MEMORY 12bit A...

Page 75: ...Press more than once to search for further date changes up to 10 times Press the STOP 3 button to stop searching A recording of longer than a minute per date area is required Date search may not function if the data code is not correctly displayed CARD PLAY CARD CAMERA PLAY VCR CAMERA REW PLAY STOP FF ZEROSET MEMORY 12bit AUDIOOUT DATESEARCH DATACODE SLIDESHOW CARD CARD STILL MOVIE DATE SEARCH but...

Page 76: ...mage set the camcorder to CARD PLAY mode 3 Select a setting option and close the menu You can save your original images or the images and sounds contained in the supplied software ZoomBrowser EX for Windows or ImageBrowser for Macintosh to the setting options MY IMAGE and MY SOUND For details refer to the Digital Video Software Instruction Manual You can also create original start up images 121 CA...

Page 77: ...ed the language follow the mark next to the menu item to change the setting The displays and at the bottom of the screen refer to the button names on the camcorder and will not change when you change the language Changing the Date Format You can select between three date formats For example JAN 1 2004 1 JAN 2004 and 2004 1 1 Open the menu and select DISPLAY SETUP Select DATE FORMAT select a format...

Page 78: ... press the ZOOM W button for mode 1 The wireless controller returns to mode 1 when you replace the batteries Change the mode if necessary Make sure that camcorder and wireless controller are set to the same mode Display the camcorder s mode by pressing any button on the wireless controller except of the REMOTE SET button and set the wireless controller s mode to the same mode Change the batteries ...

Page 79: ...imer However the flashing may be reflected in the lens when recording close ups or through glass and you may therefore decide to turn it off Open the menu and select SYSTEM Select TALLY LAMP set it to OFF and close the menu The tally lamp still lights up when the camcorder receives a signal from the wireless controller or during self timer countdown Adjusting the Brightness of the LCD Screen Open ...

Page 80: ...n the menu and select CAMERA SETUP Select 16 9 set it to ON and close the menu 16 9 appears The 16 9 mode cannot be selected when the program selector is set to The multi image screen cannot be used when the 16 9 format is selected Simultaneous recording on a memory card cannot be used when the 16 9 format is selected If you play back a 16 9 recording on a normal TV the image appears vertically co...

Page 81: ...s set to The image stabilizer is designed to compensate a normal degree of camcorder shake The image stabilizer might not be as effective when using the night modes Demonstration Mode The demonstration mode displays the camcorder s main features It starts automatically when you leave the camcorder turned on without loading a recording media for more than 5 minutes However you can set the camcorder...

Page 82: ...o to the instruction manual of the digital video device Recording 1 Set the camcorder to PLAY VCR mode and load a recorded cassette If you are connecting via AV terminal check the setting 33 2 Connected device Load a blank cassette and set the device to record pause mode 3 Locate the scene you wish to copy and pause playback shortly before the scene 4 Play back the tape 5 Connected device Begin re...

Page 83: ...e original When connecting a digital video device If the picture does not appear reconnect the DV cable or turn the camcorder off and back on again Proper operation cannot be guaranteed for all digital video devices equipped with a DV terminal If operation does not work use the S video or AV terminal E ...

Page 84: ... the recorded cassette 4 Press the REC PAUSE button In record pause mode and during recording you can check the picture on the screen 5 Connected device Play back the tape 6 Press the e a button when the scene you wish to record appears Recording starts 7 Press the 3 button to stop recording Press the e a button to pause recording Press the e a button again to restart recording 8 Connected device ...

Page 85: ...ppears Recording starts 7 Press the 3 button to stop recording Press the e a button to pause recording Press the e a button again to restart recording 8 Connected Device Stop playback Blank sections may be recorded as anomalous picture If the picture does not appear reconnect the DV cable or turn the camcorder off and back on again You can only record signals from devices with the logo recording i...

Page 86: ...gital signals via the DV terminal The DV terminal serves as output terminal only Connecting the Devices Turn off all devices before starting the connections Unload the tape from the camcorder Refer also to the instruction manual of the connected device You can also connect a VCR with S S1 VIDEO terminal 34 AUDIO VIDEO R L STV 250N Stereo Video Cable supplied Commercially available DV cable Signal ...

Page 87: ...URA400 to OFF If it is set to ON digital signals cannot be input via the camcorder s DV terminal Depending on the software and the specifications of your computer you may not be able to transfer converted signals via the DV terminal We recommend powering the camcorder from a household power source You can also press the AV DV button on the wireless controller The setting changes with each press of...

Page 88: ...order to PLAY VCR mode and load a recorded cassette Use a tape recorded in SP 12 bit mode with this camcorder 2 Open the menu and select AUDIO SETUP Select AUDIO DUB set it to AUDIO IN or MIC IN and close the menu 3 Locate the scene you wish to start audio dubbing 4 Press the PAUSE a button on the wireless controller CARD PLAY CARD CAMERA PLAY VCR CAMERA R L AUDIO OUTPUT STV 250N Stereo Video Cabl...

Page 89: ...und quality may decrease when you add sound to the same scene for more than 3 times When you connect an audio device check the picture on the LCD screen and the sound via built in speaker or audio device You can also connect a TV via S video terminal When you use a microphone you can check the picture on a TV connected via the AV terminal and the sound via headphones connected to the TV When you c...

Page 90: ... can be adjusted 2 If you have selected MIX VARI adjust the mix level Open the menu and select AUDIO SETUP Select MIX BALANCE adjust the balance with the SET dial and close the menu Turn the SET dial down to increase the volume of Stereo 1 and up to increase the volume of Stereo 2 The camcorder resets to STEREO1 when you turn the camcorder off However the mix balance is memorized by the camcorder ...

Page 91: ...not work correctly depending on the software and the specifications settings of your computer If the computer freezes while you have connected the camcorder disconnect and reconnect the DV cable If the problem persists disconnect the interface cable turn off camcorder and computer turn camcorder and computer back on and reconnect them Make sure that camcorder and computer are not connected with a ...

Page 92: ...iver in the DV Network Software Instruction Manual 2 Connect the power adapter to the camcorder 3 Set the camcorder to PLAY VCR mode When transferring video recordings from to a tape make sure that AV DV is not displayed When using the analog digital converter make sure that AV DV is displayed Change the settings as necessary 87 4 Connect the camcorder to the computer using the USB cable Make sure...

Page 93: ... remove the memory card without first pushing it in 1 Turn off the camcorder Make sure that the card access indicator is not flashing before you turn off the camcorder 2 Slide the cover to the right and open it 3 Push the memory card to release it Remove the memory card 4 Close the cover and slide it to the left This camcorder is compatible with SD Memory Cards or MultiMediaCards only Do not use a...

Page 94: ...G Joint Photographic Experts Group format Estimated Capacity of an 8 MB Memory Card These figures are approximate They vary according to the recording condition and the subject Sample images already recorded on the supplied SD Memory Card are to be included in the total number CARD PLAY CARD CAMERA PLAY VCR CAMERA CARD PLAY CARD CAMERA PLAY VCR CAMERA IMG QUALITY FINE CARD SETUP IMAGE SIZE 1632 12...

Page 95: ...he Motion JPEG format Maximum recording time on a 8 MB SD Memory Card CARD PLAY CARD CAMERA PLAY VCR CAMERA CARD PLAY CARD CAMERA PLAY VCR CAMERA MOVIE SIZE 320 240 CARD SETUP 320 240 approx 20 sec 250 KB sec 160 120 approx 50 sec 120 KB sec Image Size Max Recording Time 8 MB File Size per Second 36 CARD SETUP MOVIE SIZE 352 288 352 288 approx 2 min 48 KB sec 176 144 approx 6 min 16 KB sec Image S...

Page 96: ...E NOS CONTINUOUS CARD SETUP 36 101 0101 101 101 0102 101 0104 101 101 0101 101 101 0103 CONTINUOUS When you record 3 images When you replace the memory card and record an image RESET RESET The file number will be reset each time a new memory card is inserted If the memory card already contains image files the consecutive file number will be assigned CONTINUOUS The camcorder memorizes the file numb...

Page 97: ...re may appear out of focus for a moment while the camcorder is focusing Exposure is locked When you press the PHOTO button on the wireless controller recording starts immediately 3 Press the PHOTO button fully F and focusing frame disappear and you hear a shutter sound The card access indicator flashes and the card access display appears The still image shown on the screen will be recorded on the ...

Page 98: ...ET dial When the Focus Priority mode is set to OFF No focusing frame appears In step 2 F turns green and focus and exposure are locked The camcorder shuts off when you do not operate it for 5 minutes to save power AUTO POWER OFF appears 20 seconds before shutoff To continue recording turn the POWER switch to OFF and then back to CAMERA Recording a Still Image on a Memory Card While Recording Movie...

Page 99: ... function or via the DV terminal as still images on a memory card For connecting instructions refer to page 35 and 82 1 Set the camcorder to PLAY VCR mode If a cassette is loaded make sure that the tape is stopped When recording via the AV terminal make sure that AV DV is displayed on the screen When recording via the DV terminal make sure that AV DV is not displayed Change the setting as necessar...

Page 100: ...o the camcorder Screen Displays during Still Image Recording w Remaining Card Capacity for Still Images e Card Access Display e Image Size flashing in red No card in green 6 or more images in yellow 1 to 5 images in red No more images The indication may not decrease even though a recording has been made or may decrease by 2 images at once All indicators are displayed in green when a memory card is...

Page 101: ...green In CAMERA mode the flash can be used in record pause mode when STILL I REC is set to FINE or NORMAL 2 Press the PHOTO button fully The flash fires CARD PLAY CARD CAMERA PLAY VCR CAMERA auto The flash fires automatically according to the brightness of the subject red eye reduction auto The flash fires automatically according to the brightness of the subject and the assist lamp lights up to re...

Page 102: ...speed of 1 2000 is set in CAMERA mode However if flash on is selected the shutter speed becomes set to 1 1000 and the flash fires When the multi image screen is selected During auto exposure bracketing When an abnormality occurs during charging We recommend not using the flash when the optional Wide converter or Tele converter is attached Their shadows appear on the screen The flash mode cannot be...

Page 103: ...ill image is displayed as long as you hold the PHOTO button after recording The FILE OPER menu appears when you press the SET dial while you are reviewing a still image or when you press the SET dial right after recording In this menu you can protect 114 or erase 115 the image REVIEW cannot be selected when continuous shooting high speed continuous shooting or auto exposure bracketing is selected ...

Page 104: ...so could result in data damage When you are using a SD Memory Card make sure that the protect switch is set to allow recording Do not load unload a cassette during recording We recommend using a Canon SD Memory Card or a SD Memory Card with a transfer rate of more than 2 MB sec right after you have formatted it with this camcorder With memory cards not formatted with this camcorder or when recordi...

Page 105: ...e tape 3 Press the start stop button when the scene you wish to record appears 4 Press the start stop button to stop recording When recording from a tape in the camcorder or other video devices A movie recorded from an image in 16 9 format will be vertically compressed The data code of the movie will reflect the date and time it has been recorded on the memory card Recording stops at blank section...

Page 106: ...focusing point Depending on the size of the subject or the distance the camcorder may focus outside the frame When you operate the zoom lever the frames other than the selected one disappear The focusing point can be selected only when Focus Priority is set to ON in CARD CAMERA mode The focusing point returns to the center if you turn off the camcorder change from CARD CAMERA mode or move the prog...

Page 107: ... button CARD PLAY CARD CAMERA PLAY VCR CAMERA CARD PLAY CARD CAMERA PLAY VCR CAMERA PHOTO Continuous Shooting High Speed Continuous Shooting AEB Auto Exposure Bracketing Single Captures a quick series of still images while you press the PHOTO button For the number of frames per second refer to the table on the next page The camcorder records a still image in three different exposures dark normal l...

Page 108: ... camcorder shake warning is displayed on the screen Auto Exposure Bracketing Press the PHOTO button Three still images in different exposures are recorded to the memory card Make sure that there is sufficient space on the memory card CARD PLAY CARD CAMERA PLAY VCR CAMERA Still Image Size Maximum Number of Continuous Shots 1632 1224 2 frames 3 frames 10 images 1280 960 3 frames 5 frames 10 images 6...

Page 109: ...tem landmark etc in the overlapping portion 1 Press the button 2 Select the direction with the CARD button CARD button clockwise CARD button counterclockwise 3 Select the program AE mode and zoom on the subject Adjust focus and exposure manually as necessary Once the sequence has started you cannot change the program AE mode exposure zoom or focus 4 Press the PHOTO button to record the first image...

Page 110: ...an be recorded 6 Press the button after the last image For details on how to merge these images refer to the Digital Video Software Instruction Manual Compose each image so that it overlaps 30 to 50 of the adjoining image Try to keep the vertical misalignment within 10 Do not include moving subject in the overlapping portion Do not try to stitch images that include both distant and close subjects ...

Page 111: ... The camcorder displays the movie playback mode 2 Press the CARD button to move between images 3 To play back a movie press the e a button The first scene appears as a still image when playback is complete Pressing the e a button during playback pauses the playback Press the e a button again to restart playback Pressing the 3 button displays the first scene of the movie Press the CARD button or th...

Page 112: ...lide Show For movies press the CARD STILL MOVIE button 1 Press the SLIDE SHOW button Images are played back one after another 2 Press the SLIDE SHOW button to stop the slide show Index Screen For movies press the CARD STILL MOVIE button 1 Move the zoom lever toward W Up to 6 images appear With movies the index screen can only be started when the first scene is displayed as a still image 2 Turn the...

Page 113: ... number of the current image by the total number of images For movies press the CARD STILL MOVIE button Press and hold the CARD or CARD button When you release the button the image of the displayed image number appears With movies the card jump function can only be started when the first scene is displayed as a still image CARD PLAY CARD CAMERA PLAY VCR CAMERA CARD ...

Page 114: ...RD CAMERA mode the menu appears when you press the SET dial while you are reviewing a still image or when you press the SET dial right after recording 3 Select PROTECT appears and now the image cannot be erased To cancel the protection press the SET dial 4 Select b RETURN to close the menu Protecting during Index Screen Display 1 Move the zoom lever toward W Up to 6 images appear Select the image ...

Page 115: ...IS IMAGE NO and YES appears If an image is protected YES appears in purple 4 Select YES The image is erased and the previous image appears 5 Select b RETURN to close the menu Erasing a Single Image All Images 1 Open the menu and select CARD OPERATIONS 2 Select IMAGE ERASE 3 Select SINGLE or ALL When erasing a single image ERASE THIS IMAGE NO and YES appears If an image is protected YES appears in ...

Page 116: ...age Mix level adjustment blue area of the still image Card Luminance Key CARD LUMI Combines illustrations or title with your recordings The live video recording will appear in place of the light area of the card mix image Mix level adjustment light area of the still image Camera Chroma Key CAM CHROMA Combines backgrounds with your recordings Record your subject in front of a blue curtain and the s...

Page 117: ...he screen and moves to the right and left Random Animation moves randomly in the display Mix level adjustment blue area of the card animation image 1 Set the program selector to Q 2 Open the menu and select CARD MIX The card mix menu appears 3 Select the image you wish to combine with the CARD button 4 Select MIX TYPE CARD CHROMA CARD LUMI CAM CHROMA and C ANIMATION appears CARD PLAY CARD CAMERA P...

Page 118: ...CARD MIX button CARD MIX stops flashing The combined image appears Card mix cannot be used when STILL I REC is set to FINE or NORMAL Movies recorded on a memory card cannot be combined with camcorder recordings Additional sample images are provided on the supplied DIGITAL VIDEO SOLUTION DISK Refer to Adding Still Images from Your Computer to the Memory Card in the Digital Video Software Instructio...

Page 119: ...page http www canondv com For details on how to add the downloaded images to the memory card refer to Adding Still Images from Your Computer to the Memory Card in the Digital Video Software Instruction Manual PhotoEssentials Royalty Free Stock Photography The PhotoEssentials suite of royalty free images on CD ROM features premium quality assignment photography and is ideally suited for use in adve...

Page 120: ...rased by formatting cannot be recovered If you use a memory card other than the supplied one format it with the camcorder 1 Open the menu and select CARD OPERATIONS 2 Select FORMAT CANCEL and EXECUTE appears 3 Select EXECUTE ALL DATA WILL BE ERASED FORMAT THIS CARD NO and YES appears 4 Select YES and close the menu Formatting starts Selecting NO brings you back to step 3 CARD PLAY CARD CAMERA PLAY...

Page 121: ... Select CREATE START UP IMAGE SET THIS AS START UP IMAGE YES and NO appears 4 Select YES OVERWRITE MY IMAGE NO and YES appears 5 Select YES The still image will be saved and the image that was saved to MY IMAGE is erased Retain the original data of the still image you have set as the start up image on your computer or removable disk CARD PLAY CARD CAMERA PLAY VCR CAMERA CREATE START UP IMAGE MY CA...

Page 122: ... Make sure that the still image playback mode is displayed and CONNECT is set to STANDARD 4 Connect the camcorder to the printer using the cable appears and changes to or when the printer is properly connected to the camcorder Does not appear with movies or still images that cannot be played back with the camcorder The print share button lights up and the current print setting will be displayed fo...

Page 123: ...se the cable with the USB logo on the connector DIF 100 We recommend powering the camcorder from a household power source Refer also to the instruction manual of the respective printer The print setting menu may differ slightly depending on the connected printer Printing with the Print Share Button You can print an image without changing the settings by simply pressing the print share button 1 Sel...

Page 124: ...lect OK and press the SET dial Canon Bubble Jet Printer Printing stops even if it is incomplete and the paper is fed through Canon CP Printer A print in progress cannot be stopped Printing stops when the current print is finished and the remaining prints are canceled Printing Errors If an error occurs during the printing process an error message appears 144 Canon Bubble Jet Printer Resolve the err...

Page 125: ...ect the number of copies and press the SET dial 125 127 128 Setting the Print Style Print setting options and DEFAULT settings vary depending on the printer model For details refer to the instruction manual of your printer BORDERED The image area remains relatively unchanged from the recorded image when it is printed BORDERLESS The center portion of the recorded image is printed at an enlarged siz...

Page 126: ...per set in your printer 3 Turn the SET dial to select the paper type and press the SET dial Select the paper type of the paper set in your printer 4 Turn the SET dial to select a layout option and press the SET dial Including the Date in the Print 1 In the print setting menu turn the SET dial to select date and press the SET dial 2 Turn the SET dial to select a date print option and press the SET ...

Page 127: ... quality prints 1 In the print setting menu turn the SET dial to select print effect and press the SET dial 2 Turn the SET dial to select a setting and press the SET dial Setting the Print Style BORDERED The image area remains relatively unchanged from the recorded image when it is printed BORDERLESS The center portion of the recorded image is printed at an enlarged size The image s top bottom and...

Page 128: ...ED The image area remains relatively unchanged from the recorded image when it is printed BORDERLESS MULTIPLE The center portion of the recorded image is printed at an enlarged size The image s top bottom and sides may be cropped slightly MULTIPLE can only be selected when printing on card size paper The date print function is not supported by the CP Printers CP 10 and CP 100 1 In the print settin...

Page 129: ... menu Selecting the Borders 2 Turn the SET dial to select BORDERS and press the SET dial 3 Turn the SET dial to select a borders option and press the SET dial Pressing the MENU button brings you back to the print settings menu Including the Date 2 Turn the SET Dial to select DATE and press the SET dial 3 Turn the SET dial to select a date option and press the SET dial Pressing the MENU button brin...

Page 130: ...ween the directions up down or right left and the orientation of the frame vertical horizontal Pressing the MENU button brings you back to the print settings menu About the color of the trimming frame Canon CP Printers only White No trimming settings Green Recommended trimming size The trimming frame may not appear in green depending on the image size paper size or borders settings Red The image i...

Page 131: ... you wish to print 2 Press the SET dial to open the FILE OPER menu 3 Select PRINT ORDR 4 Select the number of copies appears on the image To cancel the print order set the number of copies to 0 5 Select b RETURN to close the menu Selecting in Index Screen Display 1 Move the zoom lever toward W Up to 6 images appear Select the image you wish to print 2 Open the menu and select CARD OPERATIONS Selec...

Page 132: ...lected and press the SET dial Printing starts The print setting menu disappears when printing is complete Depending on the connected printer you can select style or paper settings before step 3 Cancel Printing Printing Errors 124 Restarting Printing Open the CARD PLAY menu and select PRINT Select RESUME in the print setting menu and press the SET dial The remaining images will be printed Printing ...

Page 133: ...ur computer The image files on your memory card and the image files saved on the hard disk drive of your computer are valuable original data files If you wish to use image files on your computer make copies of them first and use the copied file retaining the original Make sure that camcorder and computer are not connected with a DV cable before connecting the camcorder to the computer using the US...

Page 134: ...Windows 2000 Windows XP and Mac OS 9 or later an OS standard driver will be installed automatically CARD PLAY CARD CAMERA PLAY VCR CAMERA STANDARD The camcorder automatically selects the correct mode for downloading still images or MPEG 4 movies to the computer When downloading or printing still images set the camcorder to still image playback mode and connect it to a computer or a printer When do...

Page 135: ...SB cable See Connecting the Camcorder to a Computer in the Digital Video Software Instruction Manual 4 Set the auto launch setting Follow the steps 1 to 3 in Starting ZoomBrowser EX in the Digital Video Software Instruction Manual The direct transfer menu appears on the camcorder screen and the button lights up CARD PLAY CARD CAMERA PLAY VCR CAMERA Windows OS Only SET dial ALL IMAGES Transfers all...

Page 136: ...ress the button 3 Select the image you wish to transfer with the CARD button 4 Press the button The selected image is transferred to the computer and displayed in the Main Window of ZoomBrowser EX To continue transferring select another image with the CARD button Pressing the MENU button brings you back to the transfer menu Transferring a Still Image as Wallpaper 1 Turn the SET dial to select WALL...

Page 137: ...lect OK and press the SET dial To cancel transfer turn the SET dial to select CANCEL and press the SET dial or press the MENU button When transferring with the button the camcorder retains the transfer setting even if you turn it off or change the position of the TAPE CARD switch When you have selected SELECT TRANSFER or WALLPAPER the screen to select a still image appears Press the MENU button to...

Page 138: ...ain 4 Select RETURN to close the menu Selecting in Index Screen Display 1 Move the zoom lever toward W Up to 6 images appear 2 Open the menu and select CARD OPERATIONS Select TRANSFER ORDER 3 Press the SET dial on the image you wish to transfer appears on the image To cancel the transfer order press the SET dial again 4 Close the menu Erasing All Transfer Orders 1 Open the menu and select CARD OPE...

Page 139: ...amcorder to the computer using a USB cable or DV cable NETWORK MODE appears on the camcorder screen When you have connected the camcorder to the computer start DV Messenger You can now operate the camcorder from the computer using DV Messenger When DV Messenger is started and set up for communication the video picture appears on the computer screen In NETWORK mode the camcorder can only be operate...

Page 140: ...hidden on the index screen Hiding Showing the Displays on the TV Screen When you connect a TV for recording you can select to show the camcorder displays on the TV screen For playback you can hide the camcorder displays on the TV screen Open the menu and select DISPLAY SETUP Select TV SCREEN set it to OFF and close the menu The displays disappear from the TV screen Open the menu and select DISPLAY...

Page 141: ...r countdown 58 Recording mode 59 Wind screen 62 Microphone attenuator 61 Remaining card capacity for still images 98 Remote sensor mode 78 Condensation warning 147 Audio mode 60 Headphones 61 16 9 mode 80 Volume level of speaker or headphones 32 DV USB connection 85 92 Audio level indicator 60 End search 73 Date search 75 Audio dubbing 88 Data code 71 12 bit audio 90 REC PAUSE STOP EJECT FF REW Fa...

Page 142: ...lso 100 CARD PLAY Mode Stitch assist 109 Drive mode 107 Focusing frame 106 Camcorder shake warning 57 Flash 101 Length of the movie Lap time Current image total images File number 96 Slide show 112 Data code 71 Protect mark 114 ...

Page 143: ...change the position of the protect switch Camcorder stopped operating to protect the tape Unload and reload the cassette DV cable or USB cable is not connected or the connected digital device is turned off Condensation has been detected in the camcorder Tape reached the end Rewind the tape or replace the cassette You attempted to perform audio dubbing on a tape recorded in a mode other than the SP...

Page 144: ...s been changed between print setting and start of printing You attempted to use a paper size type that is not supported by the printer You attempted to print on paper that cannot be used with the camcorder There is a problem with the ink The ink cartridge is not inserted or is out of ink The ink cartridge needs to be replaced soon There is a problem with the ink cassette The ink cannot be used wit...

Page 145: ...nd turn off the printer After a while turn the printer back on and reconnect the USB cable When you are printing using the button check the print settings Or you attempted to print from a memory card that contains a large number of images Reduce the number of images The print setting cannot be used for printing with the button The printer is in use Check the printer status Printer is warming up If...

Page 146: ...Do not disassemble the camcorder If the camcorder does not function properly consult qualified service personnel Handle the camcorder with care Do not subject the camcorder to shocks or vibration as this may cause damage Avoid sudden changes in temperature Moving the camcorder rapidly between hot and cold temperatures may cause condensation to form on its internal surfaces 147 Storage If you do no...

Page 147: ...rrectly even when you clean the video heads Do not use wet type cleaning cassettes as this may damage the camcorder Condensation Moving the camcorder rapidly between hot and cold temperature may cause condensation water droplets to form on its internal surfaces Stop using the camcorder if condensation is detected Continued use may damage the camcorder Condensation may form in the following cases H...

Page 148: ...ontinue to discharge naturally Therefore charge them on the day of use or the day before to ensure a full charge Attach the terminal cover whenever a battery pack is not in use Contact to metallic objects may cause a short circuit and damage the battery pack Dirty terminals may cause a poor contact between the battery pack and the camcorder Wipe the terminals with a soft cloth Since storing a char...

Page 149: ...e cassette or cover them with cellophane tape Handle cassettes with care Do not drop or subject them to severe impact as this may damage the cassettes Rewind tapes from time to time if they are stored for a long time With cassettes equipped with a memory function metal plated terminals may become dirty with use Clean the terminals with a cotton swab after about 10 times of loading unloading The me...

Page 150: ...s If condensation forms on the card put it aside until the droplets have evaporated completely Do not touch or expose the terminals to dust or dirt Check the direction before inserting the memory card Forcing a memory card backwards into the slot may damage the memory card or the camcorder Do not remove the label from the memory card or affix other labels on the memory card Using the Camcorder Abr...

Page 151: ...r Replace or charge the battery pack Charge the battery pack in temperatures between 32 ºF and 104 ºF 0 ºC and 40 ºC Wait until the battery pack temperature is below 104 F 40 C and retry charging Use a different battery pack Camcorder will not turn on The camcorder switches off by itself Cassette compartment will not open Cassette compartment stopped during loading unloading LCD viewfinder switche...

Page 152: ...enter Set the camcorder to CAMERA mode Set the time zone date and time or replace the backup battery and reset the date and time Turn on the power Load a cassette Rewind the tape or replace the cassette Change the position of the protect switch Set the camcorder to CAMERA mode Focus manually Adjust the viewfinder with the dioptric adjustment lever Clean the lens Adjust the viewfinder with the diop...

Page 153: ...off AV PHONESH is set to AV in the menu Set the camcorder to PLAY VCR mode Set the TAPE CARD switch to TAPE Load a cassette Rewind the tape Set AV PHONESH to AV in the menu Set AV DV OPTURA500 or AV DV OPTURA400 to OFF Set the selector to VIDEO Clean the video heads Stop playback dubbing Adjust the volume with the SET dial Set AV PHONESH to PHONESH Pressing the playback button does not start playb...

Page 154: ...4 movie playback Motion JPEG movies are displayed in still image playback mode Press the CARD STILL MOVIE button to switch to still image playback Cancel the protection Change the position of the protect switch Turn off the camcorder Remove and reinsert the memory card Format the memory card if flashing persists Memory card cannot be inserted Memory card cannot be recorded Memory card cannot be pl...

Page 155: ... 1000 Soft Carrying Case Digital Device Computer NB 2L NB 2LH BP 2L12 BP 2L14 Battery Pack WD H30 5 Wide converter FS 30 5U Filter Set TL H30 5 Tele converter SDC 128M SD Memory Card Shoulder Strap WS 20 Wrist Strap SC 2000 Soft Carrying Case S 150 S video Cable Commercially available DV Cable CA 570 Compact Power Adapter TV VCR STV 250N Stereo Video Cable SC A50 Soft Carrying Case CBC NB2 Car Bat...

Page 156: ...pack Please note that this warranty does not apply to repairs arising out of the malfunction of non genuine Canon accessories although you may request such repairs on a chargeable basis Battery Packs When you need extra battery packs select from the following NB 2L NB 2LH BP 2L12 BP 2L14 CB 2LT Battery Charger Use the battery charger for charging the battery packs It plugs directly into a power ou...

Page 157: ...r indoor shots or panoramic views When the Wide converter is attached a shadow may appear in the picture when you record with flash or assist lamp FS 30 5U Filter Set Neutral density and MC protector filters help you to control difficult lighting conditions SA 1 Adapter Bracket Use the adapter bracket to attach a video light or microphone to the camcorder VL 10Li Battery Video Light This compact y...

Page 158: ...C 2000 Soft Carrying Case A handy camcorder bag with padded compartments and plenty of space for accessories SC A50 Soft Carrying Case This lightweight bag keeps the camcorder within easy reach without weighing you down or getting in the way This mark identifies genuine Canon video accessories When you use Canon video equipment we recommend Canon brand accessories or products bearing the same mark...

Page 159: ...ance indoor outdoor or custom white balance 1 1 lx using the Night mode More than 100 lx Electronic Video Recording System Audio Recording System Television System Image Sensor Tape Format Tape Speed Maximum Recording Time 80 min cassette Fast Forward Rewind Time LCD Screen Viewfinder Microphone Lens Lens Configuration Filter Diameter AF system Minimum Focusing Distance White Balance Minimum Illum...

Page 160: ... 286 Vp p 75 ohms C signal AV Terminal DV Terminal MIC Terminal Headphone Terminal USB Terminal S video Terminal Input Output Terminals CA 570 Compact Power Adapter 100 240 V AC 50 60 Hz 17W 8 4 V DC 1 5 A 32 104 F 0 40 C 2 1 3 5 1 1 in 52 90 29 mm 4 8 oz 135 g Power supply Power consumption Rated output Operating temperature Dimensions Weight NB 2LH Battery Pack Rechargeable Lithium Ion Battery 7...

Page 161: ... Battery Pack 9582A002AA NB 2L Battery Pack 7302A001AA CB 2LT Battery Charger 7303A001AA CBC NB2 Car Battery Charger 7873A002AA S 150 S Video Cable 3062A002AA D82 0330 202 WD H30 5 Wide converter 9065A001AA TL H30 5 Tele converter 9064A001AA FS 30 5U Filter Set 6738A002AA WS 20 Wrist Strap 3118A002AA D81 0190 202 SC 2000 Soft Carrying Case 9389A001AA SC 1000 Soft Carrying Case 3083A002AA D81 1200 ...

Page 162: ...V VCR 33 Continuous shooting 107 Copyright signals 85 Data code 71 Date and time 20 Date format 77 Date search 75 Demo mode 81 Digital effects 63 Digital zoom 28 Direct print function 122 Direct transfer 135 Drive mode 107 DV dubbing 85 DV terminal 82 91 Easy recording 44 Effects 65 End search 73 Erasing images 115 Exposure 51 Faders 63 Fast forward 30 File numbers 96 Flash 101 Focusing 52 Focusin...

Page 163: ... 44 Recording still images memory card 97 Remote sensor 78 Review 103 Rewind 30 Ring light adapter 48 S1 video terminal 34 Sample images 118 Sand Snow mode 44 Screen displays 140 SD Memory Card 93 Self timer 58 Shoulder strap 158 Shutter speed 56 Skin detail 50 Slide show 112 SP mode 59 Speaker 32 Sports mode 44 Spotlight mode 44 Still image playback mode 111 Still image quality 94 Still image siz...

Page 164: ...o follow operating instructions B If the equipment is defective as a result of leaking batteries sand dirt or water damage C If defects or damages are caused by the use of unauthorized parts or by service other than our authorized agent D If the equipment is used for commercial or industrial use This Limited Warranty does not cover cabinet exterior finish video cassette tape head cleanings nor doe...

Page 165: ...digital video equipment is used for commercial professional or industrial purposes This limited warranty does not cover the cabinet exterior finish of the digital video equipment video cassette tapes head cleanings nor does it apply to digital video equipment purchased outside Canada TO OBTAIN WARRANTY SERVICE Ship your Canon digital video equipment in its original carton box or equivalent properl...

Page 166: ...ADA INC MONTREAL 5990 Côte de Liesse Quebec H4T 1V7 If you have any questions call the Canon Canada Information Center toll free at 1 800 828 4040 Canada only Si vous avez des questions veuillez téléphoner sans frais au Canada 1 800 828 4040 Canada seulement MEXICO CANON MEXICANA S DE R L DE C V Periferico Sur No 4124 Col Ex Rancho de Anzaldo C P 01900 México D F México CENTRAL Y SURAMÉRICA CANON ...

Reviews: