background image

until 

2010/12/27

Owner’s Manual

Before connecting, operating or adjusting this product, please read the instructions completely.
Spanish Quick Use Guide is included.
Guía para rápida consulta en español está incluida.

VQT3E42

For USA and Puerto Rico assistance, please call: 1-800-211-PANA(7262) or, 
contact us via the web at: http://www.panasonic.com/contactinfo

For Canadian assistance, please call: 1-800-561-5505 or visit us at www.panasonic.ca
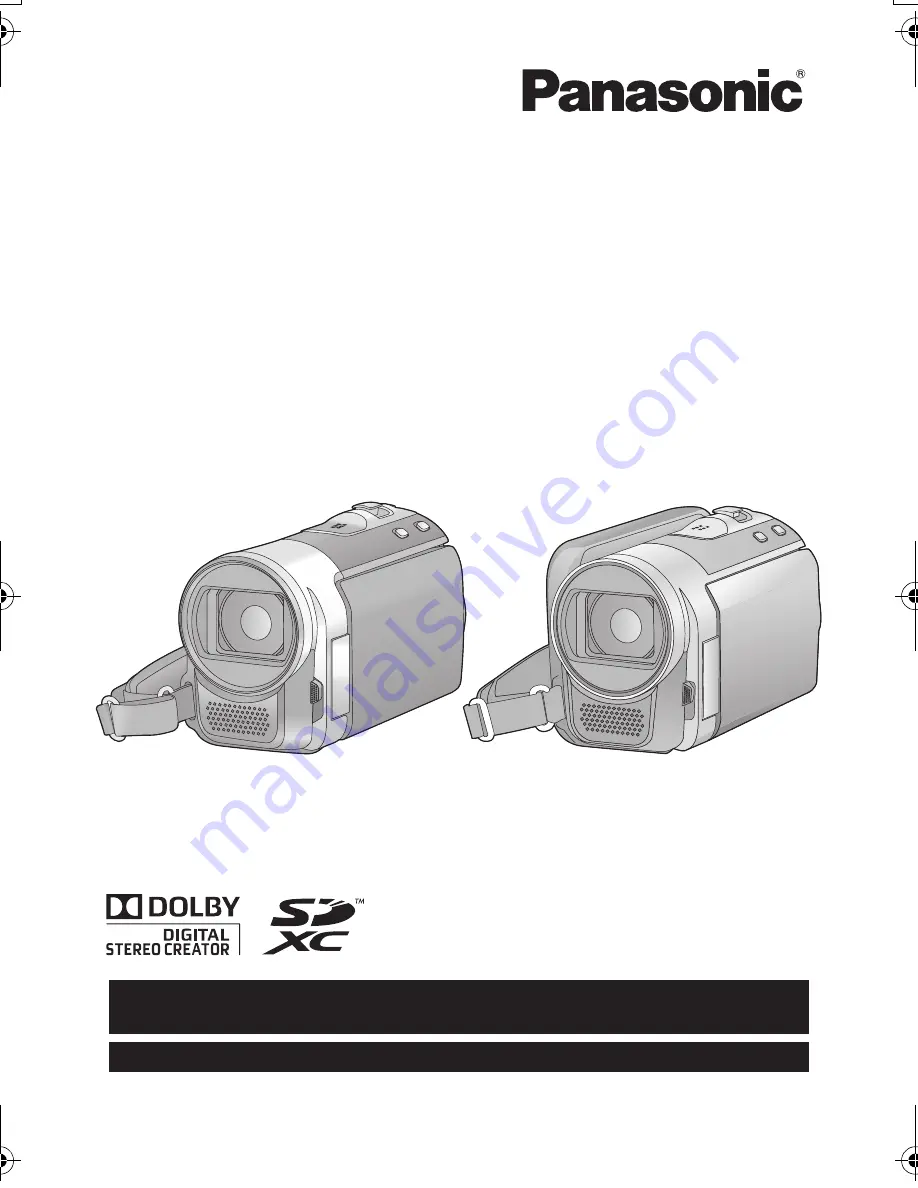
SD Video Camera

Model No.

SDR-S70P/PC
SDR-S71P/PC

SDR-T70P/PC

SD/HDD Video Camera

Model No.

 SDR-H100P/PC

SDR-H100&S71&S70&T70-VQT3E42_eng.book  1 ページ  2010年11月29日 月曜日 午後6時21分

Summary of Contents for SDR-H100K

Page 1: ...a consulta en espa ol est incluida VQT3E42 For USA and Puerto Rico assistance please call 1 800 211 PANA 7262 or contact us via the web at http www panasonic com contactinfo For Canadian assistance pl...

Page 2: ...PRODUCT DAMAGE DO NOT EXPOSE THIS APPARATUS TO RAIN MOISTURE DRIPPING OR SPLASHING AND THAT NO OBJECTS FILLED WITH LIQUIDS SUCH AS VASES SHALL BE PLACED ON THE APPARATUS USE ONLY THE RECOMMENDED ACCE...

Page 3: ...and receiver Connect the equipment into an outlet on a circuit different from that to which the receiver is connected Consult the dealer or an experienced radio TV technician for help FCC Caution To...

Page 4: ...r supply only When connecting to an AC supply outside of the U S A or Canada use a plug adaptor to suit the AC outlet configuration When connecting to a supply of greater than AC 125 V ensure the cord...

Page 5: ...grounding prong The wide blade or the third prong are provided for your safety If the provided plug does not fit into your outlet consult an electrician for replacement of the obsolete outlet 10 Prote...

Page 6: ...RATURE If the unit is suddenly moved from a cold place to a warm place moisture may form on the SD card and inside the unit DO NOT LEAVE YOUR CAMERA OR THE POWER SUPPLY TURNED ON WHEN NOT IN USE STORA...

Page 7: ...hen the lamp illuminates It may damage the built in memory or cause a malfunction in the unit jTurn off the power remove the battery jInsert and remove the USB cable jExpose the unit to vibrations or...

Page 8: ...ith models and Pictures may be slightly different from the original The illustrations used in this owner s manual show model however parts of the explanation refer to different models Depending on the...

Page 9: ...lio license for the personal and non commercial use of a consumer to i encode video in compliance with the AVC Standard AVC Video and or ii decode AVC Video that was encoded by a consumer engaged in a...

Page 10: ...ording Yourself 36 Recording Recording Basic 1 Before recording 37 Intelligent Auto Mode 38 Quick start 40 Quick power on 40 2 Recording motion pictures 41 Selecting a media to record SDR T70 SDR H100...

Page 11: ...rner to copy to play back a disc 79 Preparing for copying playing back 79 Copying to discs 81 Playing back the copied disc 83 Managing the copied disc 84 2 Dubbing images onto other video devices 85 W...

Page 12: ...reach of children to prevent swallowing Product numbers correct as of December 2010 These may be subject to change Battery pack VW VBL090 SDR S70 SDR S71 SDR T70 Battery pack VW VBK180 SDR H100 AC ada...

Page 13: ...tration and press it straight in as far as it will go Press the center of the SD card and then pull it straight out 3 Securely close the SD card cover How to turn on the power Turning the power on and...

Page 14: ...2 Press the recording start stop button to start recording When you begin recording changes to Recording still pictures 1 Change the mode to and open the LCD monitor 2 Press the button When selecting...

Page 15: ...e thumbnails Still picture playback 1 Change the mode to 2 Use the joystick to select the Play Mode Select icon A then press the center of the joystick 3 Select PICTURE then press the center of the jo...

Page 16: ...Manual button iA MANUAL l 38 3 Optical image stabilizer button O I S l 48 4 Power button l 25 5 Delete button l 70 Light Delete button LIGHT SDR S71 l 48 70 6 Audio video output terminal A V l 77 85...

Page 17: ...the recording functions and playback operations and to operate the menu screen Move the joystick up down left or right to select a setting or scene and then press the joystick to set it 1 Select by mo...

Page 18: ...DD SDR H100 l 8 27 DC input terminal DC IN l 20 Do not use any other AC adaptors except the supplied one 28 Grip belt Adjust the belt length and the pad position 1 Flip the belt 2 Adjust the length 3...

Page 19: ...nserting it in the direction shown in the figure It has been found that counterfeit battery packs which look very similar to the genuine product are made available to purchase in some markets Some of...

Page 20: ...use the power supplied from the AC outlet to power the unit for use Refer to page 113 when status indicator flashes either rapidly or slowly We recommend using Panasonic batteries l 12 21 120 If you...

Page 21: ...VW VBL090 optional 3 6 V 895 mAh 2 h 20 min 1 h 20 min 40 min VW VBK180 optional 3 6 V 1790 mAh 2 h 25 min 2 h 55 min 1 h 30 min VW VBK360 optional 3 6 V 3580 mAh 4 h 20 min 6 h 3 h 10 min SDR H100 Ba...

Page 22: ...hanges as the battery capacity reduces If the indication becomes the icon will become red If the battery discharges then will flash The remaining battery capacity is displayed when using the Panasonic...

Page 23: ...locked no recording deletion or editing will be possible on the card Keep the Memory Card out of reach of children to prevent swallowing This unit an SDXC compatible device is compatible with SD Memor...

Page 24: ...out 3 Securely close the SD card cover Do not touch the terminals on the back of the SD card See page 113 for details on handling the SD card Inserting removing an SD card When using an SD card not fr...

Page 25: ...n the power on off To turn on the power A The status indicator lights To turn off the power B The status indicator goes off In the following cases opening the LCD monitor does not turn on the power Pr...

Page 26: ...26 VQT3E42 Preparation Setup 4 Selecting a mode Change the mode to recording or playback Operate the mode switch to change the mode to or Recording mode l 41 45 Playback mode l 62 67...

Page 27: ...the submenu item B then move the joystick right or press the joystick Descriptions of submenus and current settings on menus are displayed scrolling at the bottom of the screen 4 Select the desired s...

Page 28: ...are only for 6 It will be displayed only when the MEDIA SELECT is set to VIDEO SD CARD 7 It will be displayed only when the MEDIA SELECT is set to Built inMemory Language selection Menu list SDR T70 S...

Page 29: ...y can be changed to OFF a portion of information displayed or ON all information displayed EXT DISPLAY l 78 CLOCK SET l 32 SET WORLD TIME l 33 DATE TIME l 32 DATE FORMAT l 32 SDR T70 SDR H100 ECONOMY...

Page 30: ...The amount of time left on the SD card can be checked Press the MENU button to end DEMO MODE This item is used to start the unit demonstration Only when the mode is at the position If DEMO MODE is swi...

Page 31: ...only when the Built inMemory VIDEO is selected 7 This appears only when the HDD VIDEO is selected For any other menus that are not described above refer to menus with the same names for the recording...

Page 32: ...nds A message may be displayed prompting you to set the world time l 33 Press the MENU button to complete the setting Changing the date and time display mode Select the menu l 27 SETUP DATE TIME OFF D...

Page 33: ...pears and the summer time setting is turned on the time difference from GMT is set forward by one hour Press the joystick forward again to return to standard time 4 Only when setting the region of you...

Page 34: ...stick forward again to return to standard time Close the setting by pressing the MENU button appears and the time of the travel destination is indicated To return the display to the home setting Set t...

Page 35: ...tick to return to the previous screen 2 Make adjustments Close the setting by pressing the MENU button Power LCD This makes it easier to view the LCD monitor in bright places including outdoors Select...

Page 36: ...image recorded is the same as a normal recording When the LCD monitor is rotated towards the lens side the icon will not be displayed even if you press the joystick Only some indications will appear...

Page 37: ...ind you If the subject is backlit it will become dark in the recording Keep your arms near your body and separate your legs for better balance Do not cover the microphones with your hand Basic motion...

Page 38: ...digital zoom is used Intelligent Auto Mode MANUAL Intelligent auto Manual button iA MANUAL Press this button to change the mode to Intelligent Auto Mode or Manual Mode Please refer to page 58 about Ma...

Page 39: ...this unit 2 Blue sky 3 Cloudy sky rain 4 Sunlight 5 White fluorescent lamp 6 Halogen light bulb 7 Incandescent light bulb 8 Sunrise or sunset 9 Candlelight If the automatic white balance is not funct...

Page 40: ...ecording time will be reduced Quick start standby mode is canceled if jabout 5 minutes have elapsed jmode is set to It may take some time for Automatic white balance to adjust In the Quick start mode...

Page 41: ...ll be reset to 0h00m00s h is an abbreviation for hour m for minute and s for second Still pictures can be recorded while recording the motion picture l 46 The images recorded between pressing the reco...

Page 42: ...es or still pictures then press the center of the joystick Media set for still pictures and motion pictures will be outlined in a yellow frame Press the MENU button to end Selecting a media to record...

Page 43: ...ime left for recording may increase after changing the mode or restarting the unit by turning it off and on Use time in the row of 4 GB in above table as a guideline for the time that can be copied on...

Page 44: ...pable of converting the audio recording method after recording motion pictures By using the supplied software VideoCam Suite 3 5 audio can be recorded in DOLBY mode on a DVD Video disc and in MPEG mod...

Page 45: ...ictures Refer to page 42 for methods for selecting recording media 1 Change the mode to and open the LCD monitor 2 Press the button Because of slower shutter speeds it is recommended that you use a tr...

Page 46: ...res we recommend pausing motion picture recording and taking still pictures after releasing the PRE REC mode Remaining time left for recording will become shorter when you record still pictures while...

Page 47: ...while zooming The larger the digital zoom magnification the more the image quality is degraded If you take your finger off the zoom lever during zoom operation the operation sound may be recorded Whe...

Page 48: ...of the unit Using the Color night rec function at the same time will make conditions even brighter If you turn off the power or change the mode the video light is turned off Image stabilizer function...

Page 49: ...d press the AF AE button once again 3 Start recording Pressing and holding the AF AE button releases the AF AE tracking About target frame In the event of failure to achieve target lock the target fra...

Page 50: ...g Backlight compensation Select an icon with the joystick To release reselect the operation icon Not displayed when the Intelligent Auto Mode is on The shaded operation icons are not displayed while r...

Page 51: ...ade in out Select the menu l 27 RECORD SETUP FADE COLOR WHITE or BLACK Help mode Select the desired icon with the joystick to display an explanation on the screen To exit the help mode Press the MENU...

Page 52: ...to VIDEO SETUP GUIDE LINES desired setting Set to OFF to cancel the guide line PRE REC This allows recording of the pictures and sound to start approximately 3 seconds before the recording start stop...

Page 53: ...y be different from the date when the recording actually started Intelligent contrast control If there are extremely dark or bright parts or the brightness is insufficient the effect may not be clear...

Page 54: ...To make fast moving scenes less shaky with slow playback and pause of playback Portrait To make people stand out against the background Low light For dark scenes such as at dusk Spotlight Improved qu...

Page 55: ...ancel the setting PRIMARY Only the prioritized face framing is displayed ALL All face detection framings are displayed In the Intelligent Auto Mode detected faces appear with frames Change the mode to...

Page 56: ...oom microphone is linked to the zooming operation so that far away sounds with a tele shot and close up sounds with a wide angle shot are recorded more clearly Change the mode to Select the Manual Mod...

Page 57: ...ligent Auto Mode is set to on WIND NOISE CANCELER is set to ON and the setting cannot be changed The sound quality may be changed if this function is activated in strong winds SELF TIMER The Self time...

Page 58: ...while in the screen above Press the joystick forward This will allow you to switch between Manual Mode and Manual Focus Mode To release the Manual Mode Press the iA MANUAL button again MNL MANUAL 4 5...

Page 59: ...lance modes When the unit is turned on with the lens cover closed the automatic white balance adjustment may not function properly Please turn the unit on after opening the lens cover When the display...

Page 60: ...e shutter speed and the iris gain value set the shutter speed and then set the iris gain value Manual shutter speed adjustment You may see a band of light around an object that is shining very bright...

Page 61: ...in blue The in focus area is displayed in blue The normal screen returns approximately 2 seconds after you finish bringing the subject into focus When MF ASSIST is set to OFF the blue area is not dis...

Page 62: ...enter of the joystick 3 Select VIDEO then press the center of the joystick Select SD CARD Built inMemory and VIDEO then press the center of the joystick Select SD CARD HDD and VIDEO then press the cen...

Page 63: ...ack operation with the joystick 1 Playback Pause 6 Rewind playback 5 Fast forward playback Stops the playback and shows the thumbnails Change the thumbnail display Pressing the zoom lever to the or si...

Page 64: ...me 1 Pause the playback 2 Move the joystick left or right is for reverse frame by frame playback Normal playback is restored when you select When the frames are advanced one at a time in the reverse d...

Page 65: ...set up to a maximum of 60 minutes 4 Choose the thumbnail from which you wish to begin playback then press the center of the joystick Next previous thumbnail can be displayed by selecting Scenes record...

Page 66: ...ate are played back repeatedly If playback of a scene was stopped halfway the playback can be resumed from where it was stopped Select the menu l 27 If playback of a motion picture is stopped appears...

Page 67: ...er of the joystick 3 Select PICTURE then press the center of the joystick Select SD CARD Built inMemory and PICTURE then press the center of the joystick Select SD CARD HDD and PICTURE then press the...

Page 68: ...display changes in the following order if the zoom lever is operated to side or side 20 still pictures 9 still pictures 1 still picture 9 still pictures display returns if the power is turned off or t...

Page 69: ...he number of still pictures exceeds 999 is displayed after the date in the list by date for the still pictures created from the motion picture l 64 1 Select and press the joystick 2 Select the desired...

Page 70: ...cannot be deleted 3 Only when SELECT is selected in step 2 Select the scene still picture to be deleted then press the joystick A scene or still picture will be selected and will be displayed Press t...

Page 71: ...till pictures conforming to DCF standard with this unit all the data related to the scenes still pictures may be deleted When still pictures recorded on an SD card by other products are deleted a stil...

Page 72: ...5 Select YES then press the joystick to play back the part to be deleted When NO is selected the confirmation message appears Proceed to step 7 6 When you stop the playback the confirmation message a...

Page 73: ...other still pictures repeat steps 2 3 Press the MENU button to complete the settings To cancel all DPOF settings What is DPOF DPOF Digital Print Order Format is a format which allows the user of a dig...

Page 74: ...to multiple SD cards following the instructions on the screen Change the mode to Select the menu l 27 Current media information will be displayed Press the center of the joystick to switch display be...

Page 75: ...ate which will be outlined in red Press the center of the joystick again to deselect Up to 99 still pictures or 99 dates can be set in succession If 2 or more SD cards are necessary to copy change the...

Page 76: ...stick 2 Select YES then press the joystick After formatting is complete press the MENU button to close the message screen Perform a physical formatting of the SD card when the SD card is to be dispose...

Page 77: ...of the TV for details about TV compatibility 1 Connect this unit and a TV 2 Turn on this unit and change the mode to 3 Start playback on this unit If the image or audio from this unit does not appear...

Page 78: ...uctions of the TV for details To display the on screen information on the TV The information displayed on the screen operation icon and time code etc can be displayed on the TV Select the menu l 27 Se...

Page 79: ...atically finalized to allow playback on other devices and additional copying will not be possible 2 Only DVD RAM copied with the DVD burner or VideoCam Suite 3 5 can additionally copy 3 Connect this u...

Page 80: ...onnection Cable supplied with DVD burner B DVD burner optional Insert the plugs as far as they will go 4 Insert the disc in the DVD burner Insert the DVD disc with the recording side down when using t...

Page 81: ...joystick again to deselect When SELECT DATE is selected Press the center of the joystick to select the date which will be outlined in red Press the center of the joystick again to deselect Up to 99 sc...

Page 82: ...corded motion still pictures into other devices a message prompting you to format the disc may be displayed Do not format the disc since deleted data cannot be restored later Approximate time for copy...

Page 83: ...l 77 2 Use the joystick to select a scene or a still picture then press the center of the joystick for playback The playback operation is performed the same as when playing back motion pictures or sti...

Page 84: ...hen copying still pictures 1 Select the menu l 27 If a disc that you copied to is inserted in another device without protecting it a message may be displayed prompting you to format the disc We recomm...

Page 85: ...images recorded by this unit can be copied dubbed onto the hard disk or a DVD disc Refer to the operating instructions of your DVD recorder for information about whether or not it supports copying dub...

Page 86: ...u can copy motion still picture data to the HDD of PCs Copy to disc You can copy to disc in conventional standard picture quality MPEG2 format Select the function you wish to use and follow the on scr...

Page 87: ...anasonic net avc sdcard information SDXC html VideoCam Suite 3 5 can handle images recorded with this unit or by using VideoCam Suite 3 5 Images created with other video cameras DVD recorders software...

Page 88: ...e Engineering Decompiling or Disassembly Licensee may not reverse engineer decompile or disassemble the Software except to the extent either of them is permitted under law or regulation of the country...

Page 89: ...th Microsoft Windows 3 1 Windows 95 Windows 98 Windows 98SE Windows Me Windows 2000 and Windows NT Operating environment for VideoCam Suite 3 5 PC IBM PC AT compatible PC OS Windows 7 32 bit Starter W...

Page 90: ...an administrative account user only can use this software If using Windows Vista Windows 7 administrative account and standard account users only can use this software An administrative account user...

Page 91: ...dows XP 32 bit SP3 CPU Windows 7 Windows Vista 1 0 GHz or higher Windows XP Intel Pentium III 450 MHz or higher or Intel Celeron 400 MHz or higher RAM Windows 7 1 GB or more 32 bit 2 GB or more 64 bit...

Page 92: ...setup exe Continue When using Windows 7 or the following screen is not displayed automatically select Start Computer or double click on Computer on the desktop and then double click Panasonic 2 Click...

Page 93: ...ideoCam Suite 3 5 Follow the steps below to uninstall any software applications that you no longer require 1 Select start Control Panel Uninstall a program 2 Select VideoCam Suite 3 5 then click Unins...

Page 94: ...ect this unit to a PC Insert the USB connectors as far as they will go Do not use any other USB cables except the supplied one Operation is not guaranteed with any other USB cables The Smart wizard sc...

Page 95: ...iting between a PC and an SD card be aware that some SD card slots built into PCs and some SD card readers are not compatible with the SDHC memory card or SDXC memory card To disconnect USB cable safe...

Page 96: ...pplied one Operation is not guaranteed with any other USB cables Be sure to connect the unit directly to the PC Blu ray disc recorder or DVD recorder During charging the status indicator flashes You c...

Page 97: ...ouble click the folder that contains the still pictures DCIM 100CDPFQ etc 2 Drag and drop the still pictures onto the destination folder on the PC s HDD Do not delete the SD card s folders Doing so ma...

Page 98: ...y authorized or with the user name for a standard user account If you log on with a user name for a guest user account the software cannot be used On the PC Select start All Programs Programs Panasoni...

Page 99: ...al drive of Mac When you select an option other than PC reconnect the USB cable When using the battery the LCD monitor will be turned off after about 5 seconds Operating the joystick will cause the LC...

Page 100: ...d recording possible status Recognizing the card Red Recording Green Recording pause SDR S71 SDR T70 SDR H100 R 1h20m 0h00m00s A 1 100 OPEN 0dB MF NOV 15 2011 12 34PM PRE REC AWB SP 1h30m R3000 XP SP...

Page 101: ...possible status Recording still picture HDD Falling detection l 8 3 G 1 5 6 7 8 D E 1 2 Display during playback l 62 67 0h00m00s Playback time l 63 No 10 Scene number Repeat playback l 66 100 0001 St...

Page 102: ...l 95 2 Accessing the HDD l 95 3 Time display The built in battery is low l 32 Warning for face to face recording l 36 SD card is not inserted or is non compatible The HDD cannot be accessed as the Dro...

Page 103: ...the power and contact consumer support l 124 125 HDD ERROR OCCURRED PLEASE TURN UNIT OFF THEN TURN ON AGAIN 2 Access to HDD failed Turn on the power again Make sure not to give a strong shock or impa...

Page 104: ...iting a while If recovery fails repeatedly format a media on the unit Please be aware that if a media is formatted then all the data recorded on the media will be erased If the thumbnail information i...

Page 105: ...set Intelligent contrast control When the Color night rec function is used When the iris gain is set Color night rec When the AF AE tracking is used Shutter sound While recording motion pictures When...

Page 106: ...he economy function l 29 is set to OFF When this unit is connected to a DVD burner to copy or play back images a disc is being accessed the power turns off automatically if the USB Connection Cable is...

Page 107: ...rdable time may have shortened due to the deterioration of the data writing speed or repeated recording and deletion Using the unit format the SD card built in memory or HDD l 76 If the unit is expose...

Page 108: ...sed and cannot be recovered Back up important data on a PC disc etc If the SD card is inserted in this unit it is not recognized If the SD card is formatted on a PC it may not be recognized by this un...

Page 109: ...tructions on the screen The power of the DVD burner cannot be turned on When the unit is connected to the DVD burner use the respective AC adaptors for both this unit and the DVD burner The sound does...

Page 110: ...and cables If you use optional accessories use the cords and the cables supplied with them Do not extend the cords and the cables Do not spray insecticides or volatile chemicals onto the unit If the u...

Page 111: ...creen instructions To physically format the HDD connect the unit via the AC adaptor select SETUP FORMAT MEDIA HDD from the menu and then press and hold the delete button on the screen below for about...

Page 112: ...ding time If you drop the battery accidentally check to see if the terminals are damaged Inserting a battery with damaged terminals can damage the unit Do not throw an old battery into fire Heating a...

Page 113: ...ry The memory capacity indicated on the label of an SD card is the total of the capacity for copyright protection and management and the capacity which can be used on the unit a PC etc Do not apply st...

Page 114: ...card carefully When the LCD monitor gets dirty wipe it with a soft cloth such as eye glass cleaner In a place with drastic temperature changes condensation may form on the LCD monitor Wipe it with a s...

Page 115: ...r to outside When a cold room has been warmed up quickly When cool wind from an air conditioner is directly blown onto this unit After summer afternoon showers of rain When this unit is in a very humi...

Page 116: ...eo standard Built in memory Independent standard HDD Independent standard Image sensor 1 8z CCD image sensor Total 800 K Effective pixels 410 K to 520 K 4 3 380 K to 470 K 16 9 Lens Auto Iris F1 9 to...

Page 117: ...e No copyright protection support Built in memory Read only HDD Read only Hi Speed USB USB 2 0 USB terminal Type Mini AB Dimensions 54 9 mm W k64 mm H k107 3 mm D 2 16 q W k2 52 q H k4 22 q D excludin...

Page 118: ...512 MB 1 GB 2 GB FAT12 and FAT16 system compliant SDHC Memory Card 4 GB 6 GB 8 GB 12 GB 16 GB 24 GB 32 GB FAT32 system compliant SDXC Memory Card 48 GB 64 GB exFAT system compliant Built in memory 4...

Page 119: ...ompliant SDXC Memory Card 48 GB 64 GB exFAT system compliant Built in memory 4 GB HDD 80 GB Compression JPEG Design rule for Camera File system based on Exif 2 2 standard DPOF corresponding Picture si...

Page 120: ...ptor VW AD21PP K VW AD20PP K is required to charge the battery pack VW VBG130 VW VBG260 Accessory No Figure Description VW BC10PP Battery Charger VW VBL090 1 SDR S70 SDR S71 SDR T70 Rechargeable Lithi...

Page 121: ...A RP SDN04GU1A RP SDN02GU1A Class 4 16 GB SDHC Memory Card Class 4 8 GB SDHC Memory Card Class 4 4 GB SDHC Memory Card Class 4 2 GB SD Memory Card RP SDW64GU1K RP SDW48GU1K RP SDW32GU1K RP SDW16GU1K R...

Page 122: ...FICE 20421 84th Avenue South Kent WA 98032 Ship To Mr Mrs Ms First Last Street Address City State Zip Phone Day Night 4 Shipping information UPS delivery requires complete street address Please photoc...

Page 123: ...call 1 800 211 PANA 7262 When shipping the unit carefully pack include all accessories and send it prepaid adequately insured and preferably in the original carton If Lithium Ion batteries are shippe...

Page 124: ...rantor s Consumer Affairs Department at the addresses listed for the warrantor PARTS AND SERVICE WHICH ARE NOT COVERED BY THIS LIMITED WARRANTY ARE YOUR RESPONSIBILITY Customer Services Directory Unit...

Page 125: ...ments misadjustment of consumer controls improper maintenance improper batteries power line surge lightning damage modification introduction of sand humidity or liquids commercial use such as hotel of...

Page 126: ...mode 30 Digital zoom 47 Display 29 Dividing a scene to partially delete 72 DPOF setting 73 Dubbing 85 DVD burner 79 E Economy 29 Enhanced optical zoom 47 F Face framing 55 Fade 51 Focus 61 Format 76...

Page 127: ...d 23 SD Speed Class Rating 23 SDHC Memory Card 23 SDXC Memory Card 23 Self recording 36 Self timer recording 57 Shooting guide 44 Shutter sound 57 Shutter speed 60 Simultaneous recording 46 Slide show...

Page 128: ...a en la ilustraci n y presionarlo con fuerza hacia adentro todo lo posible Apriete el centro de la tarjeta SD y luego extr igala 3 Cerrar bien la tapa de la tarjeta SD C mo encender la unidad Encender...

Page 129: ...e el bot n de inicio parada de grabaci n para iniciar la grabaci n Cuando se comienza a grabar cambia a Grabaci n de pel culas 1 Cambiar el modo a y abrir la pantalla LCD 2 Pulsar el bot n C mo selecc...

Page 130: ...s Reproducci n de fotograf as 1 Cambie el modo a 2 Usar el joystick para seleccionar el cono de Selecci n de Modo de Reproducci n A luego presionar el centro del joystick 3 Seleccione IMAGEN luego pre...

Page 131: ...131 VQT3E42...

Page 132: ...rporation 2010 Panasonic Consumer Electronics Company Division of Panasonic Corporation of North America One Panasonic Way Secaucus NJ 07094 Panasonic Canada Inc 5770 Ambler Drive Mississauga Ontario...

Reviews: