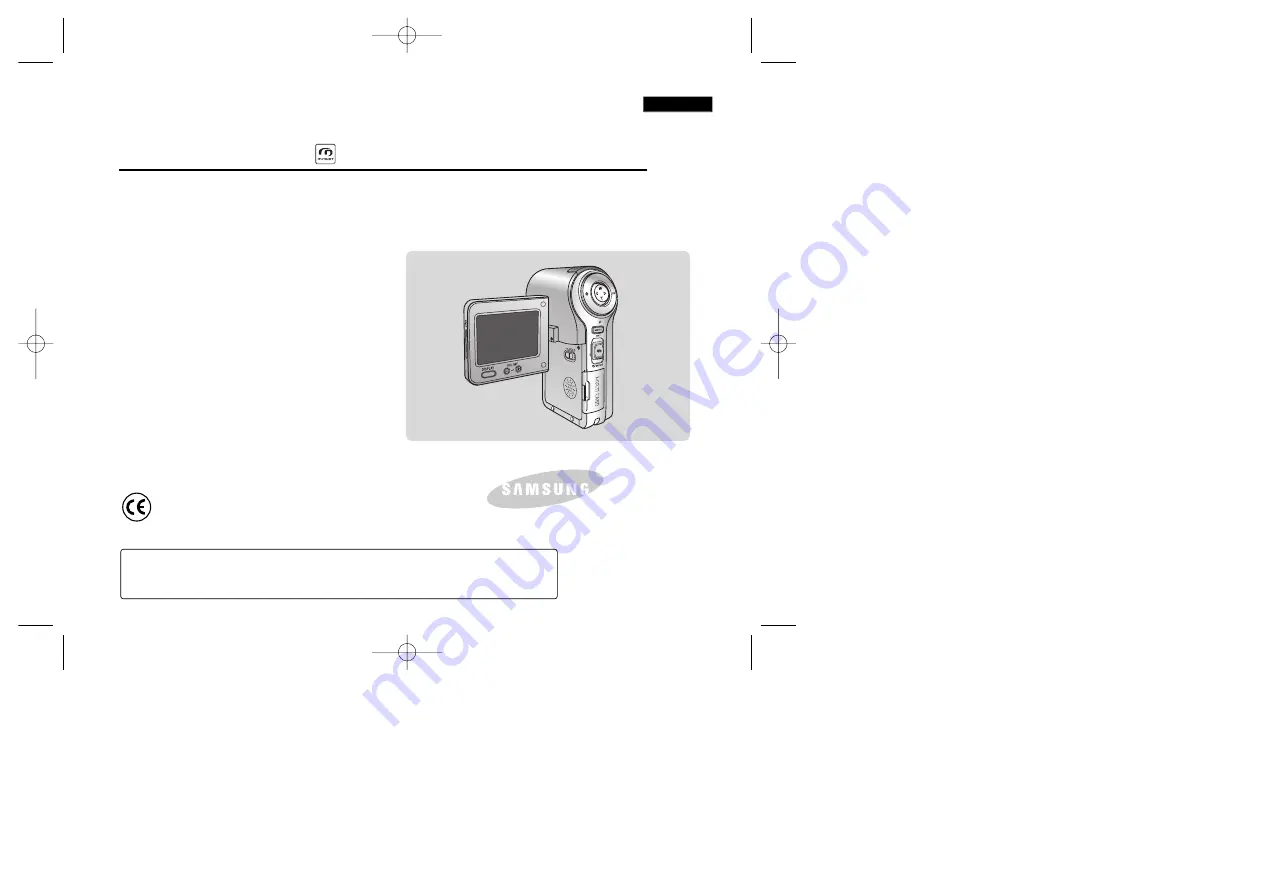
background image

Digital Camcorder

Owner’s Instruction Book

Before operating the unit, please read this
Instruction Book thoroughly, and retain it for
future reference. 

This product meets the intent of
Directive 89/336 CEE, 73/23 CEE, 93/68 CEE.

AF

Auto Focus

CCD

Charge Coupled Device

LCD

Liquid Crystal Display

VP-M2050S(B)/M2100S(B)/M2200S(B)

ENGLISH

Use only approved battery packs.
Otherwise there is a danger of overheating, fire or explosion.
Samsung is not responsible for problems occurring due to using unapproved batteries.

00906B VP-M2100 UK~007  9/28/05 9:22 PM  Page C

Summary of Contents for VP-M2100S

Page 1: ...ent of Directive 89 336 CEE 73 23 CEE 93 68 CEE AF Auto Focus CCD Charge Coupled Device LCD Liquid Crystal Display VP M2050S B M2100S B M2200S B ENGLISH Use only approved battery packs Otherwise there...

Page 2: ...AM 13 Rear Left View 14 Right Bottom View 15 LCD Display 16 OSD On Screen Display in Video Record Mode Video Play Mode 16 OSD On Screen Display in Photo Capture Mode Photo View Mode 17 OSD On Screen D...

Page 3: ...nd Out 37 Playing 38 Playing on the LCD Monitor 38 Selecting File Options 40 Deleting Video files 40 Locking Video files 41 Copying Video files 42 Setting Multi Selection 43 Setting the PB Option 44 S...

Page 4: ...hoto files 63 Setting DPOF Digital Print Order Format Function 64 Setting Multi Selection 65 Setting Various Functions 66 Setting the Photo file Size 66 Setting the Flash 67 Setting the Focus 68 Setti...

Page 5: ...ng Voice files 83 Copying Voice files 84 Deleting Files or Folders 85 Locking Files 86 Copying Files or Folders 87 Viewing File Information 88 Adjusting the LCD Monitor 90 Adjusting the LCD Brightness...

Page 6: ...USB connection to a computer 107 System Environment 107 Using PC Cam 108 Connecting the CAM to a Printer 109 Connecting the CAM with other Devices 111 Connecting the CAM to TV 111 Connecting the CAM t...

Page 7: ...122 Using the Built in Rechargeable Battery 122 Regarding the Battery 123 Using the CAM Abroad 124 Self Diagnosis Display 125 ENGLISH 7 7 Specifications 129 Index 131 Power Sources United Kingdom Only...

Page 8: ...ect sunlight on one s eyesight Particular care should be observed if photographing infants when the flash should be no less than 3 feet from your subject If the device is not working properly please c...

Page 9: ...on the rights of the Copyright owners and is contrary to copyright laws All the trade names and registered trademarks mentioned in this manual or other documentation provided with your Samsung produc...

Page 10: ...using the Battery Pack you need to fully charge it Do not drop the Battery Pack Dropping the Battery Pack may damage it Fully discharging a Lithium Polymer battery damages the internal cells The Batte...

Page 11: ...lacement parts specified by the manufacturer and having the same characteristics as the original part Unauthorized substitutions may result in fire electric shock or other hazards Correct Disposal of...

Page 12: ...look by adding various special effects USB Interface for Data Transfer You can transfer still images and video files or any other files to a PC using the USB interface PC Cam for multi entertaining Yo...

Page 13: ...der 12 Scart Adapter 13 Extended life Battery Pack ENGLISH 13 13 Getting to know your CAM Accessories Supplied with the CAM 3 Audio Video Cable 2 AC Power Adapter 1 Lithium Polymer Battery Pack 11 Tri...

Page 14: ...POWER MODE Selector 17 MULTI CARD slot ENGLISH 14 14 Name of Each Part 1 Built in MIC 6 Built in Speaker 7 Record Stop button 8 button Move backward RPS 9 W button Zoom out Multi play screen Move up...

Page 15: ...ejection button 6 USB Port 7 Strap Hook 8 Power Adapter Receptacle 9 Tripod Receptacle 3 Battery Pack 1 Lens 4 Earphones and AV jack 8 Power Adapter Receptacle 2 Flash 9 Tripod Receptacle 6 USB Port 5...

Page 16: ...dicator 4 Image counter Current image 5 Memory type indicator 6 Battery life indicator 7 Warning and note indicator 8 Image size indicator 9 Counter Elapsed time Recorded time 10 Operation indicator P...

Page 17: ...note indicator 1 Current display indicator 2 Mode indicator 3 Number of print 4 Printer indicator 5 Lock indicator 6 Image counter Current image 7 Scroll bar 8 Multi Selection indicator 9 Warning and...

Page 18: ...ng Rate Bit Rate 4 Elapsed time Remaining time 5 Operation indicator 6 Battery life indicator 7 Memory type indicator 1 Progress Bar 2 Volume indicator 3 Lock indicator 4 Elapsed time Recorded time MP...

Page 19: ...ery ejection button to eject the Battery Pack To eject the Battery Pack Clean the terminals to remove foreign substances before inserting the Battery Pack If the CAM will not be in use for a while rem...

Page 20: ...is used in temperatures below 32 F 0 C or left in temperatures above 104 F 40 C for a long period Do not put the Battery Pack near any heat sources fire or flames for example Do not disassemble proces...

Page 21: ...es and record the video file continuously when the EIS function is off If you close the LCD screen it switches off automatically The continuous recording times given in the table below are approximati...

Page 22: ...f you are charging the battery the colour of the charge indicator is orange The charge indicator flickers if the battery is abnormal Battery Level Indicator State Fully charged 40 60 used 60 80 used 8...

Page 23: ...apter into the outlet You can charge the Battery Pack when you use the CAM but it takes a long time relatively It is recommended you fully charge the Battery Pack before use You should only charge the...

Page 24: ...ge Green Orange Blink Power Video Voice Record On Off Off Charging state Charging Fully charged Error When the Battery Pack is inserted When the AC Power Adapter is unplugged LED Colour Red Green Powe...

Page 25: ...mode and press the OK button The system is automatically converted into the selected mode in two seconds even when the OK button is not pressed 5 Press the OK button to take pictures record hear musi...

Page 26: ...s no file when you press the OK button in Video Record Photo Capture the message as No Files appears Refer to page 39 for further details about the function button Notes Record Capture Mode Play Mode...

Page 27: ...imes It turns to the initial screen MP3 Voice Recorder File Browser System Settings mode Once The back light turns off Twice The LCD monitor turns off 3 times It turns to the initial screen If you pre...

Page 28: ...pressed 3 Move the W T button to select Display and press the button 4 Move the W T button to select LCD Brightness or LCD Colour and press the OK button 5 Move the W T button to select desired bright...

Page 29: ...SMOV AVI Video file SWAV WAV Voice file MP3 MP3 file MISC DPOF files are stored Do not change the file or folder name except Free You can freely change the file or folder name of Free Video files that...

Page 30: ...43min approx 86min X X X approx 10min approx 21min approx 43min approx 1min 20sec approx 3min approx 4min approx 11min approx 21min approx 43min 720i 720p approx 14min approx 29min approx 58min X X X...

Page 31: ...512MB VP M2050S B 1GB VP M2100S B 2GB VP M2200S B 32MB 64MB 128MB 256MB 512MB 1GB 32MB 64MB 128MB 256MB 512MB 1GB Quality 1600 1200 approx 756 approx 1513 approx 3027 approx 46 approx 93 approx 188 a...

Page 32: ...the W T button to select desired type and press the OK button You can select external or internal memory ENGLISH 32 32 Selecting the Memory Type Getting Started If you insert a Memory Card when the CA...

Page 33: ...ower off while recording playing erasing files or formatting a Memory Card Turn the power off before you insert or eject a Memory Card to avoid losing data Do not place a Memory Card near a strong ele...

Page 34: ...utton The system is automatically converted into the selected mode in two seconds even when the OK button is not pressed Menu Selection 1 Press the MENU button after selecting the desired mode 2 The m...

Page 35: ...ting the Video file Quality 46 Setting the Video file Record mode 47 Setting the External Input Output 48 Setting the Focus 49 Setting the EIS Electronic Image Stabilizer 50 Setting the White Balance...

Page 36: ...utton again to stop recording It stops recording and the CAM is ready again 4 Move POWER MODE Selector up to turn off the CAM Notes If you press it again within 1 second a new video file will not be c...

Page 37: ...ecord STBY 00 00 00 00 43 41 Video Record STBY BLC 00 00 00 00 43 41 F 720i Video Record ideo Record STBY Zoom In Zoom Out Notes Zooming in the CAM is X10 optical electro motion zoom and the quality a...

Page 38: ...n It moves to Video Play mode 3 Press the W button The Multi play screen appears 4 Move the W T button to find the video file you want to play Each time you move the W T button the frame moves vertica...

Page 39: ...A video codec is required to play the video files recorded on the CAM on a computer Install the software provided in the CD Bundle to have the CODEC automatically installed in the system If you do no...

Page 40: ...to select the video file you want to delete Each time you move the W T button the frame moves vertically and horizontally Each time you press the VOL button another page of 9 frames is displayed 5 Pr...

Page 41: ...you want to lock Each time you move the W T button the frame moves vertically and horizontally Each time you press the VOL button another page of 9 frames is displayed 5 Press the MENU button Move th...

Page 42: ...e moves vertically and horizontally Each time you press the VOL button another page of 9 frames is displayed 5 Press the MENU button Move the W T button to select Copy To and press the OK button If yo...

Page 43: ...the MENU button Move the W T button to select Multi Select and press the OK button Use VOL button to add selection VOL button to deselect the message appears Press OK button to close the confirm messa...

Page 44: ...e video file you want to set the function Each time you move the W T button the frame moves vertically and horizontally Each time you press the VOL button another page of 9 frames is displayed 5 Press...

Page 45: ...d press the OK button 720 Select 720 576 pixel 352 Select 352 288 pixel 5 Press the MENU button to finish setting The icon of selected function is displayed AF Line In Out Out Record Mode TV Quality F...

Page 46: ...button Super Fine SF Select highest quality Fine F Select high quality Normal N Select normal quality 5 Press the MENU button to finish setting The icon of selected function is displayed AF Line In Ou...

Page 47: ...elect Video mode or Previous mode as the start up mode in System Settings Refer to page 98 2 Press the MENU button The Video Settings screen appears 3 Move the W T button to select Record Mode and pre...

Page 48: ...ss the OK button Out Select this when recording or playing back the contents of the CAM into an external device In Select this when recording the contents of an external device into the CAM 5 Press th...

Page 49: ...ed function is displayed If you select the AF no icon is displayed Notes If you select button in the menu the previous menu appears Changes in the set up made in the Photo mode are all retained in the...

Page 50: ...n appears 3 Move the W T button to select EIS and press the button 4 Move the W T button to select the desired setting and press the OK button On Set the EIS function Off Cancel the EIS function 5 Pre...

Page 51: ...tomatically Hold Record with first selected colour without adjusting colour Outdoor Record with the balanced light Natural light Indoor Record with the balanced light Glow lamp or light in the studio...

Page 52: ...suitable for sports events recording outside in the car Spotlight Compensates for a subject that appears too bright under strong direct light such as spotlight It is suitable for concert and school p...

Page 53: ...he button 4 Move the W T button to select desired setting and press the OK button Off Cancel the BLC function On Set the BLC function 5 Press the MENU button to finish setting is displayed If you sele...

Page 54: ...photograph Negative Reverses the colours creating the look of a negative Mirror This mode cuts the picture in half using a Mirror effect B W Changes the images into Black and White 5 Press the MENU b...

Page 55: ...ct Digital Zoom and press the button 4 Move the W T button to select desired setting and press the OK button Off Cancel the Digital Zoom On Set the Digital Zoom X100 5 Press the MENU button to finish...

Page 56: ...e in System Settings Refer to page 98 2 Press the MENU button The Video Settings screen appears 3 Move the W T button to select B L Auto Ctl and press the button 4 Move the W T button to select the de...

Page 57: ...2 Copying Photo files 63 Setting DPOF Digital Print Order Format Function 64 Setting Multi Selection 65 Setting Various Functions 66 Setting the Photo file Size 66 Setting the Flash 67 Setting the Foc...

Page 58: ...n two seconds even when the OK button is not pressed 3 Press Record Stop button to take pictures The message capturing appears on the screen and then it disappears 00 00 00 00 43 41 F 720i Photo STBY...

Page 59: ...hoto Capture screen appears 3 Press the Record Stop button to take pictures 1600 Photo Capture 1600 Photo Capture 1600 Photo Capture Zoom In Zoom Out Notes Zooming in the CAM is X10 optical electro mo...

Page 60: ...not pressed The Photo Capture screen appears 3 Press the OK button It moves to Photo View mode 4 Press the W button The Multi play screen appears 5 Move the W T button to find the photo you want to vi...

Page 61: ...ars 5 Move the W T button to select the photo file you want to delete Each time you move the W T button the frame moves vertically and horizontally Each time you move the VOL button another page of 9...

Page 62: ...K button It moves to Photo View mode 4 Press the W button The Multi play screen appears 5 Move the W T button to select the photo file you want to lock 6 Press the MENU button Move W T button to selec...

Page 63: ...ars 3 Press the OK button It moves to Photo View mode 4 Press the W button The Multi play screen appears 5 Move the W T button to select the photo file you want to copy 6 Press the MENU button Move W...

Page 64: ...e 4 Press the W button The Multi play screen appears 5 Move the W T button to select the photo file you want to print 6 Press the MENU button Move W T button to select DPOF and press the OK button You...

Page 65: ...ulti play screen appears 5 Press the MENU button Move W T button to select Multi Select and press the OK button Use VOL button to add selection VOL button to deselect the message appears Press OK butt...

Page 66: ...file sizes such as 2400X1800 1600x1200 1024x768 and 640x480 6 Press the MENU button to finish setting The selected photo file size is displayed on the LCD monitor ENGLISH 66 66 3 5 6 Photo Mode Settin...

Page 67: ...utton 5 Move the W T button to select the desired setting and press the OK button Auto Set the flash automatically On Turn on the flash Off Turn off the flash 6 Press the MENU button to finish setting...

Page 68: ...e MENU button to finish setting The icon of selected function is displayed If you select AF no icon is displayed System White Balance Auto Auto Size Size White Balance Auto BLC Off BLC Off Focus AF Ph...

Page 69: ...ust the colour depending on the condition automatically Hold Record with first selected colour without adjusting colour Outdoor Record with the balanced light Natural light Indoor Record with the bala...

Page 70: ...e POWER MODE Selector down to turn on the CAM The Video Record screen appears 2 Move POWER MODE Selector down again to select Photo mode and press the OK button The system is automatically converted i...

Page 71: ...mode in two seconds even when the OK button is not pressed The Photo Capture screen appears 3 Press the MENU button 4 Move the W T button to select B L Auto Ctl and press the button 5 Move the W T but...

Page 72: ...s 76 Locking Music files 77 Copying Music files 78 Setting Random play 79 Voice Recorder Mode Recording 80 Recording Voice 80 Playing 81 Playing Voice files 81 Selecting File Options 82 Deleting Voice...

Page 73: ...with the USB cable Refer to page 106 Your computer recognizes this device and the symbol for removable drive will appear in My Computer 2 Move POWER MODE Selector down turn on the CAM The USB Mode sc...

Page 74: ...o hear and press the OK button The selected music is played 5 Press the OK button again to stop hearing music Each time you press the OK button play or pause is selected repeatedly black or white mp3...

Page 75: ...t Repeat and press the OK button 6 Move the W T button to select desired setting and press the OK button No Cancel the Repeat Play function One One file is repeated All All files are repeated 7 Press...

Page 76: ...ton Move the W T button to select Delete and press the OK button 5 Move the W T button to select the followings and press the OK button Selected The selected music file is deleted All All music files...

Page 77: ...MENU button Move the W T button to select Lock and press the OK button 5 Move the W T button to select the followings and press the OK button Selected The selected music file is locked All All music...

Page 78: ...selected the Storage type External the file is copied to Internal and vice versa 5 Move the W T button to select the followings and press the OK button Selected Copy the selected music file All Copy a...

Page 79: ...m and press the OK button 4 Move the W T button to select the desired setting and press the OK button Yes Set the Random Play Function No Cancel the Random Play Function MP3 Mode Selecting File Option...

Page 80: ...into the selected mode in two seconds even when the OK button is not pressed The Voice Record screen appears 3 Press the Record Stop button to record voice The elapsed time and REC is displayed It st...

Page 81: ...K button The voice file list appears 4 Move the W T button to select a voice file you want to play 5 Press the OK button to play the recorded voice Press the OK button to pause playing 00 00 00 00 43...

Page 82: ...and press the OK button 6 Move the W T button to select the followings and press the OK button Selected The selected voice file is deleted All All voice files are deleted Cancel Cancel deleting voice...

Page 83: ...the W T button to select the followings and press the OK button Selected The selected voice file is locked All All voice files are locked Cancel Cancel locking voice files 1 2005 01 01 12 22 00 2 200...

Page 84: ...ed the Storage type External the file is copied to Internal and vice versa 6 Move the W T button to select the followings and press the OK button Selected Copy the selected voice file All Copy all voi...

Page 85: ...e selected folder Perform these steps repeatedly until the file you want to delete appears 4 Press the MENU button Move the W T button to select Delete and press the OK button 5 Move the W T button to...

Page 86: ...ck appears 4 Press the MENU button Move the W T button to select Lock and press the OK button 5 Move the W T button to select the followings Press the OK button Selected The selected file is locked Al...

Page 87: ...ss the MENU button Move the W T button to select Copy To and press the OK button If you selected the Storage type External the file is copied to Internal and vice versa 5 Move the W T button to select...

Page 88: ...screen appears 3 Move the W T button to select the file you want to see 4 Press the OK button Perform these steps repeatedly until the file you want to see its file information appears The screen with...

Page 89: ...Function 97 Setting Start up Mode 98 Setting the File No Function 99 Setting the Beep Sound 100 Viewing Version Information 101 Setting Memory 102 Selecting the Storage Type 102 Formatting the Memory...

Page 90: ...automatically converted into the selected mode in two seconds even when the OK button is not pressed The System Settings menu appears 3 Move the W T button to select Display and press the button 4 Mo...

Page 91: ...utton to select LCD Colour and press the button 5 Move the W T button to select the colour you want and press the OK button You can adjust value for the LCD colour between 0 100 Notes If you select bu...

Page 92: ...rmat 12 Hour 12 Hour Back Back Set Date AM 2005 01 01 Set Date The built in clock creates the time stamp You can adjust the time you use 1 Move POWER MODE Selector down to turn on the CAM The Video Re...

Page 93: ...setting and press the button to move to the next setting Press the OK button to confirm selection Settings Date Time Settings Date Time System Date Format Date Format Set Time Set Time 12 00 00 12 00...

Page 94: ...th Date DD MM YY The date is displayed in order as Date Month Year MM DD YY The date is displayed in order as Month Date Year Memory System System System Memory Language Language English English Engli...

Page 95: ...s displayed as the unit of 12 hours 24 Hour The time is displayed as the unit of 24 hours Memory System System System Memory Language Language English English English System Settings System Settings D...

Page 96: ...ut off function Memory System Memory Language Language English English English System Settings System Settings Date Time Date Time Display Display System System Auto Shut off 5 Minutes File No File No...

Page 97: ...unction now 3 4 5 Setting the CAM Setting the System Setting the Demonstration Function Memory System Memory Language Language English English English System Settings System Settings Date Time Date Ti...

Page 98: ...ou used last Setting the CAM Setting the System Memory System Memory Language Language English English English System Settings System Settings Date Time Date Time Display Display System Auto Shut off...

Page 99: ...last file number assigned on the previous Memory Card Setting the CAM Setting the System 3 4 5 Setting the File No Function Auto Shut off Auto Shut off 5 Minutes 5 Minutes File No Off Off Start up Sta...

Page 100: ...f Turn the beep sound off Memory System Memory Language Language English English English System Settings System Settings Date Time Date Time Display Display System Demonstration Demonstration Off Off...

Page 101: ...to finish viewing version information If you select Close in the screen the screen disappears 3 4 5 Memory System Memory Language Language English English English System Settings System Settings Date...

Page 102: ...SD MMC Memory Stick or Memory Stick Pro 3 4 5 Selecting the Storage Type Setting the CAM Setting Memory System Date Time Date Time Language Language English English English Display System Settings Sy...

Page 103: ...ect External the message is displayed to confirm 6 Press the OK button to format Select Cancel to cancel formatting System Date Time Date Time Language Language English English English Display System...

Page 104: ...o select Memory Space Usable memory space and total memory space are displayed System Date Time Date Time Language Language English English English Display System Settings System Settings System Displ...

Page 105: ...own again to select System Settings mode and press the OK button The system is automatically converted into the selected mode in two seconds even when the OK button is not pressed The System Settings...

Page 106: ...PictBridge Mass Storage PC Cam Notes If you disconnect the USB cable from the PC or the CAM during the data transfer the data transfer will stop and the data may be damaged If you connect the USB cabl...

Page 107: ...low it may take long time to edit the video file Intel Pentium III or Pentium 4 is a trademark of the Intel Corporation Mac Macintosh and Mac OS are trademarks of Apple Computer Inc Windows is a regis...

Page 108: ...AM can be used as a PC Camera for programs such as Windows Messenger ENGLISH 108 108 Setting the CAM Using USB Mode Using PC Cam Notes The CAM can be used as a PC Camera for programs such as Windows M...

Page 109: ...Copies and press the button 7 Move the W T button to select desired number and press the OK button You can select the number of copy from 1 to 99 8 Move the W T button to select Print and press the O...

Page 110: ...unscramble contents from other digital devices 114 Connecting the CAM to a PC using the USB cable 115 Installing Programs 116 Installing DV Media Pro 1 0 116 USB Interface for Data Transfer 117 Printi...

Page 111: ...s the OK button to play the video file in Video Record mode 5 Move W T button to find the video file you want to play 6 Press the OK button to play the video file Notes You can stop and play video fil...

Page 112: ...2 Connect the Audio Video cable to the external input terminal of your VCR set by matching the colours of the terminals 3 Connect the Audio Video cable to the Video line Output and TV line Input 4 Se...

Page 113: ...ove the W T button to select the video file you want to copy and press the OK button 6 Press the Record Stop button on the VCR to start recording 7 Press the OK button on the CAM to finish copying Not...

Page 114: ...ve the W T button to select the desired record mode and press the OK button 6 Move the W T button to select Line In Out and press the button 7 Move the W T button to select In and press the OK button...

Page 115: ...ous Information Connecting the CAM with other Devices Connecting the CAM to a PC using the USB cable Notes If the CAM does not recognise the USB device when the USB cable is connected to USB Port on t...

Page 116: ...t button on the left bottom of the PC screen and select Run If the window of Run appears enter D autorun exe in case the CD ROM driver is set to D Drive and press the Enter key 3 Click DV Driver on th...

Page 117: ...ct the provided USB cable to the USB port of the CAM 3 Move the W T button to select PC Cam and press the OK button 4 Install and run the Ulead VIDEO STUDIO program provided along with the system The...

Page 118: ...u connect the USB cable to a PC using a USB HUB or with other device at the same time it might cause conflict and may not work properly If this occurs remove all other devices and try the connection a...

Page 119: ...from 1 to 99 6 Move the W T button switch to select Print and press the OK button Back USB Mode PictBridge Mass Storage PC Cam Print Next Photo Previous Photo Date Off Copies 5 PictBridge 100 0024 Pri...

Page 120: ...copies Notes For further details about printing photos refer to the User s manual of the printer Printing may not be performed depending on types of printers In this case download JPEG file to the PC...

Page 121: ...Battery consumption may vary depending on the condition of use Recording with many starts and stops frequent zooming and recording in low temperatures will shorten actual recording times Dispose of us...

Page 122: ...aning should be done only after the Battery Pack has been removed and other power sources have been disconnected Using the Built in Rechargeable Battery The CAM incorporates a rechargeable lithium cel...

Page 123: ...the Battery Pack to water The Battery Pack is not water resistant Keep the battery out of reach of children If it is swallowed seek medical assistance immediately Wipe the battery with a clean dry cl...

Page 124: ...to copy it to a video cassette recorder VCR the television set or the VCR must comply with PAL compatible and have the appropriate Audio Video ports Otherwise you may need to use a separate Video Form...

Page 125: ...ormat the Memory Card Failed to write Failed to read The format is not supported Memory Card is protected to write The video file is corrupted Not enough free space Corrupted file Paper error Ink erro...

Page 126: ...nt devices Light is forced to cancel Light is not available for recording The Photo Mode is selected To save power consumption the LCD monitor and CAM s power turns off if there is no button operation...

Page 127: ...igital Zoom Off On B L Auto Ctl Off On BLC Off On B L Auto Ctl Off On Photo MP3 White Balance Auto Hold Outdoor Indoor Random Yes No Repeat No One All Lock Selected All Cancel Copy To Selected All Can...

Page 128: ...o 5 Minutes Off Demonstration Off 5 Minutes Play Now Start up Video Mode Previous Mode File No Reset Series Beep Sound On Off Close 4 Memory 5 Language Storage Type Internal External Format Internal E...

Page 129: ...xif 2 2 Stereo Playing WAVE file record play 8KHz Sampling 16 bit Stereo Internal memory Memory Stick Memory Stick Pro SD MMC Refer to page 30 1 3 6 inch CCD 2110K x10 Optical x100 Digital f 4 1 41mm...

Page 130: ...Output Operating Temperature Dimensions Weight AC 100 240V 50 60Hz DC 4 8V 1 0A 0 C 40 C 32 F 104 F 70mm x 30mm x 42mm 104g Including DC cable These technical specifications and design may be changed...

Page 131: ...tal Zoom 55 DISPLAY button 27 DPOF 64 120 DV Media Pro 1 0 116 E Effect 54 EIS 50 F File Browser 85 88 Focus 49 68 Format 103 Function button 26 Flash 67 L Language 105 LCD Brightness 90 LCD Colour 91...

Page 132: ...ogram AE 52 R Random Play 79 Repeat Play 75 Reset 23 S Start up Mode 98 Storage type 102 T Time 92 Troubleshooting 125 126 U USB Cable 13 USB mode 106 109 V Version Information 101 W White Balance 51...

Page 133: ...d Kingdom Only The plug used on this product is a unitary transformer plug and is designed specifically for this camcorder it must never be replaced or removed with any other type of plug 00906B VP M2...

Page 134: ...considered to be defective in materials nor workmanship by reason that it requires adaptation in order to conform to national or local technical or safety standards in force in any Country other than...

Page 135: ...to timolovgio hv h apovdeixh lianikhv pwvlhsh pavnw sthn opoiva o seiriakov ariqmov tou proiovnto prevpei na eivnai eukrinhv 2 H upocrevwsh th SAMSUNG aforav movno thn episkeuhv tou proiovnto 3 H epi...

Page 136: ...pou antivkeintai sti tecnikev prodiagrafev asfaleiva pou iscuvoun katav thn crhvsh tou proiovnto B Episkeuhv pou evgine apov mh exousiodothmevna sunergeiva service G Atuchvmata qeomhnive hv opoiadhvpo...

Page 137: ...ENGLISH Samsung Electronics Internet Home Page United Kingdom www samsung co uk AD68 00906B THE CAM IS MANUFACTURED BY 00906B VP M2100 UK 007 9 28 05 9 22 PM Page B...

Reviews: