background image

Thank you for choosing one of our products. To get the most out of your oven we recommend that you:
• Read the notes in this manual carefully: they contain important instructions on how to install, use and service this oven safely.
• Keep this booklet in a safe place for easy, future reference.

When the oven is first switched on it may give out acrid smelling fumes. This is because the bonding agent for insulating panels around
the oven has been heated up for the first time.
This is a completely normal, if it does occur you merely have to wait for the fumes to clear before putting the food into the oven.
An oven by its very nature becomes very hot. Especially the glass of the oven door.
Do not allow children to go near the oven when it is hot, especially when the grill is on.
A specially designed protector shield (some models only) which reduces considerably the surface temperature of the oven door can
be obtained through our service organization. This shield is recommended for households with young children.

GENERAL WARNINGS

To locate the fixing holes, open the oven door and look inside.
To allow adequate ventilation, the measurements and distances
indicated in the diagram on last page must be adhered to when
fixing the oven.
Note: For ovens that are combined with a hob unit the instructions
contained in the manual for the hob unit must be followed.

  IMPORTANT

If the oven is to work properly, the kitchen housing must be suitable.
The panels of the kitchen unit that are next to the oven must be
made of a heat resistant material. Ensure that the glues of units
made of veneered wood can withstand temperatures of at least
120 

°

C. Plastics or glues that cannot withstand such temperatures

will melt and deform the unit. Once the oven has been lodged
inside the unit, the electrical parts must be completely insulated.
This is a legal safety requirement. All guards must be firmly fixed
into place so that it is impossible to remove them without using
special tools.

Remove the back of the kitchen unit to ensure an adequate
current of air circulates around the oven. The hob must have
a rear gap of at least 45 mm.

  CONNECTING TO THE POWER SUPPLY

Plug into the power supply. Ensure first that there is a third contact
that acts as earthing for the oven. 

The oven must be properly

earthed.

If the model of oven is not fitted with a plug, fit a standard plug
to the power cable. It must be able to bear the power supply
indicated on the specifications plate. The earthing cable is yellow-
green. The plug must be fitted by a properly qualified person.
If the socket and the plug are incompatible the socket must be
changed by a properly qualified person. A properly qualified person
must also ensure that the power cables can carry the current
required to operate the oven.
An ON/OFF switch with a minimum distance of 3 mm between
contacts may also be connected to the power supply. The
connections must take account of the current supplied and must
comply with current legal requirements. The yellow-green earthing
cable must not be governed by the ON/OFF switch. The socket
or the ON/OFF switch used for connecting to the power supply
must be easily accessible when the oven has been installed.
Important: During installation, position the power cable in such a
way that it will not be subjected to temperatures of above 50

°

C

at any point.
The oven complies with safety standards set by the regulatory
bodies. The oven is safe to use only if it has been adequately
earthed in compliance with current legal requirements on wiring
safety. You must ensure that the oven has been adequately
earthed.

The manufacturers cannot be held responsible for any harm
or injury to persons, animals or belongings caused by failure
to properly earth the oven.

WARNING: the voltage and the supply frequency are showed
on the rating plate (fig. on last page).

The cabling and wiring system must be able to bear the maximum
electric power required by the oven. This is indicated on the
specifications plate.
If you are in any doubt at all, use the services of a professionally
qualified person.

  DECLARATION OF COMPLIANCE

The parts of this appliance that may come into contact with
foodstuffs comply with the provisions of EEC Directive 89/109.


This appliances complies with Directives 89/336/EEC,
73/23/EEC and following changes.
When you have unpacked the oven, make sure that it has not
been damaged in any way. If you have any doubts at all, do 
not use it: contact a professionally qualified person.
Keep packing materials such as plastic bags, polystyrene, or
nails out of the reach of children because they are dangerous
for children.

  SAFETY HINTS

The oven must be used only for the purpose for which it was
designed: it must only be used for cooking food.

Any other use, e.g. as a form of heating, is an improper use 
of the oven and is therefore dangerous.
The manufacturers cannot be held responsible for any damage
caused by improper, incorrect or unreasonable use.

When using any electrical appliance you must follow a
few basic rules.

–  Do not pull on the power cable to remove the plug from the 

socket.

–  Do not touch the oven with wet or damp hands or feet.
–  Do not use the oven unless you are wearing something on

your feet.

–  Do not allow children or irresponsible people to use the oven

unless they are carefully supervised.

–  It is not generally a good idea to use adapters, multiple sockets

for several plugs and cable extensions.

–  If the oven breaks down or develops a fault switch it off at the

mains and do not touch it.
If the cable is at all damaged it must be replaced promptly. 
When replacing the cable, follow these instructions.
Remove the power cable and replace it with one of the HO5RR-
F, H05VV-F, H05V2V2-F type. The cable must be able to bear
the electrical current required by the oven. Cable replacement
must be carried out by properly qualified technicians.
The earthing cable (yellow-green) must be 10 mm longer than
the power cable.
Use only an approved service centre for repairs and ensure 
that only original parts are used. If the above instructions are
not adhered to the manufacturers cannot guarantee the safety
of the oven.

  INSTALLATION

Installation is the customer’s responsibility. The manufacturers
have no obligation to carry this out. If the assistance of the
manufacturer is required to rectify faults arising from incorrect
installation, this assistance is not covered by the guarantee.
The installation instructions for professionally qualified personnel
must be followed. Incorrect installation may cause harm or injury
to people, animals or belongings. The manufacturer cannot be
held responsible for such harm or injury.

  FITTING THE OVEN INTO THE KITCHEN UNIT

Fit the oven into the space provided in the kitchen unit; it may be
fitted underneath a work top or into an upright cupboard.
Fix the oven in position by screwing into place, using the four
fixing holes in the frame.

8 GB

Summary of Contents for F242-3X

Page 1: ...USO GB OVENS USER INSTRUCTIONS ES HORNOS EMPOTRABLES INSTRUCCIONES DE USO NL OVEN GEBRUIKSAANWIJZING DE EINBAUBACKÖFEN BEDIENUNGSANLEITUNG FR FOURS ENCASTRABLES NOTICE D EMPLOI ET D INSTALLATION PT FORNOS MANUAL DE INSTRUÇÕES DE UTILIZAÇÃO ...

Page 2: ...essionalmente qualificato Una errata installazione può causare danni a persone animali o cose nei confronti dei quali il costruttore non può essere considerato responsabile INSERIMENTO DEL MOBILE Inserire l apparecchio nel vano del mobile sottopiano o in colonna Il fissaggio si esegue con 4 viti attraverso i fori della cornice visibili aprendo la porta Per consentire la migliore aerazione del mobi...

Page 3: ...del forno vuoto impostando la manopola forno in corrispondenza della massima temperatura Non usare prodotti abrasivi pagliette metalliche oggetti appuntiti panni ruvidi prodotti chimici o detersivi che possono danneggiare irrimediabilmente lo smalto Si consiglia inoltre di utilizzare pentole a bordi alti nel caso di cotture di vivande particolarmente grasse arrosti ecc e di usare la leccarda quand...

Page 4: ...e i tasti o per regolare la durata Lasciare i tasti Selezionare la funzione di cottura con la manopo la commutatore Al termine della durata impostata il forno si spegne da solo se deve essere fermato prima si deve portare la manopola commutatore in posi zione O oppure portare a 0 00 la durata della cot tura tasti TIMER e o Permette di impostare la durata della cottura del cibo inserito nel forno P...

Page 5: ... in senso orario fino a fare coincidere il tempo selezionato nel quadrante E L inizio cottura parte im mediatamente e termina automaticamente allo sca dere del tempo selezionato Durata max cottura 180 minuti 3 ore Al termine della durata impostata il forno si spe gne automaticamente e viene segnalata da una suoneria che si arresta dopo 3 minuti Per fermare prima la fun zione impostata e o la suo n...

Page 6: ... di Spagna torte Margherita pasta sfoglia ecc Grill ventilato a porta chiusa L aria riscaldata dalla resistenza grill viene aspirata dal ventilatore che la riversa sulle vivande alla temperatura desiderata tra 50 e 200 C Il grill ventilato sostituisce egregiamente il girarrosto e garantisce ottimi risultati con pollame salsicce e carni rosse anche in quantità rilevante Suola ventilata Adatta per c...

Page 7: ...scaldate per 15 min ungere la teglia del forno disporre le 4 focacce oliate e salate prima di infornare lascire lievitare a temperatura ambiente per almeno 2 ore Focaccia n 4 gr 200 di pasta cad 2 200 2 180 25 30 20 25 Carne Tutte le carni possono essere cotte in recipiente con bordo basso o bordo alto È consigliabile coprire il recipiente a bordo basso con un coperchio per evitare di sporcare il ...

Page 8: ...marino in teglia Pirex Carote 800 gr 1 80 85 220 1 70 80 200 Tagliate le carote a fettine copritele e cuocetele in teglia Pirex Frutta Mele intere Kg 1 1 45 55 220 2 45 55 200 Cuocere la frutta in teglia di Pirex o ceramica non coperta Lasciare raffreddare in forno Come sopra Pere Kg 1 1 45 55 220 2 45 55 200 Come sopra Pesche Kg 1 1 45 55 220 2 45 55 200 Cottura a grill La cottura con il grill de...

Page 9: ...t The oven complies with safety standards set by the regulatory bodies The oven is safe to use only if it has been adequately earthed in compliance with current legal requirements on wiring safety You must ensure that the oven has been adequately earthed The manufacturers cannot be held responsible for any harm or injury to persons animals or belongings caused by failure to properly earth the oven...

Page 10: ... and warming compartment door must be cleaned when they are cold Damage that occurs to them because this rule was not adhered to are not covered by the guarantee To replace the interior light switch off the mains power supply and unscrew bulb Replace with an identical bulb that can withstand very high temperatures SELF CLEANING OVEN WITH CATALYTIC Special self cleaning panels covered in a micro po...

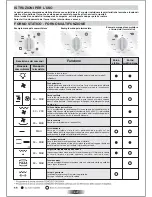
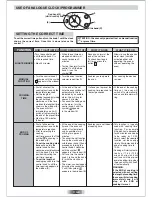
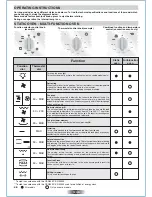
Page 11: ...osition O Enables you to operate the oven COOKING TIME Press and hold the TIMER button Press the buttons or to set the lenght of coo king required Release all buttons Set the cooking function with the oven function selector When the time is elapsed the oven will switch off automatically Should you wish to stop cooking earlier either turn the function selector to 0 or set time to 0 00 TIMER and but...

Page 12: ...rn the control 1 until the Blue hand C is on the symbol Turn the control knob 1 until the blue hand C is on the required time Max 55 minutes MINUTE MINDER Allows to use the oven as alarm clock could be activated either with operating the oven or with out operating the oven For cooking the desired recipes MANUAL FUNCTION Turn the control knob 2 clockwise until the symbol appears in the window E Tur...

Page 13: ...astes and smells It cooks very gently and is ideal for sponge cakes pastries etc Door closed fan grill The air is heated by the grill element and the fan blows the air onto the food at the required temperature This ranges from 50 C to 200 C The grill fan is an excellent alternative to roasting on the spit It is ideal for roasting even large quantities of poultry sausages and red meats Fan plus low...

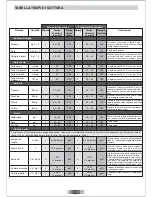
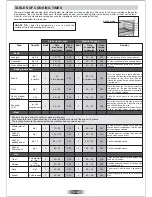
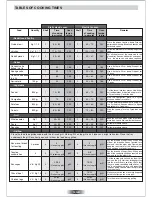
Page 14: ...20 2 200 30 35 25 30 Focaccia n 4 gr 200 of dough each 2 200 2 180 25 30 20 25 Meat All meats can be roasted in shallow or deep roasting trays It is advisable to cover the shallow trays to avoid splattering the sides of the oven with grease The roasting times are the same whether the meat has been covered up or not Put the meat into a deep Pyrex dish and season with salt and pepper turn the meat h...

Page 15: ...h the infra red grill Warning When the grill is on it takes on a bright red colour Place the tray underneath the grill to collect juices and fat from the food being grilled Squares of bread for toasting 4 pieces 4 5 5 to heat up grill grill 4 5 10 to heat up grill grill Lay the bread on the grill tray When one side of the bread has been toasted turn over and toast the other side Remember keep the ...

Page 16: ...s de los cuales el fabricante no puede ser considerado responsable INTRODUCCIÓN DEL MUEBLE Introduzca el aparato en el hueco del mueble bajo encimera o en columna El horno se fija introduciendo 4 tornillos en los agujeros del marco visibles al abrir la puerta Con el objeto de permitir una mejor ventilación del mueble empotre el horno respetando las medidas y las distancias indicadas en la última p...

Page 17: ...ación de esta regla elemental no están cubiertos por la garantia La bombilla del horno puede ser sustituida desconectando eléctricamente el aparato y destornillando la ampolla que la encierta sustituyendo la bombilla por una análoga resistente a altas temperaturas HORNO AUTOLIMPIANTE CATALÍTICO Los paneles especiales autolimpiantes recubiertos por un esmalte con estructura microporosa ofrecidos co...

Page 18: ...a con una señal acústica la señal acústica se para sola para inter rumpirlo inmediatamente pulse la tecla Emite una señal acústica finalizado el tiempo establecido Para visualizar el tiempo restante pulse la tecla Efectúe las cocciones deseadas FUNCIÓN MANUAL Pulse la tecla Seleccione la función de cocción con el mando selector de función Situer el mando selector de función en la posición O Permit...

Page 19: ...ntrario a las agujas del reloj hasta posicionar la aguja C en el tiempo deseado 55 minutos como máximo FUNCIÓN MODO DE ACTIVACIÓN MODO DE DESCONEXIÓN FUNCIONAMIENTO FINALIDAD MINUTERO Permite utilizar el progra mador del horno a modo de alarma sin necesidad de poner o dejar el horno en funcionamiento Emite una señal acústica finalizado el tiempo establecido Efectúe las cocciones deseadas FUNCIÓN M...

Page 20: ...r sabores y olores Cocción delicada indicada para plum cakes tarta Margarita hojaldre etc Grill ventilado con puerta cerrada El aire calentado por la resistencia grill es aspirado por el ventilador que lo vuelve a ampujar sobre los alimentos a la temperatura deseada entre 50 y 200 C El grill ventilado sustituye perfectamente el asador y garantiza óptimos resultados con pollo salchichas y carnes ro...

Page 21: ...0 25 Carne Todas las carnes pueden ser cocidas en recipientes de borde bajo o borde alto Es aconsejable cubrir el recipiente de borde bajo con una tapa para evitar ensuciar el horno con salpicaduras del condimento Las carnes cubiertas resultan más blandas y jugosas mientras que las descubiertas resultan más crujientes Los tiempos indicados valen para cocciones con recipiente cubierto o descubierto...

Page 22: ...a no cubierta Dejar enfriar en horno Como arriba Peras Kg 1 1 45 55 220 2 45 55 200 Como arriba Molocotones Kg 1 1 45 55 220 2 45 55 200 Cocción al grill La cocción al grill debe ser realizada colocando el alimento bajo el grill eléctrico a rayos infrarrojos Atención durante el funcionamiento el grill está al rojo vivo La grasera debe ser colocada bajo la rejilla para recoger las salsas Pan de mol...

Page 23: ...et onder de garantie De oven dient door een technisch bevoegd persoon geïnstalleerd te worden volgens de installatie instructies De fabrikant is niet verantwoordelijk voor eventuele persoonlijke of materiële schade ten gevolge van een onjuiste installatie INBOUW VAN DE OVEN Plaats de oven in de daarvoor bestemde opening onder het aanrecht of in kolomopstelling De oven wordt vast gezet door de vier...

Page 24: ... Schade aan de glazen delen vallen niet onder de garantie indien u het bovenstaande niet in acht neemt Om het binnenlichtje te vervangen dient u de stekker uit het stopcontact te halen of de elektriciteit af te sluiten en de oude lamp te vervangen door een soortgelijke nieuwe lamp ZELFREINIGENDE OVENWANDEN Als extra optie zijn voor alle modellen speciale zelfreinigende ovenwanden met een micro por...

Page 25: ...an de gewenste gerechten HANDMATIGE BEDIENING Druk op de knop Stel de kookfunctie in met de selectieknop voor de ovenfunctie Draai de selectieknop voor de ovenfunctie naar positie O Schakelt de ovenbediening in BAKTIJD Houd de TIMER knop ingedrukt Druk op de knoppen om de vereiste kooktijd in te stellen Laat alle knoppen los Stel de kookfunctie in met de selectieknop voor de ovenfunctie Wanneer de...

Page 26: ...Draai de knop tegen de klok in totdat de blauwe wijzer C op de vereiste tijdsduur staat max 55 minuten FUNCTIE HOE TE ACTIVEREN HOEUITTESCHAKELEN WERKING DOEL WEKKER Hiermee kunt u de oven als alarmklok gebruiken zelfs indien u de oven niet gebruikt Activeert een alarm nadat de ingestelde tijd verstreken is Voor het maken van de gewenste gerechten HANDMATIGE BEDIENING Draai knop 2 tegen de klok in...

Page 27: ... luchtjes en smaken Het is zeer geschikt voor delicate gerechten cake taarten bladerdeeg enz Geventileerd grillen met gesloten deur De door het verwarmingselement van de grill verhitte lucht wordt gecir culeerd door de ventilator die deze verspreid over het voedsel bij tempe raturen van 50 tot 200 De geventileerde grill vervangt het spit en zorgt zelfs bij grote hoeveelheden voor optimale resultat...

Page 28: ... Niveau 20 Vlees Roast beef 1 5 kg 190 1 Niveau 90 Kalfsvlees 1 kg 150 160 1 Niveau 120 150 Kalfsfricandeau 2 kg 170 190 1 Niveau 60 90 Lamsvlees 1 5 kg 150 160 1 Niveau 60 75 Reeragout 1 5 kg 200 1 Niveau 90 Wild Zwijnragout 1 5 kg 190 1 Niveau 120 Gevogelte Gebraden duiven 150 150 1 Niveau 45 Kalkoen 2 kg 150 1 Niveau 180 240 Gans 4 kg 160 1 Niveau 240 270 Eend 2 5 kg 175 1 Niveau 90 150 Kip 1 5...

Page 29: ...2 Niveau 90 Rollade 2 kg 180 1 Niveau 100 Borst 1 kg 180 1 Niveau 60 Lamsvlees Bout 1 kg 200 2 Niveau 95 Schouder 1 kg 175 1 Niveau 70 Schapenvlees Schouder 1 kg 180 1 Niveau 85 Bout 1 5 kg 200 1 Niveau 90 Borst 1 5 kg 180 1 Niveau 70 Wild Gebraden fazant 1 kg 200 1 Niveau 70 Haasgebraad 2 kg 175 1 Niveau 75 Konijn 1 kg 175 1 Niveau 75 Gevogelte Kalkoen 1 5 kg 180 2 Niveau 70 Parelhoen 1 kg 180 2 ...

Page 30: ...u muß entsprechend derAnleitung und durch qualifiziertes Fachpersonal erfolgen Durch einen falschen Einbau können Schäden an Personen Tieren oder Sachen verursacht werden für die der Hersteller nicht verantwortlich gemacht werden kann EINBAU IN DEN SCHRANK Das Gerät in den Schrank an den vorgesehenen Platz einsetzen unterhalb der Kochfläche bzw einzeln in separater Nische Die Befestigung erfolgt d...

Page 31: ... aus Spiegelglas dürfen erst dann gereinigt werden wenn sie vollständig abgekühlt sind Eventuelle Schäden die auf die Mißachtung dieser grundsätzlichen Regel zurückzuführen sind fallen nicht unter die Garantie Zum Austauschen der Innenlampe ist der Backofen von der Stromversorgung zu trennen Schrauben Sie die Glasschutzhülle der Lampe ab und ersetzen Sie die Birne mit einer ähnlichen Typs die eben...

Page 32: ...lle Knöpfe loslassen Stellen Sie die Backfun ktion mit dem entsprechen den Kontrollknebel für die Backfunktion Wenn die eingestellte Zeit abgelaufen ist schaltet sich der Ofen automatisch ab Wenn Sie den Backvorgang vorzeitig ab bzw unterbre chen möchten drehen Sie den Knebel zum Auswählen der Ofenfunktion bis zur Position O oder stellen Sie die programmierte Zeit auf 0 00 Knöpfe TIMER und Bei Err...

Page 33: ...SCHALTEN FUNKTION NÜTZLICH FÜR MANUELLER BETRIEB Es ermöglicht es Ihnen die Erinnerungsfunktion des Ofenalarms zu benutzen auch wenn den Ofen nicht zum Backen verwendet wird Es aktiviert den Alarm am Ende der eingestellten Backzeit Zum Zubereiten der gewünschten Rezepte MANUELLE FUNKTIONSEIN STELLUNGMENTO Drehen Sie den Kontrol lknebel 2 im Uhrzeigersinn bis das Symbol im Fenster E erscheint Bring...

Page 34: ...ür Die durch die Heizung erhitzte Luft wird vom Ventilator angesaugt und über die Speisen bei der gewünschten Temperatur zwischen 50 C und 200 C verteilt Der Umluft Grill eignet sich ausgezeichnet für das Braten von Geflügel Würsten und Fleisch auch in größeren Mengen anstelle des Drehspießes Umluft mit Unterhitze Diese Funktion ist ideal für empfindlichen Speisen Soufflés kuchen 50 MAX 50 200 50 ...

Page 35: ...ten Niedrige Bräter sollten abgedeckt werden damit keine Soßen und Fettspritzer den Backofeninnenraum übermäßig verschmutzen So bleibt das Fleisch außerdem saftig und zart Ohne Deckel ist das Fleisch dagegen kroß und knusprig Die angegebene Zeiten gelten fürs Braten mit oder ohne Deckel Fleisch in einem hohen Bräter braten Einmal wenden Roastbeef Kg 1 3 220 3 200 70 80 50 60 Bratform abdecken Schw...

Page 36: ...g wird glühend rot Zum Auffangen von Fett und Bratensaft schieben Sie die Fettpfanne unter das Grillgut Toastbrot 4 Sch 4 5 5 vorheizen grill 4 5 10 vorheizen grill Toastbrot auf den Rost legen Von beiden Seiten grillen Vor dem Servieren auf dem Backofenboden warmhalten Bratwurst 5 St 4 25 30 5 vorheizen grill 4 15 20 10 vorheizen grill Kotelett 4 St 4 25 5 vorheizen grill 4 15 20 10 vorheizen gri...

Page 37: ...rompu par l interrupteur La prise et l interrupteur omnipolaire utilisés doivent être facilement accessibles une fois l appareil électroménager installé IMPORTANT Une fois installé le fil d alimentation doit être positionné de manière a ce que sa température ne dépasse pas de 50 C la température ambiante L appareil est conforme aux exigences de sécurité prévues par les organismes qui établissent l...

Page 38: ...désagréable et les projections de graisse seront encore plus difficiles à enlever Pour l intérieur du four utiliser de l eau chaude avec une éponge grattoir Il existe dans le commerce des produits adaptés au nettoyage du four Le nettoyage du four est fastidieux Il existe en option des panneaux autonettoyants spéciaux avec un émail microporeux qui peuvent s adapter sur les fours voir paragraphe fou...

Page 39: ...tionner le four TEMPS DE CUISSON Appuyer et maintenir appuyer sur la touche TIMER Appuyer sur les touches ou pour régler la durée Relâcher les touches Choisir la fonction de cuisson avec le bouton de sélection Sélectionner la durée de la cuisson des alimentes dans le four Pour visualiser le temps restant appuyer la touche TIMER Pour modifier le temps restant appuyer la touche TIMER ou Quand le tem...

Page 40: ...ommencer choisir la température et la fonction désirées Sélectionner la durée de cuisson en tournant le bou ton 2 dans le sens horai re jusqu à faire coïncider le temps sélectionné dans le cadran E La cuisson part immédia tement et termine automa tiquement à la fin du temps sélectionné Durée max cuisson 180 minutes 3 heures Au terme de la durée sé lectionnée le four s éteint automatiquement et un ...

Page 41: ...ur créé des flux d air autour des aliments pour mieux griller et gratiner Sole ventilée Utilisation de la resistance de sole et de la turbine qui brasse l air dans l enceinte du four Cette fonction est recommandée pour la cuisson des tartes à fruits juteux les tourtes les quiches et les patés 50 MAX 50 200 50 MAX Convection naturelle Mise en fonctionnement des deux résistances La convection nature...

Page 42: ...e cuire avec du sel cuillère d huile Sole filet kg 1 2 40 45 220 2 35 40 200 Saumon même type de cuisson non couverte Daurade cuire avec couvercle de l huile et du sel Dorade 2 entières 2 40 45 220 2 35 40 200 Volailles lapin Volailles et pintade plat pyrex ou en terre assaisonné avec très peu d huile Pintade Kg 1 1 3 2 60 85 220 2 60 70 200 Poulet kg 1 5 1 7 2 110 120 220 2 100 110 200 Lapin le c...

Page 43: ...asts 4 tranches 4 5 5 Préchauf gril 4 5 5 Préchauf gril Mettre les tranches de pain de mie sous le gril Dès que les tranches sont dorées retournez les Eteignez le gril pour les maintenir au chaud Croques monsieur n 4 3 5 5 Préchauf gril 3 5 8 5 Préchauf gril Saucisses n 6 kg 0 9 4 25 30 5 Préchauf gril 4 15 20 5 Préchauf gril Couper les saucisses en deux disposées sous le gril Retournez les saucis...

Page 44: ...qualificado O cabo de ligação à terra amarelo verde tem de ter um comprimento 10 mm superior ao comprimento do cabo de alimentação de energia Sempre que o seu forno necessitar de ser reparado recorra exclusivamente a um serviço de assistência técnica aprovado certifique se sempre de que só são utilizadas peças sobressalentes originais Se estas instruções não forem cumpridas o fabricante não poderá...

Page 45: ...s com óleo ou outra gordura TEMPOS DE COZEDURA Para saber quais os tempos de cozedura recomendados para cozinhar os alimentos quando utilizar o forno pela primeira vez recomendamos que consulte as tabelas constantes na páginas 49 50 Quando adquirir mais experiência do modo de funcionamento do seu forno poderá querer alterar os tempos indicados segundo o seu gosto LIMPEZA E MANUTENÇÃO Limpe as supe...

Page 46: ... Durante o período de Garantia os Serviços de Assistência Técnica efectuarão a reparação de qualquer deficiência no funcionamento do aparelho resultante de defeito de fabrico A Garantia não inclui deslocações a casa do cliente que serão debitadas de acordo com a taxa de deslocação em vigor a cada momento Exceptua se a 1ª deslocação se se efectuar no primeiro mês de vigência da Garantia que será gr...

Page 47: ...IMER e É possível verificar qual o tempo seleccionado para o prato escolhido Para verificar quanto tempo resta até ao fim do tempo seleccionado pressione o botão TIMER Para alterar o tempo se leccionado pressione o botão TIMER e seleccione o novo tempo pressionan do No final do tempo selec cionado o forno desligar se à automaticamente e será emitido um sinal sonoro FIM DO TEMPO DE COZEDURA Normalm...

Page 48: ...elógio até o ponteiro azul C estar sobre o tempo pretendido 55 minutos máx CONTA MINUTOS É possivel utilizar o forno como relógio com alarme mesmo sem o forno estar ligado para cozinhar No final do tempo seleccionado é emitido um sinal sonoro Para cozinhar os pratos desejados FUNÇÃO MANUAL Rode o botão 2 no sentido dos ponteiros do relógio até o símbolo aparecer na janela E Rode o selector do forn...

Page 49: ...consequentemente o ideal para confeccionar pão de ló bolos etc Porta fechada grelhado ventilado O ar é aquecido pela resistência do grelhador e a ventoinha sopra o ar para os alimentos à temperatura necessária Esta temperatura estende se dos 50 C aos 200 C A função de grelhador com ventoinha é uma excelente alternativa a assar alimentos no espeto É aliás a função ideal para assar mesmo grandes qua...

Page 50: ...0 25 Carne Todos os tipos de carne podem ser cozinhados em recipientes tanto de bordos altos como de bordos baixos Se optar por um recipiente de bordos baixos é aconselhável tapá lo a fim de evitar que o forno fique sujo com os salpicos dos condimentos utilizados no tempero da carne As carnes confeccionadas em recipientes cobertos ficam mais macias e com mais sucos enquanto que as carnes cozinhada...

Page 51: ... 60 65 220 2 60 65 200 Corte em bocados iguais e cozinhe num pirex coberto com óleo sal oregãos ou rosmaninho Cenouras 800 gr 1 80 85 220 1 70 80 200 Corte às rode las e cozinhe num pirex tapado Fruta Maçãs inteiras Kg 1 1 45 55 220 2 45 55 200 Cozinhe num pirex ou recipiente cerâmico sem tapar Deixe arrefecer no forno Idem Pêras Kg 1 1 45 55 220 2 45 55 200 Idem Pêssegos Kg 1 1 45 55 220 2 45 55 ...

Page 52: ...kelijk voor eventuele drukfouten in deze brochure Kleine veranderingen en technische ontwikkelingen zijn voorbehouden Der Hersteller übernimmt keine Hauftung für eventuelle Druck oder Übersetzungsfehler dieser Bedienungsanleitung Der Hersteller behält sich vor technische Änderungen zur Verbesserung der Produktqualität im Interesse des Endverbrauchers vorzunehmen Le constructeur décline toute respo...

Reviews: