background image


WARRANTY AND ASSISTANCE


This equipment


is warranted by CAMPBELL SCIENTIFIC (CANADA) CORP. (“CSC”) to 

be free from defects in materials and workmanship under normal use and service for 

twelve (12) months

 from date of shipment unless specified otherwise.  

***** Batteries 

are not warranted. *****

 CSC's obligation under this warranty is limited to repairing or 

replacing (at CSC's option) defective products.  The customer shall assume all costs of 
removing, reinstalling, and shipping defective products to CSC.  CSC will return such 
products by surface carrier prepaid.  This warranty shall not apply to any CSC products 
which have been subjected to modification, misuse, neglect, accidents of nature, or 
shipping damage. This warranty is in lieu of all other warranties, expressed or implied, 
including warranties of merchantability or fitness for a particular purpose.  CSC is not 
liable for special, indirect, incidental, or consequential damages. 
 
Products may not be returned without prior authorization.  To obtain a Return 
Merchandise Authorization (RMA), contact CAMPBELL SCIENTIFIC (CANADA) CORP., 
at (780) 454-2505.  An RMA number will be issued in order to facilitate Repair Personnel 
in identifying an instrument upon arrival.  Please write this number clearly on the outside 
of the shipping container.  Include description of symptoms and all pertinent details. 
 
CAMPBELL SCIENTIFIC (CANADA) CORP. does not accept collect calls. 
 
Non-warranty products returned for repair should be accompanied by a purchase order to 
cover repair costs. 


Summary of Contents for MSX10

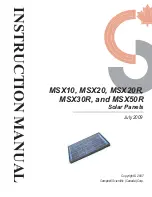
Page 1: ...INSTRUCTION MANUAL MSX10 MSX20 MSX20R MSX30R and MSX50R Solar Panels July 2009 Copyright 2007 Campbell Scientific Canada Corp...

Page 2: ...glect accidents of nature or shipping damage This warranty is in lieu of all other warranties expressed or implied including warranties of merchantability or fitness for a particular purpose CSC is no...

Page 3: ...ations 1 3 Installation 1 3 1 Mounting 1 3 2 Orientation 3 4 Maintenance 4 5 Power Considerations 5 5 1 Solar Power and Lead Acid Batteries 5 5 2 Voltage Regulator 5 6 Appendix A 6 Mounting the MSX50R...

Page 4: ...an external 12 volt lead acid battery 2 Specifications MSX10 MSX20 MSX20R MSX30R MSX50R Typical peak power Pp 10 W 20 W 30W 50W Voltage peak power Vpp voltage from solar panel before regulator 17 1 V...

Page 5: ...the MSX10 solar panel is being used route the solar panel cable to the datalogger power supply and charging circuitry If the MSX20R MSX30R or MSX50R is being used attach the leads of the solar panel d...

Page 6: ...n Table 1 After determining the tilt angle loosen the 5 16 nuts on each side of the solar panel mounting bracket adjust the panel and tighten the nuts to secure the position See Figure 3 TABLE 1 Solar...

Page 7: ...pable of dissipating solar panel power between the two leads No voltage output implies a bad solar panel regulator or cable The magnitude of the voltage output depends on the incident solar radiation...

Page 8: ...t or low charging stormy winter days 5 2 Voltage Regulator The solar panel must be regulated either with a Campbell Scientific regulator or an attached regulator The regulator has two basic functions...

Page 9: ...Appendix A Mounting the MSX50R Solar Panel with the C1286 6...

Page 10: ...Crossarm Brackets Foot Brackets Adapter Plate Mounting Hardware Backplate Solar Panel Mounting Hardware C1286 Assembly Hardware A 1 C1286 Overview A 2 C1286 Assembly Hardware A 3 Solar Panel Mounting...

Page 11: ...ep 1 Loosely attach both of the foot brackets to the slot located at each end of the back plate Figure A 4 Figure A 4 Mounting Foot Brackets Step 2 Loosely assemble crossarm brackets with foot bracket...

Page 12: ...panel and line up the appropriate hole in the panel with the slots of the crossarm Be sure to keep the panel and C1286 square to one another and have mounting hardware evenly spaced in slots Note The...

Page 13: ...le Depending on the mounting location it may be easier to do this while the solar panel is on the ground Step 6 The solar panel can now be installed Again depending on the installation this step may r...

Reviews: