10 Sp
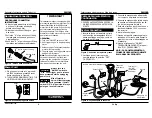
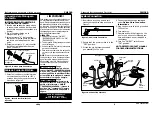
Conexión de la Manugera
de Jardín
"A"
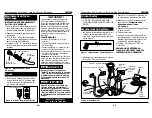
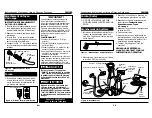
Figure 5 - Garden Hose Connection
Conector rápido
Manguera de
jardín
Adaptador de
manguito
¡ IMPORTANTE !
Esta lavadora a presión está equipada con
un microinterruptor sensible al flujo del
agua. Este interruptor de arranque y para-
da instantáneos detecta el flujo del agua
en la bomba. Cuando se suelta el gatillo, el
agua deja de fluir por la bomba. Entonces,
el interruptor de arranque y parada instan-
táneos apaga el motor para proteger la
bomba del recalentamiento.
OPERACIÓN
1. Coloque el interruptor "ON/OFF"
("ENCENDIDO/APAGADO") en "ON"
("ENCENDIDO").
2. Tire del gatillo de la pistola para comen-
zar a rociar agua.
3. Suelte el gatillo. El motor de la lavadora
a presión se detendrá.
4. Para rociar nuevamente, tire del gatillo,
y el motor y la bomba arrancarán otra
vez.
NOTA
: El motor puede ocasionalmente
funcionar por un corto tiempo para llevar
agua fresca fría a la bomba, aunque se
haya soltado el gatillo. Esto es parte del
funcionamiento normal y no dañará la
unidad.
Ponga
siempre el inter-
ruptor "ON/OFF" (ENCENDIDO/APAGA-
DO) en "OFF" (APAGADO) y luego pre-
sione el gatillo de la pistola para liber-
ar la presión en la manguera, antes de
desenchufar el cordón de energía.
Peligro
de inyeccion. La
unidad comenzara a rociar al oprimir el
gatillo si el interruptor "ON/OFF"
("ENCENDIDO/APAGADO") esta en la
posicion "ON" (encendido). Siempre
apunte la pistola hacia una posicion
segura.
!
ADVERTENCIA
!
PRECAUCION
Llame al 1-800-330-0712
para Servicio Técnico
(sólo en los Estados Unidos)
INSTRUCCIONES DE CONEXIÓN DE
LA MANGUERA DE JARDÍN
1. Inserte el adaptador de manguito en
la conexión de entrada de la unidad
(es posible que ya esté conectado a la
bomba).
2. Fije el conector rápido en la
manguera de jardín.
3. Jale el extremo "A" del conector
rápido hacia la manguera de jardín y
conéctelo en el adaptador de man-
guito.
4. Empuje el extremo "A" del conector
rápido hacia el adaptador de man-
guito, y suéltelo.
Instrucciones de montaje y lista de piezas
PW1380
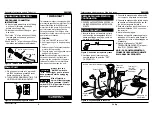
Cable de Corriente Eléctrica
1. Enchufe el cable de corriente eléctrica a
un tomacorriente con tierra de 120V y
presione el botón de reposición como se
muestra en la Figura 6.
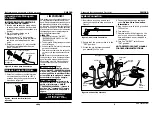
Reset
Figura 6 - Enchufe con tierra/botón de
reposición
Dispositivo de reposición
3
www.chpower.com
Assembly Instructions and Parts List
PW1380
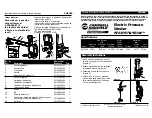
13 mm
Outlet
Inlet
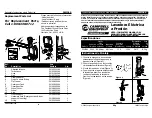
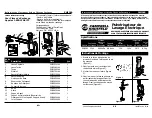
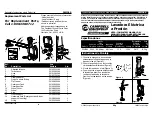
Figure 8 - Connection Call-Outs
1. Insert lance into the gun and turn
clockwise to positive stop as shown in
Figure 7.
2. Ensure that the power switch is in the
“OFF” position.
3. Attach the high pressure hose and
gun assembly to the unit.
4. Connect garden hose as explained
under
Garden Hose Connection
Instructions
.
5. Plug the power cord into a grounded
120V outlet.
6. Turn water on.
7. Depress and hold the trigger on the
gun for one minute to release pres-
sure and remove any air trapped in
the system.
8. Turn the “ON/OFF” switch to the
“ON” position.
NOTE: REFER TO PRODUCT MANUAL
FOR OPERATING INSTRUCTIONS
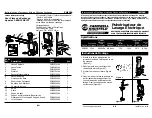
System Connection
Figure 7 - Gun/Lance Connection
Detergent
Tank
On/Off
Switch
Gun
GFCI Plug
High
Pressure
Hose
Garden
Hose
Detergent Fill


