18
06.-18.FLOW1-13
(All FLOW programs consist of various programmed colour change effects. The effect speed is separately adjustable and a stroboscope effect can be
activated additionally)
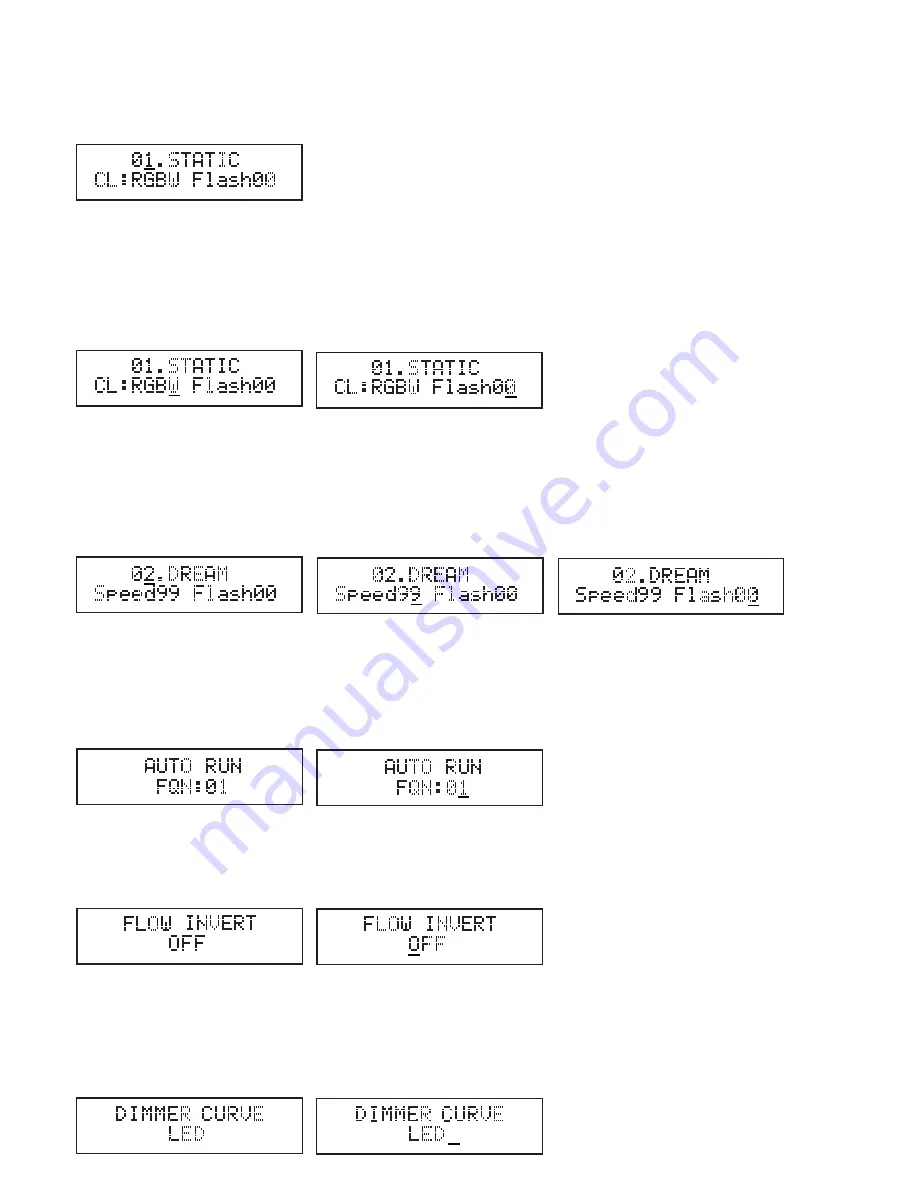
Pressing the ENTER button makes the cursor appear in the top line of the display. Now the desired program can be selected using the UP and DOWN
buttons. Confirm the input with ENTER.
To change the colour in STATIC program 01, press ENTER repeatedly until the cursor appears in the “CL:xxxx” field in the bottom line. Now “black-
out” (BLAC = all LEDs off) or a colour mixture can be selected using the UP and DOWN buttons. “RGBW” means that all LEDs (red, green, blue, and
white) operate at full power, resulting in a bright white colour. Primary colours (R = red, G = green, B = blue, and W = white) and colour mixtures
such as “RG” (red and green = yellow) and “RB” (red and blue = magenta), etc., can be selected here. Confirm the input with ENTER.
The cursor jumps to the “Flashxx” field. Here you can now add a stroboscope effect to the selected colour. “Flash00” stands for stroboscope effect
deactivated, “Flash01” for the slowest and “Flash99” for the fastest flash frequency. Once the desired stroboscope effect has been set, press ENTER
to confirm the input.
The effect speed and stroboscope frequency can each be adjusted separately for programs 02 – 18. Press ENTER repeatedly until the cursor appears
in the top line of the display and then use the UP and DOWN buttons to select the desired program 02 – 18. Press ENTER again to confirm the
change and move the cursor to the field “Speedxx” in the bottom line. Now the effect speed can be set using the UP and DOWN buttons. “00” stands
for the slowest and “99” for the fastest speed.
Pressing the ENTER button again confirms the input and moves the cursor to the “Flashxx” field. Now the stroboscope effect can be set as desired
using the UP and DOWN buttons. “Flash00” stands for stroboscope effect deactivated, “Flash01” for the slowest and “Flash99” for the fastest flash
frequency. Once the desired stroboscope effect has been set, press ENTER to confirm the input.
AUTO RUN
In AUTO RUN mode, various colour change, colour fade, and meteor programmes run in succession.
Press the MODE button repeatedly until “AUTO RUN” appears in the display. To set the sequential speed of the individual programs, press ENTER. The
cursor appears in the “FQN:xx” field in the bottom line. Use the UP and DOWN buttons to set the speed at which the individual programmes follow
one another to the desired value. “FQN:01” stands for the fastest sequence, “FQN:99” for the fastest sequence of the programs. Press ENTER to
confirm the input.
FLOW INVERT
The direction of flow of lighting sequences, for example, in the METEOR programme, can be inverted using the “FLOW INVERT” function.
Press the MODE button repeatedly until “FLOW INVERT” appears in the display. Now press ENTER. The cursor appears in the bottom line of the
display. Use the UP and DOWN buttons to select whether the flow direction should be inverted (ON) or not (OFF). To confirm the input, press ENTER.
DIMMER CURVE
The operating modes “DIMMER CURVE LED” and “DIMMER CURVE HALOGEN” can be used to determine how the light reacts to sudden, large jumps
in DMX dimmer values in DMX mode (DMX value 000 directly to 255 and the other way round). In “LED” mode, the lights react to the change in
value immediately without delay and in “HALOGEN” mode they react in a manner similar to that of a halogen lamp with a slight delay (pre-glow and
afterglow). Press the MODE button repeatedly until “DIMMER CURVE” appears in the display. As soon as you press ENTER, the cursor appears in the
bottom line of the display. Now the desired mode can be selected using the UP and DOWN buttons. Confirm the input with ENTER.


