background image

45

9

Alarm Management

9.1 Sensor Alarm

To complete the entire sensor alarm 
settings, you should enable the sensor 
alarm of each camera and then set up 
the alarm handling of each camera.

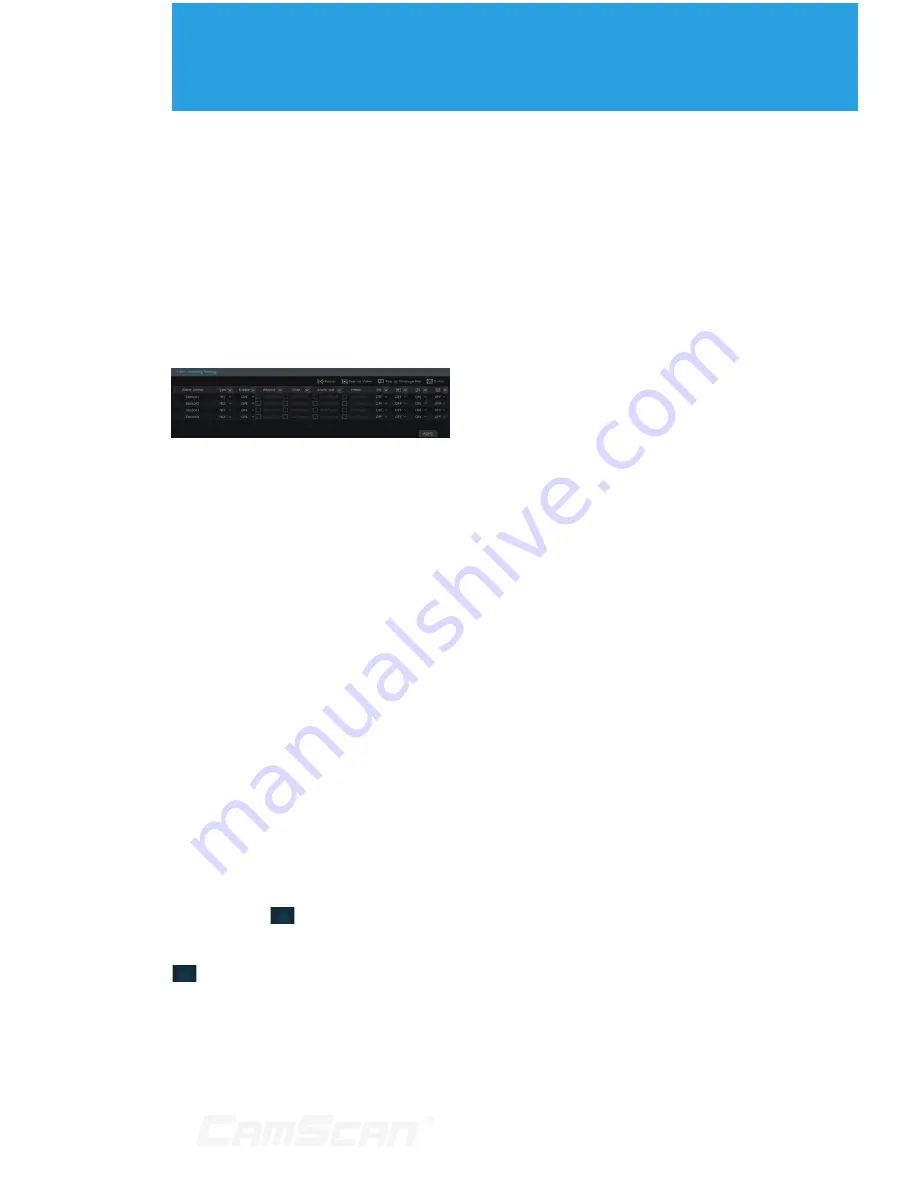
1.  Click Start  Settings  Alarm  

Sensor Alarm to go to the following 
interface.

2.  Select the alarm type (NO or NC) 

according to trigger type of the 
sensor.

3.  Enable the sensor alarm of each 

camera.

4.  Check the “Record”, “Snap”, “Alarm-

out” and “Preset” and enable or 
disable the “Buzzer”, “Pop-up Video”, 
“Pop-up Message Box” and “E-mail” 
as required.

5.  Click “Apply” to save the settings.

The configuration steps of the above 
mentioned alarm linkages are as follows.

Record:

 check it and then the 

“Trigger Record” window will pop up 
automatically (you can also click 
“Configure” button to pop up the 
window). Select camera on the left side 
and then click 

 to set the camera 

as the trigger camera. Select trigger 
camera on the right side and then click 

 to cancel the trigger camera. Click 

“OK” button to save the settings. The 
trigger cameras will record automatically 
when the sensor alarm is triggered.

Snap:

 check it and then the “Trigger 

Snapshot” window will pop up 
automatically. Configure the trigger 
camera in the window. The trigger 
cameras will snap automatically when 
the sensor alarm is triggered.

Alarm-out: 

check it and then the 

“Trigger Alarm-out” window will pop up 
automatically. Configure the trigger 
alarm-out in the window. The system 
will trigger the alarm-out automatically 
when the sensor alarm is triggered. 
You need to set the delay time and the 
schedule of the alarm outputs. See 9.4.1 
Alarm-out for details.

Preset:

 check it and then the 

“Trigger Preset” window will pop up 
automatically. Configure the trigger 
preset of each camera. To add presets, 
please see 6.2 Preset Setting for details.

Buzzer:

 if enabled, the system will 

begin to buzz when the sensor alarm 
is triggered. To set the delay time of 
the buzzer, please see 9.4.4 Buzzer for 
details.

Pop-up Video:

 After camera setting, the 

system will pop up the corresponding 
video automatically when the sensor 
alarm is triggered. To set the duration 
time of the video, please see 9.4.3 
Display for details.

Pop-up Message Box:

 if enabled, the 

system will pop up the corresponding 
alarm message box automatically when 
the sensor alarm is triggered. To set 
the duration time of the message box, 
please see 9.4.3 Display for details.

E-mail: 

if enabled, the system will 

send an e-mail when the sensor alarm 
is triggered. Before you enable the 
email, please configure the recipient’s 

Summary of Contents for CS-DR8900

Page 1: ...USER MANUAL Please read this instruction carefully for correct use of the product and preserve it for reference purposes Digital Video Recorder DVR...

Page 2: ...nly with a dry cloth n n Do not block any ventilation openings and ensure proper ventilation around the machine n n Do not power off the device at normal recording condition n n This machine is for in...

Page 3: ...Add Camera Group 24 4 3 2 Edit Camera Group 24 5 Live Preview Introduction 25 5 1 Preview Interface Introduction 25 5 2 Preview Mode 25 5 2 1 Preview By Display Mode 25 5 2 2 Quick Sequence View 26 5...

Page 4: ...ion 47 9 4 1 Alarm out 47 9 4 2 E mail 48 9 4 3 Display 48 9 4 4 Buzzer 48 9 5 Manual Alarm 48 9 6 View Alarm Status 48 10 Account Permission Management 49 10 1 Account Management 49 10 1 1 Add User 4...

Page 5: ...eview 60 12 4 2 Remote Playback 62 12 4 3 Remote Backup 62 12 4 4 Remote Configuration 62 13 Appendix 63 13 1 Appendix A FAQ 63 13 2 Appendix B Calculate Recording Capacity 66 13 3 Appendix C Compatib...

Page 6: ...ras to be added quickly or manually Support batch or single configuration of the cameras OSD video parameters mask motion and so on Support a maximum of 8 user permission groups including Administrato...

Page 7: ...t the same time and batch or single configuration of the record stream Support manual and auto record modes Support schedule recording sensor alarm recording and motion detection recording Support sch...

Page 8: ...exception alarm Support alarm to be triggered and cleared manually Support system auto reboot when exception happens Network Functions Support TCP IP and PPPoE DHCP DNS DDNS UPnP NTP SMTP protocol and...

Page 9: ...en connection the light is blue Fn No function temporarily Type II Name Descriptions Power Power Indicator when connected the light is blue HDD The light turns blue when reading writing HDD Net The li...

Page 10: ...ice like microphone pickup etc 2 ALARM IN Alarm inputs for connecting sensors 3 ALARM OUT Relay output connect to external alarm 4 GND Grounding 5 AHD VIDEO IN 4 CH AHD video inputs 6 AUDIO OUT Audio...

Page 11: ...udio input connect to audio input device like microphone pickup etc 6 ALARM OUT Relay output connect to external alarm 7 VIDEO IN 8 CH video inputs 8 HDMI Connect to high definition display device 9 V...

Page 12: ...B Connect USB storage device or USB mouse 10 DC12V DC12V power input 1 5 Connections Video Connections Video Output Supports VGA HDMI video output You can connect to monitor through these video output...

Page 13: ...Type 2 The RS485 interfaces are not only used to connect speed dome but also to connect keyboard The way to connect speed dome to the DVR Type 1 Disconnect pluggable block from the RS485 terminal blo...

Page 14: ...licking OK button 2 Disconnect the power By mouse 1 Click Start Shutdown to pop up the Shutdown window Select Shutdown in the window The unit will power off after a while by clicking OK button 2 2 Dis...

Page 15: ...utton To go to cruise setting in PTZ mode Track Button No track function temporarily Wiper Button No function temporarily Light Button No function temporarily Clear Button No function temporarily Fn2...

Page 16: ...store it to the previous size In the live preview playback interface if the interfaces display in full screen move the mouse to the bottom of the interface to pop up a tool bar The tool bar will disap...

Page 17: ...key of punctuation character Enter key Space key 2 5 Common Button Operation Button Meaning Click it to show the menu list Click it to change the sequence of the list Click it to change the camera dis...

Page 18: ...and enter the corresponding password next time Click Edit Security Question to set questions and answers for password security of admin If you forget the password please refer to Q4 in Appendix A FAQ...

Page 19: ...camera as shown on the above right Input the new camera name IP address port username and the password of the camera You can click Test to test the effectiveness of the input information Click OK to...

Page 20: ...and RAID status Network status button Click it to view the network status Information button Click it to view system information Introduction of area 2 Click Camera to view all the added cameras in th...

Page 21: ...mera Management see Chapter 4 Camera Management for details Image Settings see 5 3 Preview Image Configuration for details Motion see 9 2 1 Motion Configuration for details and PTZ see Chapter 6 PTZ f...

Page 22: ...uch as Basic Configuration see 11 2 Basic Configuration for details Device Information see 11 7 View System Information for details Log Information see 11 6 View Log for details and Configuration File...

Page 23: ...to pop up the Add Camera window as shown below You can quickly add or add the IP camera manually Quickly Add Check the cameras and then click Add to add cameras Click to edit the camera s IP address u...

Page 24: ...ce as shown below Click to pop up the window as shown below Set the group name and dwell time in the window Check the cameras and then click Add to add group Click to view the cameras in the group aft...

Page 25: ...audio by enabling audio Snap Click it to pop up the snap window Click Save in the window to save the image Click Export to export the image PTZ Control Click it to go to PTZ control interface See Chap...

Page 26: ...lay mode in the list Click Rename to edit the display mode name click Delete to delete the display mode 5 2 2 Quick Sequence View You can start quick sequence view if the scheme has not been created I...

Page 27: ...em Basic Output Settings Output 2 to go to the interface as shown below Click on the left to create a new scheme Each scheme can only add one analog camera Select a scheme on the left and then double...

Page 28: ...l of the camera s image Contrast It is the color difference between the brightest and darkest parts Saturation It is the degree of color purity The color is purer the image is brighter Hue It relates...

Page 29: ...de is selected the time interval setup will be available Click to increase decrease the focal length Click it to focus instantly Day night mode switch autofocus If checked the lens will focus automati...

Page 30: ...Click to hide show the analog joystick Click it to return to the live preview interface Analog Joystick Control The analog joystick on the left side of the interface provides quick PTZ control The do...

Page 31: ...dow as shown below Select the preset and then input the preset name in the window finally click OK button to save the settings You can add 255 presets for each dome at most Adjust the dome s direction...

Page 32: ...ng speed position zoom focus and iris of the preset and then click Save Position to save the preset Delete Preset Select camera and preset and then click Delete to delete the preset 6 3 Cruise Setting...

Page 33: ...sure the analog speed dome camera is well connected to the DVR before you control it Select the camera and then set the protocol baud rate and address of the dome according to the settings of the dome...

Page 34: ...hen motion alarm happens Always 24x7 Record Sensor Record Normal record is enabled all the time sensor alarm record will be started when sensor alarm happens Always 24x7 Record Motion Record Sensor Re...

Page 35: ...tion FPS bitrate and audio of main stream for each camera in Event Record Stream and Timing Record Stream interfaces Click Apply to save the settings You can set the record stream of each camera one b...

Page 36: ...Clear All to clear all the selected area in a day Click Copy To to copy the schedule of the day to other days Refer to the picture below Check the days in the window and then click OK to save the sett...

Page 37: ...ppears in the setup schedule The setup steps are as follows 1 Set the motion based recording schedule of each camera See 7 3 Schedule Setting for details 2 Enable the motion and set the motion area of...

Page 38: ...then click on the top right corner of the added disk or camera to delete it from the group The deleted disks and cameras will be moved into group one automatically Each group can add the disks and ca...

Page 39: ...lick Add to add playback camera The buttons on the tool bar area 1 at the bottom of the playback interface are introduced in the table below Button Meaning Start button Click it to pop up area 2 Full...

Page 40: ...set You can check the record type as required for record playback first you should click on the tool bar at the bottom of the interface to clear all the playback camera then check the record type manu...

Page 41: ...backup format in the window and then click Backup button to start the backup 5 Click Playback button to play the record in the playback interface refer to 8 2 Playback Interface Introduction for detai...

Page 42: ...e of the interface and then click to search the record The searched record will be displayed in the list 5 Click in the list to play back the record in the popup window Select one record data in the l...

Page 43: ...tically The private format record can be played by RPAS player only 8 4 2 Backup by Event 1 Click Start Backup By Event to go to By Event tab 2 Click to set the start time and end time on the left top...

Page 44: ...age click to delete the image click to play all the images 8 4 4 View Backup Status Click Start Backup Backup Status or click on the tool bar at the bottom of the playback interface to view the backup...

Page 45: ...e trigger camera in the window The trigger cameras will snap automatically when the sensor alarm is triggered Alarm out check it and then the Trigger Alarm out window will pop up automatically Configu...

Page 46: ...detects a motion it will go to alarm and would not detect any other motion specific to camera in 10 seconds If there is another motion detected during this period it will be considered as continuous m...

Page 47: ...similar to that of the sensor alarm see 9 1 Sensor Alarm for details 3 Click Apply to save the settings 9 3 3 Exception Handling Settings 1 Click Start Settings Alarm Exception Exception Handling Sett...

Page 48: ...en click Apply to save the setting You can click Test to test the buzzer 9 5 Manual Alarm Click on the tool bar at the bottom of the live preview interface to pop up a window Click Trigger to start al...

Page 49: ...Ordinary can be changed 10 1 1 Add User 1 Click Start Settings Account and Authority Account Add User or click beside the search box to pop up the window as shown below 2 Set the username password and...

Page 50: ...Click Login button to log in the system Logout Click Start Logout or click Start Shutdown to pop up the Shutdown window Select Logout in the window and then click OK button to log out the system 10 3...

Page 51: ...of which the IP address is in the allow list can access DVR remotely while the PC client in the block list cannot 3 Add IP IP segment MAC Click Add IP or Add MAC button and then check Enable in the po...

Page 52: ...r port and RTSP port of the DVR and then click Apply to save the ports HTTP Port the default HTTP port of the DVR is 80 The port number can be changed to others like 81 The port is mainly used to IE r...

Page 53: ...ypes are selected Go to the relative DNS website to register domain name and then input the registered domain information here Now we take www dvrdydns com for example 1 Input www dvrdydns com in the...

Page 54: ...ings Click Edit Recipient to go to the following interface Click Add and then input the recipient s e mail address in the popup window Click Add in the window to add the recipient Click to delete the...

Page 55: ...and Log Out Automatically if checked you can set the wait time Click Apply to save the settings Device Name The name of the device It may display on the client end or CMS that help user to recognize t...

Page 56: ...en click Upgrade The system may automatically restart during upgrading Please wait for a while and do not power off the DVR during upgrading n n Note The file system of the USB mobile device which is...

Page 57: ...list and then click Export button to export the log file Click on the Content title bar to pop up a menu list Check contents in the menu list and then the log list will show the checked log contents o...

Page 58: ...of the DVR in the IE address bar and then press enter to go to the login interface as shown below You can change the display language on the top right corner of the login interface Input the username...

Page 59: ...to go to the login interface Input the username and password of the DVR in the interface and then click Login to go to the live preview interface Router Access 1 Click Start Settings Network TCP IPv4...

Page 60: ...apshot path and record path as shown below Click Apply button to save the settings 12 4 1 Remote Preview Click Live Display in the remote interface to go to the preview interface The preview interface...

Page 61: ...trate and then click Apply to save the settings Operation panel introduction Button Meaning Click it to snap Click it to start recording click it again to stop recording Click it to zoom in the image...

Page 62: ...tton Click the time scale and then click it to set the backup end time Backup button Backup tasks button Click it to view the backup status Button Meaning Event list button Click it to view the event...

Page 63: ...ork normally Q3 The screen has no output after booting the DVR normally a Please make sure the screen HDMI or VGA cables are good and well connected b Please make sure the screen supports the resoluti...

Page 64: ...no disk but cameras in the disk group so please add at least one disk to the group Refer to 7 5 1 Storage Mode Configuration for details e The HDD could have gone bad Please change another one Q7 Fail...

Page 65: ...open RPAS player and then click Open Folder button in the middle of the interface to select the record data Refer to Fig 9 1 Select camera in the resource tree on the left side of the interface to pla...

Page 66: ...5 5400 384 168 75 4050 256 112 5 2700 The table below shows the recording capacity requirements for record storage in 30 days 13 Appendix Record Bitrate Kbps Recording Capacity TB 1CH 4CH 8CH 16CH 32C...

Page 67: ...commended 1TB 2TB 3TB Surveillance HDD Series recommended 1TB 2TB 3TB 4TB 6TB Western Digital Blue Series 500GB 1TB Green Series 2TB 3TB 4TB Purple Series recommended 1TB 2TB 3TB 4TB 6TB Compatible US...

Page 68: ...68...

Reviews: