28
image settings to the default factory
settings.
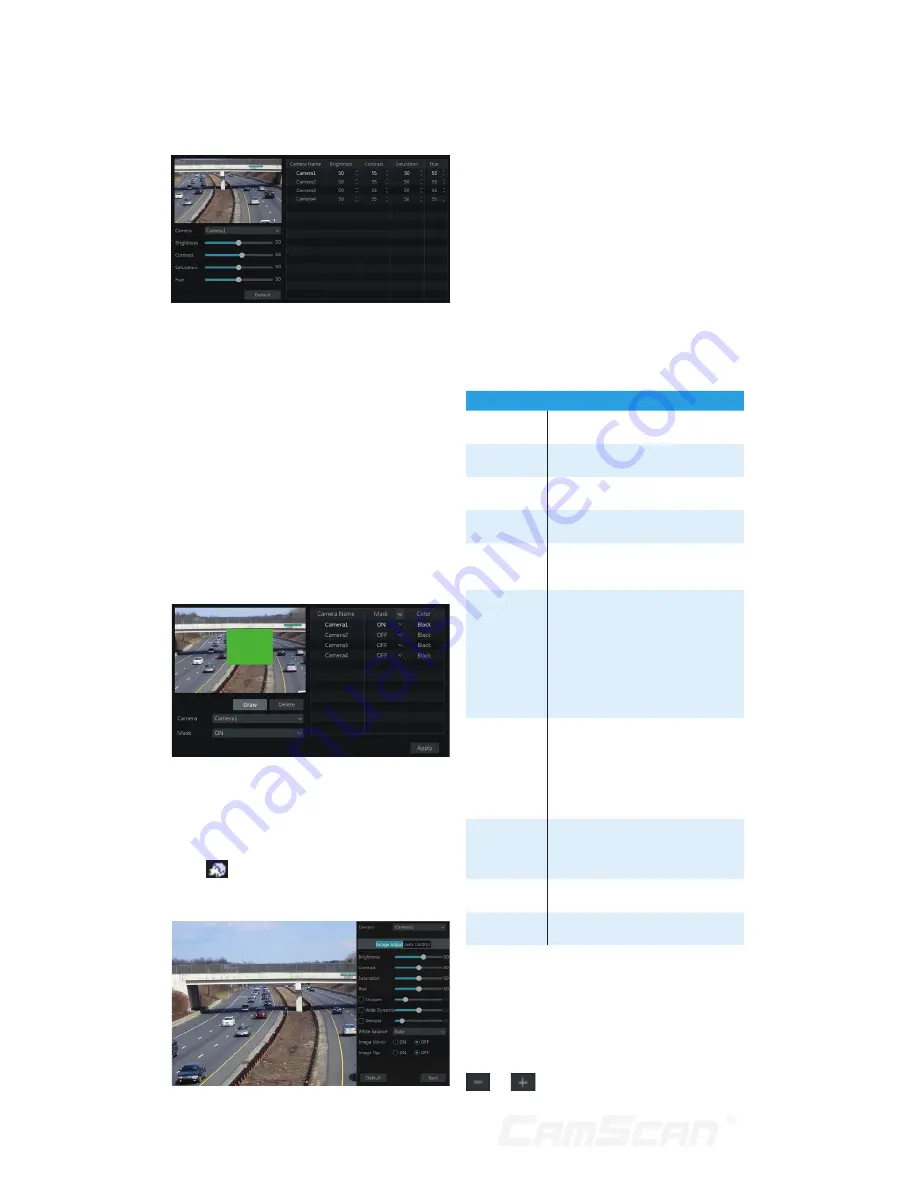
5.3.3 Mask Settings
Some areas of the image can be masked
for privacy. Up to four mask areas can
be set for each camera. Click Start
Settings
Camera
Image
Mask
Settings to go to the interface as shown
below. Select the camera and enable
the mask. Click “Draw” button and then
drag the mouse on the image area to set
the mask area; click “Delete” button to
delete the mask areas; click “Apply” to
save the settings.
5.3.4 Image Adjustment
Go to live preview interface and then
click
button on the tool bar under
the camera window to go to the image
adjustment interface.
Image Adjustment
Select the camera and then click “Image
Adjustment” to go to image adjustment
tab. Refer to the above picture. Drag the
slider to set the camera’s brightness,
contrast, saturation and hue value.
Check sharpen, wide dynamic and
denoise and then drag the slider to set
the value. Click “Default” button to set
these parameters to default values.
The introductions of these parameters
are as follows:
Parameter
Meaning
Brightness
It is the brightness level of the
camera’s image.
Contrast
It is the color difference between
the brightest and darkest parts.
Saturation
It is the degree of color purity. The
color is purer, the image is brighter.
Hue
It relates to the total color degree
of the image.
Sharpen
It relates to the resolution level of
the image plane and the sharpness
level of the image edge.
Wide
Dynamic
The wide dynamic range (WDR)
function helps the camera provide
clear images even under back
light circumstances. When there
are both very bright and very dark
areas simultaneously in the field of
view, WDR balances the brightness
level of the whole image and
provide clear images with details.
Denoise
Adopt the noise reduction
technology to decrease the
noise and make the image more
thorough. Increasing the value will
make the noise reduction effect
better but it will reduce the image
resolution.
White
Balance
White balance is the white rendition
function of the camera to adjust
the color temperature according to
the environment automatically.
Image Mirror
Reverse the current video image
right and left.
Image Flip
Turn the current video image
upside down.
Lens Control
Select the camera and then click “Lens
Control” to go to lens control tab. Click
or
to adjust the zoom and focus
5 Live Preview Introduction
Summary of Contents for CS-DR8900
Page 68: ...68...


