Cadis Aquavision Control User Manual Download Page 8


8/23  www.cadis.be  [email protected]  


User’s Manual   
Aquavision Control  


Monitoring Module  

2.


Functions and configurations only available with pasword 

After installing this module, the sanitary installer has correctly set the basic functions such as pipe diameters, pulse 
settings for the water meter, water meter ID, etc. in order to start the module. This is described in separate 
installation instructions. 

A user with a password can check these settings and modify them as required by logging in with his computer and 
following this user's manual. For that purpose, the user must make a connection by means of his web browser with 
the web server of the AV Control module. He can do this also via the touch screen of the module. 


3.1.  Making a connection with the module 

To configure and enter the correct settings in the module a connection must be established by your computer with 
the AV CONTROL module. For this reason both your computer and the AV CONTROL module must be linked either 
directly or via a LAN network of the building on the LAN port. After this 

an Internet browser must be opened and 

the pre-set IP address of the module must be entered in the address bar at the top of the browser: 
10.100.100.225


N.B.: To do that the computer must be set in the same IP range. Otherwise no connection can be set up with the 

module (see the information at the end of this document on how to adjust the range of your computer). When the 
module and the computer are directly connected without using a network, a "crossed" LAN network cable must 
always be used. 
 

3.2. 

Modifying network settings 

First of all, check whether the configuration of the module is correctly carried out. The module will only work 
correctly if the installer has configured it correctly. 
Log in as a user with 

user/user


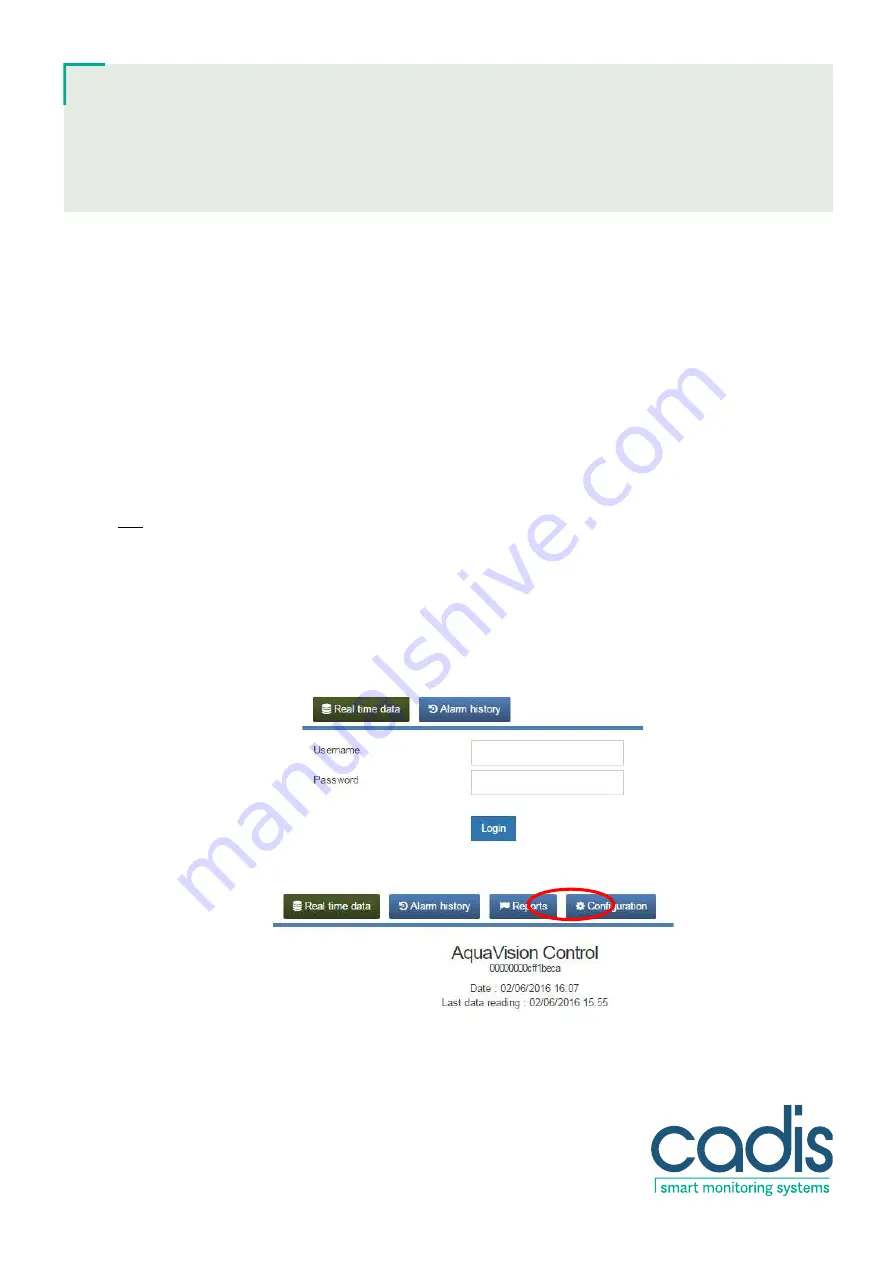
After logging in, a screen appears with the following headings. Click here on the "Configuration" button. 


A screen then appears automatically with the Network settings. Check these network settings and amend the data 
as necessary for the building in which the module was installed. Always consult a network specialist first for this to 

Summary of Contents for Aquavision Control

Page 1: ...9 3 5 Modifying the password and user language 10 3 6 Alarm when daily or weekly consumption is exceeded 10 3 7 Alarm during a period of no water consumption 11 3 8 Activation of special functions via...

Page 2: ...e diagram below If additional branch pipelines need to be protected against leaks and water wastage a second Aquavision Control module must be fitted For each additional module three extra branch pipe...

Page 3: ...is automatically correctly set if the module is linked to a network with access to the Internet Indication of the consumption period and the normal or alarm state of the module Temperature and pressu...

Page 4: ...define the actions that must be linked to an alarm Possible actions are sending an alarm e mail cutting off the water supply or activating a buzzer Each alarm must be acknowledged by the user on the...

Page 5: ...y the message System normal 2 3 Consulting the list of alarms and creating alarm reports To be able to analyse several alarms that have occurred the user can view a summary of all alarms on a separate...

Page 6: ...tected that was calculated by the module Small leak Module detected a small leak Very small leak Leak alarm for a micro leak alarm after 24 hours Average daily consumption exceeded Alarm report if the...

Page 7: ...r pressure out of range of pre set limits Alarm signal when the pressure exceeds or falls below the pre set minimum or maximum limits Temperature out of range of pre set limits Alarm signal when the t...

Page 8: ...dule must be linked either directly or via a LAN network of the building on the LAN port After this an Internet browser must be opened and the pre set IP address of the module must be entered in the a...

Page 9: ...h a CADIS Aquavision Master module At the bottom of the Network settings page you can also enter an IP address for the Aquavision MASTER module N B This should only be done if a CADIS MASTER module ha...

Page 10: ...the user language and the name the place of the module can be set or modified 2 5 Alarm when daily or weekly consumption is exceeded Go to the Device settings same screen as above On the Device settin...

Page 11: ...ecial functions can be activated Connect external leak detection system to the AV Control module to cut off water supply or to send alarms Activate unlimited water consumption for a set period via ext...

Page 12: ...e burglar alarm system is switched on the AV CONTROL module will automatically cut off the water supply by closing the shut off valves When the burglar alarm system is switched off the AV Control modu...

Page 13: ...rise If this sanitary pipeline also supplies the water for fire hoses then no shut off valve may be fitted 3 Connect the water meter that was installed by the distribution company on the street side f...

Page 14: ...icking on the pencil on the right If you click on the pencil on the right the next screen opens where you can amend the data per pipe The ID of the water meter and the name of the pipe can be filled i...

Page 15: ...l on the right and also set limits for the alarms 2 9 Setting alarm e mail cutting off water supply and buzzer per alarm type You can insert the addresses to which alarm e mails must be sent to in the...

Page 16: ...d here 2 10 The calendar function cut off or allow water supply with volume limit By activating this function the AV Control module will turn on or cut off water at pre set times for predefined pipeli...

Page 17: ...hich pipeline is involved option button after Input Note The time period can never be longer than 1 week A week starts at the earliest on Monday and finishes at the latest on Sunday The existing calen...

Page 18: ...rt must be generated Set to 10 as standard 2 12 Creation of consumption reports All consumption data alarms and actions are saved in the module for 1 year and can be consulted at any time Via a separa...

Page 19: ...en of the AV Control module he must also manually open them afterwards using the same procedure In the Real Time screen select the User action button This brings you to a screen where you see the name...

Page 20: ...nded for persons who set up and program the GBS systems The following data can be read by a GBS system by means of a ModBus TCP IP communication protocol on the standard IP port 502 Modbus RTU via RS4...

Page 21: ...open Register 30038 Status External Intrusion alarm input 1 Input closed 0 Input open Register 30039 Time left in hours until Unlimited mode ends Value in hours 0 24 Register 30040 General Status Aqua...

Page 22: ...er or laptop with a network cable to the AQUAVISION CONTROL module Amend the IP address of the computer via the Network centre Open the computer s network centre via the Configuration screen Click on...

Page 23: ...ddress and Subnet masker as shown in the example above Click on OK Click on Close Click on Close The computer works now with the fixed IP address 10 100 100 220 Enter the IP address in the web browser...

Reviews: