0
6) Assembly of Protech FasNSeal
a) FasNSeal General Notes:
• Do not cut 4” FasNSeal pipe. Consult FasNSeal instructions for method of cutting other 3” pipe.
• Orient FasNSeal vent components so that the arrows on the piping labels are in the direction of flue gas flow.
• Support horizontal piping sections at intervals of 6 feet or less.
• Vertical venting systems must be supported by at least one FasNSeal support. An additional vertical support is
required after any offset.
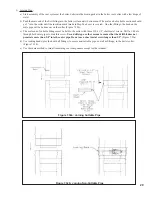
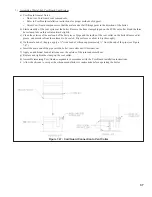
b) Remove the hose clamp shipped on the FCM vent collar. Bend the three hose clamp tabs on this collar outward
slightly. Clean the exterior of the male end of the first piece of pipe and the inside of the vent collar on the boiler.
Remove dirt, grease, and moisture from the surfaces to be sealed. On the male end of the pipe, apply a ¼” wide bead
of high temperature silicone approximately ¼" from the male end of the pipe. Insert the male end of the pipe into the
boiler vent collar until it bottoms out. Apply an additional bead of silicone over the outside of the joint and the seams
on the vent collar and smooth out (Figure 7.50). Replace and tighten the clamp on the vent collar.
c) All other joints in the FasNSeal venting system rely on a gasket in the female end of the pipe for a proper seal.
d) Align the longitudinal seam of both pipes. Insert the male end of the second pipe into the female end of the first pipe
until the bead on the male end contacts the flare on the female end.
e) Tighten the locking band with a nut driver.
f) Repeat (d) and (e) for the remaining FasNSeal components.
g) Allow the silicone to cure per the silicone manufacturer’s instructions before operating the boiler.
7) Installation of Horizontal Exhaust Terminal:
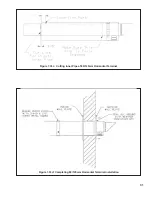
a) When stainless steel venting is used, use U.S. Boiler stainless exhaust terminal P/N 8110701. The outer edge of this
terminal must be between 6 and 12 inches from the surface of the wall.
The joint between the terminal and the last
piece of pipe must be outside of the building
.
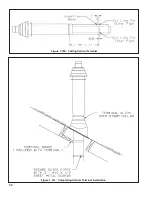
b) Male end of terminal will fit into the female end of any of the approved stainless vent systems.
c) Apply a heavy bead of silicone to the male end of the terminal before inserting it into the last piece of pipe. Orient the
terminal so that the seam in the terminal is at 12:00.
d) Smooth the silicone over the seam between the terminal and the last piece of pipe, applying additional silicone if
necessary to ensure a tight seal.
e) Allow the silicone to cure per the silicone manufacturer’s instructions before operating the boiler.
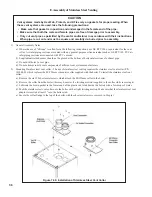
FigurE 7.0: FasnsEal COnnECTiOn TO VEnT COllar
Summary of Contents for FREEDOM
Page 8: ...8 Figure 1 Wall Mounting Hole locations ...
Page 9: ...9 Figure 5 2 Boiler Mounting Hardware ...
Page 11: ...11 Figure 6 1 Boiler Installed In A Confined Space Ventilation Air From Inside ...
Page 42: ...42 FIGURE 7 51 CONDENSATE PIPING ARRANGEMENT ...
Page 55: ...55 Figure 10 1 Wiring Connections Diagram ...
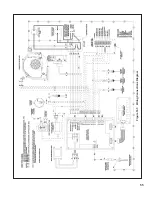
Page 56: ...56 Figure 10 2 Ladder Diagram ...
Page 57: ...57 Figure 10 3 Wiring of Isolation Relay for Control of Two Heating Circulators ...
Page 60: ...60 FCM Series Lighting and Operating Instructions ...
Page 66: ...66 FIGURE 12 2 BASIC MENU TREE ...
Page 75: ...75 ...
Page 77: ...77 ...
Page 79: ...79 ...
Page 80: ...80 ...
Page 81: ...81 ...
Page 83: ...83 150 151 152 153 154 155 ...
Page 84: ...84 156 157 158 159 160 161 ...
Page 85: ...85 162 ...


