background image

Page 27

29877 080301

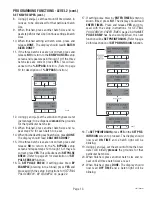
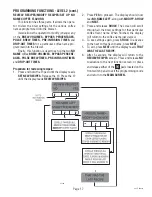
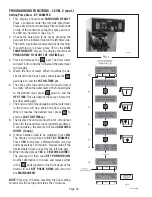
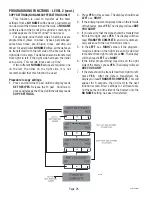
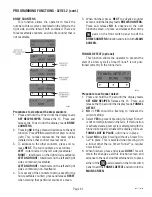
ENABLE ADS?

This function allows the operator to choose whether

or not to display the advertising message that was
entered into the brewer with an 

AD CARD

. This mes-

sage will be displayed when the brewer is not in use.

Procedure to Enable/Disable Ads

:

1. Press and hold the  ® pad until the display reads

SET NEW RECIPES

. Release the ®.  Press and

release the ® until the display reads 

ENABLE ADS

.

The 

YES

  or 

NO

  will be flashing to indicate the

current selection.

2. Press and release the 

NO

  pad to disable this

function (no ads will be displayed on the screen),
or;

3. Press and release the 

YES

  pad to enable this

function (ads will be displayed on screen).

4. When finished, press and release 

DONE

 to save the

new setting, exit the 

ENABLE ADS

 function and

advance to the next function screen, 

SET TEMP.

Another alternative is to press and release either of

the 

 pads located on the front switch panel to

exit the 

ENABLE ADS 

function and return to the

MAIN SCREEN.

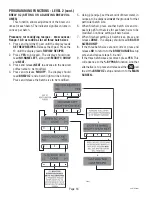
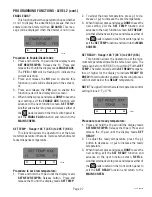
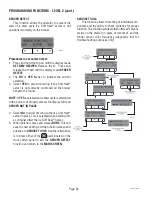
SET TEMP  - Range: 185˚F (85˚C) to 205˚F (96˚C)

This function allows the operator to set the brew

water temperature in the tank.  It also sets the hot water
faucet dispense temperature.

P2301

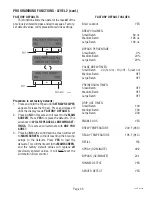
PROGRAMMING FUNCTIONS - LEVEL 2 (cont.)

P2302

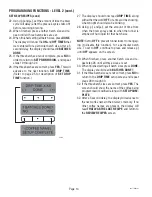
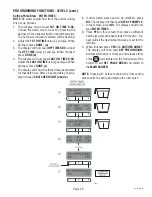
Procedure to set brew temperature:

1. Press and hold the ® pad until the display reads

SET NEW RECIPES

. Release button.  Press and

release the ® until the display reads 

SET TEMP

.

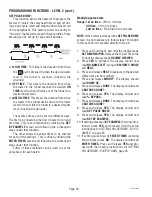
P2303

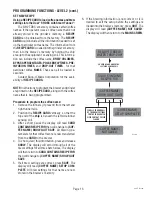
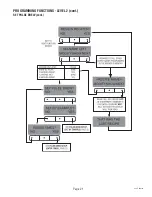
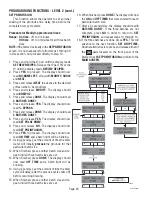
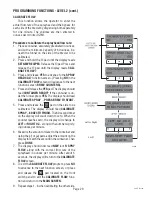
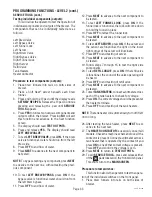
Procedure to set ready temperature:

1. Press and hold the ® pad until the display reads

SET NEW RECIPES

. Release the ® pad.  Press and

release the ® pad until the display reads 

SET

READY

.

2. To adjust the ready temperature, press the 

(-)

button to decrease, or 

(+)

 to increase the ready

temperature.

3. When finished, press and release 

DONE

 to save the

new setting, exit the 

SET READY

  function and

advance to the next function screen, 

REFILL.

Another alternative is to press and release either of

the 

 pads located on the front switch panel to

exit the 

SET READY 

function and return to the

MAIN SCREEN.

2. To adjust the brew temperature, press 

(-)

 to de-

crease or 

(+)

 to increase the brew temperature.

3. When finished, press and release 

DONE

 to save the

new setting, exit the 

SET TEMP 

function and

advance to the next function screen,  

SET READY.

Another alternative is to press and release either of

the 

 pads located on the front switch panel to

exit the 

SET TEMP 

function and return to the 

MAIN

SCREEN.

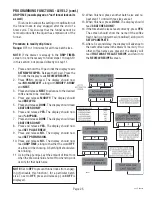
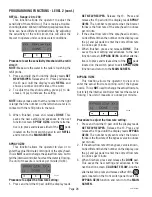
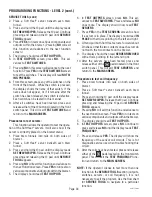
SET READY - Range: 185˚F (85˚C) to 203F (95C)

This function allows the operator to set the mini-

mum temperature allowable to start a brew cycle. The
range can be from 185˚F (85˚C) to within 2˚F of the 

SET

TEMP. 

The water must be at the 

SET READY

 tempera-

ture or higher for the display to indicate 

READY TO

BREW

. If brew lockout is enabled, the brewing process

will not start below this 

READY

 temperature.

NOTE: 

The upper limit is the water temperature control

setting minus 2˚F (-17

°

C).

Summary of Contents for Single SH

Page 1: ...DR Y BO ILE D DR Y HE AT ED WH EN EM PTY HE AT ED WH EN EM PTY US ED ON HIG H FLA ME US ED ON HIG H FLA ME OR EX PO SE D ELE CT RIC OR EX PO SE D ELE CT RIC ELE ME NT S ELE ME NT S FA ILU RE TO CO MP LY RIS KS INJ UR Y FA ILU RE TO CO MP LY RIS KS INJ UR Y PN 658 PN 658 1985 BUN N O MA TIC COR POR ATIO N 1985 BUN N O MA TIC COR POR ATIO N FU NN EL CO NT EN TS FU NN EL CO NT EN TS AR E HO T AR E HO...

Page 2: ...gly statements by such individuals whether oral or written do not constitute warranties and should not be relied upon If BUNN determines in its sole discretion that the equipment does not conform to the warranty BUNN at its exclusive option while the equipment is under warranty shall either 1 provide at no charge replacement parts and or labor during the applicable parts and labor warranty periods...

Page 3: ...nor G9 2T DBC Grinder 16 Review Recipes Modify Recipes Set up No Name Coffee 17 Set Brew Volumes 18 Set Bypass Percentages 19 Set Pulse Brew Times 20 By Example 22 Enter Times 23 Set Preinfusion Times 24 Set Drip Times 25 Copy Settings 26 Enable Ads 27 Set Temp Brewing Temperature 27 Set Ready Ready Temperature 27 Refill Adjust Sensitivity 28 Spray Oz M Read sprayhead flow rate 28 Bypass Oz M Read...

Page 4: ...ge 4 00656 0000 00831 0000 00658 0000 20201 5600 USER NOTICES The notices on this brewer should be kept in good condition Replace unreadable or damaged labels 29877 040201 10044 0000 03408 0000 03409 0000 ...

Page 5: ...flare or female quick connect NOTE Bunn O Matic recommends 1 4 copper tubing for installations of less than 25 feet and 3 8 for more than 25 feet from the 1 2 water supply line A tight coil of copper tubing in the water line will facilitate moving the brewer to clean the counter top Bunn O Matic does not recommend the use of a saddle valve to install the brewer The size and shape of the hole made ...

Page 6: ...f the brewer will exit the setup and return to the main screen c BREW PAD Momentarily pressing and releasing this pad begins a brew cycle d PAD Pressing and holding the pad allows entry to the programming menus Pressing and releasing the pad steps through each function screen during programming e FUNCTION SCREEN This is the display which shows the various functions of the brewer and allows the pro...

Page 7: ...ly select the correct size to brew If the grounds are not obtained through a grinder compatible with a Smart Funnel a batch size must be chosen on the brewer 5 Place an empty server under the funnel 6 Momentarily press and release the pad If the brewer has the funnel lock option and if it is activated once a brew cycle has been started the funnel is locked in place There may be certain situations ...

Page 8: ...nd each alternating on time for the remainder of the brew cycle MAIN SCREEN The term used to describe the screen that is displayed when the brewer is not in use This screen is also displayed after exiting the programming mode NO NAME COFFEE The term for the recipe used by the brewer when there is no coffee name stored in the funnel The brewer can contain separate No Name recipes for the left and r...

Page 9: ...the different function screens hidden programming switches are used There are five of these switches that will be used for the setup of the brewer 1 2 3 4 5 1 symbol upper right of the BUNN logo This is used to access the programming mode and is also used to scroll forward through the function list 2 Upper left corner of the B in the BUNN logo This is used to scroll backwards through the function ...

Page 10: ...below the set READY temperature Select NO to permit brewing at any water temperature When finished press and release DONE This will exit this function screen and return to the MAIN SCREEN on the display PROGRAMMING THE BREWER The programming of the brewer is divided into two levels There is one function in Level 1 All other functions are accessed in Level 2 Thefollowingfunctionscreensareinorderofa...

Page 11: ...ly to provide optimum brewing quality METHOD 2 Using a RECIPE CARD to enter all of the brew settings at one time If using a coffee name not in the G9 2T DBC s memory the customer can obtain a RECIPE CARD from the factory with all the information needed to set up that particular coffee flavor This includes the COFFEE NAME BREW VOLUMES BYPASS PER CENTAGES PULSE BREW TIMES PREINFUSION TIMES and DRIP ...

Page 12: ...ST It will be necessary to grind another batch following steps 1 and 2 7 If the grind is acknowledged by the brewer the displaywillreadBEGINSETUPOF COFFEENAME ThenthescreenwilldisplayBREWOZ andabatch lightwillbeblinking Refertopage18fordescrip tion of BREW OZ function SET NEW RECIPE Using a Smart Funnel and a G9 2T DBC Grinder This function allows the operator to set BREW VOLUMES BYPASS PERCENTAGE...

Page 13: ...t press and release NO to return to the BYPASS setup screen and repeat steps 12 through 15 If they are correct pressYES ThiswilladvancetoSETPULSE BREW Refer to page 20 for description of SET PULSE BREW function 16 To SET PULSE BREW if setting pulse brew BY EXAMPLE brewing into a funnel press YES and proceed with the setup instructions for SETTING PULSE BREW BY EXAMPLE on page 22 17 If setting puls...

Page 14: ...mount of time from when the brew spray ends to when the funnel is emptied of hot liquid for that batch size NOTE Set to OFF to prevent funnel locks from engag ing to disable this function for a particular batch size To set to OFF continue to press and release until OFF appears on the screen 29 When finished press another batch size and re peat step 28 until all three sizes are set 30 When finished...

Page 15: ...left and right funnel rails 2 Position the RECIPE CARD vertically so that the top end of the chip is beneath the left side funnel sensing coil 3 After a short pause the display will read CARD CONTAINS RECIPE FOR then will change to COF FEE NAME SHOW QUIT SAVE All brewing pa rameters for that coffee flavor are now transferred from the CARD to the brewer 4 Toshow view thisinformation pressandrelease...

Page 16: ...he brewer can be set up independently of each other This includes BREW VOLUMES BYPASS PERCENT AGES PULSE BREW TIMES PREINFUSION TIMES and DRIP OUT TIMES The brewer will perform in the same capacity as a standard Bunn Dual Brewer The instructions for programming the NO NAME settings are on the following pages The same steps are followed for setting the recipe as those that are used to MODIFY A RECI...

Page 17: ...he display reads SET NEW RECIPES Release the Press the until the display reads REVIEW RECIPES PROGRAMMING FUNCTIONS LEVEL 2 cont P2360 2 Press YES to proceed The display should now readNO NAMELEFT alongwithMODIFY SHOW and NEXT 3 Press and release SHOW The screen will scroll through all the brew settings for that particular coffee flavor name When finished the display will return to the coffee name...

Page 18: ... and a batch light will be blinking Press and release the batch size to be modified P2291 29877 080301 PROGRAMMING FUNCTIONS LEVEL 2 cont 5 Using and set the amount of brew water in ounces to be dispensed over the grounds for that particular batch size 6 When finished press another batch size and re peat step 5 for that size for each batch size to be modified Continue setting all batch sizes 7 Whe...

Page 19: ...nd release NEXT to advance to the desired coffee name to be modified P2292 4 Press and release MODIFY The display should read BREW OZ 5 Press and release DONE The display should read 3 BATCHES DONE 6 Press and release YES The display should now read BYPASS and a batch light will be blinking Press and release the batch size to be modified 7 Using and set the amount of bypass water percentage to be ...

Page 20: ...he subsequent steps under that function Either of these methods can be used to set the pulse brew for each batch P2293 Modifying pulse brew Range 1st on time off to 4 minutes Off time off to 4 minutes Last on time Preinfusion to 4 minutes NOTE IfthebrewerisalreadyintheSETPULSEBREW screen it is not necessary to follow steps 1 through 8 in this section but proceed directly to step 9 1 Press and hold...

Page 21: ...Page 21 SET PULSE BREW cont PROGRAMMING FUNCTIONS LEVEL 2 cont 29877 080301 ...

Page 22: ... the water level in the funnel drains to the desired level press again to end the OFF TIME This also begins the spray of water for the final setting d 7 The brew water will begin again and the water level in the funnel will rise Watch the flow of water When it reaches the desired level press to end the LAST ON TIME e 8 The display should now show the 1st off and last times for the batch size just ...

Page 23: ...ONE c 5 The display will show the three times just entered for that batch size After a 5 second delay the dis play will read 3 BATCHES DONE d and e P2411 6 If other batch sizes need to be modified press NO The display will then read SET BY EXAMPLE 7 In that screen press NO The display should now read ENTER TIMES 8 Press YES in this screen then press a different batch size pad and repeat steps 2 th...

Page 24: ...isplay should now read SET PULSE BREW 9 Press and release NO The display should now read SET PREINFUSION 10 Press YES to proceed The display should now read ON TIME and a batch light will be blinking 11 Using and set the amount of time the brew water will initially presoak the grounds for that particular batch size 12 When finished press another batch size and re peat until all three batch sizes a...

Page 25: ...lease DONE The display should read 3 BATCHES DONE 8 Press and release YES The display should now read SET PULSE BREW 9 Press and release NO The display should now read SET PREINFUSION 10 Press and release NO The display should now read DRIP TIME along with either the word OFF or a time will be showing A batch light should also be blinking 11 Using the and set the amount of time from when the brew ...

Page 26: ...T RECIPES Release the pad Continue to press and release the pad until the display reads COPY SETTINGS PROGRAMMING FUNCTIONS LEVEL 2 cont 29877 090401 P2298 2 Press YES in this screen The display should read LEFT RIGHT 3 Iftheinitialprogrammingwasdoneontheleftside ofthebrewer pressYES ThedisplaywillreadARE YOU SURE 4 If you are sure that the data should be transferred from left to right press YES T...

Page 27: ...Release button Press and release the until the display reads SET TEMP P2303 Procedure to set ready temperature 1 Press and hold the pad until the display reads SET NEW RECIPES Release the pad Press and release the pad until the display reads SET READY 2 To adjust the ready temperature press the button to decrease or to increase the ready temperature 3 Whenfinished pressandreleaseDONEtosavethe new ...

Page 28: ...tch panel to exit REFILL and return to the MAIN SCREEN SPRAY OZ M This function allows the operator to view or to enter the actual flow rate coming out of the sprayhead This is NOT used to change the actual flow rate but to telltheinternalcontrollerhowfastthewaterisflowing The unit of measure is ounces per minute Oz M Procedure to adjust the flow rate setting 1 Press and hold the pad until the dis...

Page 29: ...NER READY If the container is un der the funnel pressYES The display should read CALIBRATE SPRAY PRESS BREW TO START 5 Press and release the pad on the side to be calibrated The display should read CALIBRATE SPRAY 60 SEC TO FINISH The 60 second timer on the display will count down to zero When the counter reaches zero the display will change to LEFT or RIGHT OZ along with a number signify ing ounc...

Page 30: ...PASS PRESS BREW TO START 6 Press and release the pad on the side to be calibrated The display should read CALIBRATE BYPASS 60 SEC TO FINISH The 60 second timer on the display will count down to zero When thecounterreacheszero thedisplaywillchangeto LEFT or RIGHT OZ along with a number signify ing ounces per minute 7 Measure the amount of water in the container and using or adjust the amount on the...

Page 31: ...detect 1 Press and hold the pad until the display reads SET NEW RECIPES Release the Press and release the pad until the display reads FUNNEL DETECT 2 NO or YES should be flashing to indicate the current setting 4 Select YES to prevent brewing if a Smart Funnel is not correctly situated in the rails If this function is activated and a brew cycle is attempted with the funnel not properly situated th...

Page 32: ... Heat server is not correctly positioned on the brewer beneath the funnel NOTE If YES isselectedandabrewcycleisattempted with a server not properly placed the display will read SERVER NOT IN PLACE 4 Select NO to allow brewing without a Soft Heat server in place This is selected when brewing into a container other than a Soft Heat Server 5 When finished press and release DONE This will save the new...

Page 33: ... and release either of the pads located on the front switch panel This will return to the MAIN SCREEN Procedure to test switches Thisfunctionallowstheoperatortotesttheopera tion of the individual switches on the front panel 1 Place brew funnels into rails on both sides of brewer 29877 121302 PROGRAMMING FUNCTIONS LEVEL 2 cont SERVICE TOOLS cont Testing individual components outputs This will allow...

Page 34: ...ithinthebrewer 5 The display should read TEST OUTPUTS 6 In TEST OUTPUTS screen press NO This ad vances to TEST SWITCHES Press and release NO once more The display should now read TEST SERVERS 7 Press YES in the TEST SERVERS screen to show if a server is in place The display should read IN PLACE with arrows pointing to the left and right 8 Lift and pull both Soft Heat servers forward about 2inchess...

Page 35: ...ewing setups to the defaults Press YES to load the defaults ThiswillthenreverttotheMAINSCREEN and the factory default values will replace all previously entered values It will NOT reset the summation Brew counter P2312 29877 121302 PROGRAMMING FUNCTIONS LEVEL 2 cont FACTORY DEFAULT VALUES Brew Lockout YES BREW VOLUMES Small Batch 64 oz Medium Batch 128 oz Large Batch 192 oz BYPASS PERCENTAGE Small...

Page 36: ... the valve Damage may result if solenoids are energized for more than ten minutes without a supply of water The use of two wrenches is recommended whenever plumbing fittings are tightened or loosened This will help avoid twists and kinks in the tubing Makecertainthatallplumbingconnectionsaresealedandelectricalconnectionstightandisolated This brewer is heated at all times Keep away from combustible...

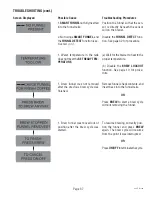
Page 37: ...position after the brew cycle was started Position the funnel so that the sen sor is directly beneath the sensor coil on the brewer Disable the FUNNEL DETECT func tion See page 32 for procedure a Wait for the brewer to heat to the proper temperature b Disable the BREW LOCKOUT function See page 10 for proce dure Removefunnel checkcontents and insert back into the funnel rails OR Press BREW to start...

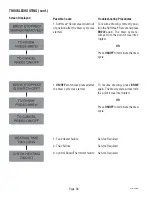
Page 38: ...ted 1 Tank Heater failure 2 Triac Failure 3 Control Board Thermistor failure To resume brewing correctly posi tion the Soft Heat Server and press BREW again The brew cycle re sumes from the point it was inter rupted OR PressON OFFto terminate the brew cycle To resume brewing press BREW again Thebrewcycleresumesform the point it was interrupted OR PressON OFFto terminate the brew cycle Service Requ...

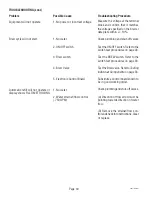
Page 39: ...l Board Failure 1 TemperatureSensorProbewire s broken or not making connection 1 TemperatureSensorProbewire s shortedtohousing ortoeachother Check water supply shut off Service required Service required Check wire and connection of both black and white wires of tempera ture probe Checktoconfirmthatwire s arenot pinched between two surfaces or connected to each other ...

Page 40: ...rewer data plate within 10 Check plumbing and shut off valves Test the ON OFF switch Refer to the switch test procedures on page 33 Test the BREW switch Refer to the switch test procedures on page 33 TesttheBrewvalve RefertoTesting Individual Components on page 33 Substitute a control board known to be in good working order Checkplumbingandshut offvalves A Direction of flow arrow must be pointing ...

Page 41: ...n be adjustedtocompensateforextreme water conditions very pure low conductancewaterrequiresahigher setting while high mineral content high conductance water requires a lowersetting Notethattheleftnum ber changes from a high value when waterisNOTtouchingtherefillprobe to a low value when water IS touch ing the probe For best operation the right number should be set to a value midway between these l...

Page 42: ... a high value when waterisNOTtouchingtherefillprobe to a low value when water IS touch ing the probe For best operation the right number should be set to a value midway between these low and high numbers Before changing the setting confirm that the refill probeisfreeofscalebuildupandthe connection to it is secure Substitute a control board known to be in good working order Remove power from the br...

Page 43: ... from the brewer Connect a voltmeter across one of the tank heaters Reapply power to the brewer and refer to Testing Indi vidual Components on page 33 If the full supply voltage is measured when the tank heater is turned on and zero voltage is measured with the triac off then the triac is good If half the supply voltage is measured the triac is defective If very low or zerovoltageismeasured therec...

Page 44: ... to Test ing Individual Components on page 33 Turn the valve on for 30 seconds andcollectthewaterdispensedfrom the sprayhead Repeat the test sev eral times to confirm a consistent volume of dispensed water If not consistent check the valve tubing and sprayhead for lime buildup Ifbypassisbeingusedontheincon sistent brewing recipe test the By pass Valve Refer to Testing Indi vidualComponentsonpage33...

Page 45: ...roperly wet the bed of ground coffee in the funnel The BUNN paper filter should be centered in the funnel and the bed of groundcoffeeleveledbygentleshak ing Empty the server remove its cover and place the server beneath the sprayhead Place empty funnel over the server entrance with ON OFF switch in the ON position press the startswitchandreleaseit Checkthe water temperature immediately be low the ...

Page 46: ...t age preinfusion or pulse brew Contact Bunn O Matic for sugges tions The nut on back of the solenoid must be tight or it will vibrate during operation Plumbing lines should not be rest ing on the counter top A The brewer must be connected to a cold water line B Water pressure to the brewer must not be higher than 90 psi 620 kPa Install a regulator if necessary to lower the working pressure to app...

Page 47: ...Page 47 29877 080301 ...

Page 48: ...C 4 AMP RESETTABLE FUSE 24VDC LEFT SERVER TRANSFORMER RIGHT SERVER TRANSFORMER RECTIFIER AC AC 4 AMP RECTIFIER 24VDC CONTROL PC BOARD RIGHT FUNNEL SENSOR LEFT FUNNEL SENSOR VIO WHI VIO WHI YEL YEL J9 1 J9 5 J2 1 J2 5 J2 10 J11 1 J11 10 J11 18 J11 5 J4 1 J4 10 J4 19 J4 5 J4 15 Touch Switch Assembly Codes A1 Left Brew A2 Left On Off A3 Right On Off A4 Right Brew B1 Hidden Left B2 Hidden Right C1 Lef...

Reviews: