background image

Installation and starting up

The original packaging has been designed for dispatch by post. Keep it in case you need to return the toaster 
to the supplier. Before installing the toaster, 

comply with all the points of the safety instructions on the 

previous pages.
After removing the toaster from its packaging, make sure that it is in perfect condition and make sure that 
no kind of matter, packaging material, warranty sheets or the like have accidentally fallen inside the slots 
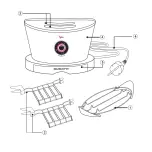
(3) during transport or when opening the packaging. 


The plastic bag in which the toaster is packaged should be kept out of reach of children as it poses a suffocation 
hazard.
In order to remove dust that may have accumulated  on the toaster, simply dust it off with a dry soft cloth. 
     
After you have carried out the above steps and have strictly followed the safety standards, proceed to 
connect to the power supply. 

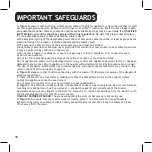
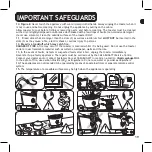
Connecting to power supply: electric current can kill! Follow safety instructions strictly. Plug the power 

cable (6) of the Volo toaster into a power socket, the voltage of which corresponds to the voltage 

indicated on the rating plate underneath the toaster.

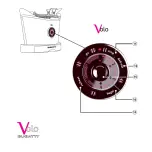
To disconnect, make sure that the toaster is not running or press the Stop button (11) and wait for the 

toaster to stop and for the Go/Stop button light to stop blinking . Remove the plug from the wall socket 

when the red light stops blinking. Do not unplug the toaster from the power point by pulling on the 

cable.

Make sure that the electric socket that you are using is suitably earthed         .
Never use faulty or damaged power cables. Use an extension cable only after making sure that it is in perfect 
condition (adhere strictly to the safety instructions specified in point 5).

Never allow parts carrying live voltage to come into contact with water: you may cause a short circuit!!! 

(adhere strictly to all points of the safety instructions specified above).
The toaster may emit a pungent odour or light smoke the first time you use it. This is a normal result of the 
manufacturing process. The odour or smoke is harmless and will quickly disperse. 

Running the toaster 

without bread may damage the toaster irreparably and thus automatically void the warranty.


20

Summary of Contents for Volo

Page 1: ......

Page 2: ......

Page 3: ......

Page 4: ......

Page 5: ......

Page 6: ...HE TOASTER UNLESS YOU ARE THOROUGHLY FAMILIAR WITH THE INSTRUCTIONS WARNING No liability is accepted for damage due to incorrect use or use other than for its intended purpose using the toaster contin...

Page 7: ...25 Warranty Pag 16 Technical features Pag Description of toaster parts Pag Toaster controls Pag 17 19 Important safeguards Pag 20 Installation and starting up Pag 21 23 Advice and recommedations on us...

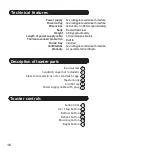
Page 8: ...roximately Pressed Solid Steel 2 8 Kgapproximately 1 0 meterapproximately Built in Included See ratingplateunderneath machine As per attached certificate Description of toaster parts Bun warmer 1 Sand...

Page 9: ...es of the toaster DANGER OF BURNS 2 The toaster has been designed for HOUSEHOLD USE ONLY Use toaster only for its intended use Do not make any technical modifications that might cause risks 3 Close su...

Page 10: ...er with a damaged cord or plug or after the appliance develops faults or has been damaged in any manner Return appliance to the nearest authorized service facility for examination or repair The use of...

Page 11: ...a foodstuff which may catch fire DANGER OF FIRE A fire may occur if the toaster is covered whilst it is being used Do not use the toaster under or near flammable material such as curtains wallpaper wa...

Page 12: ...le 6 of the Volo toaster into a power socket the voltage of which corresponds to the voltage indicated on the rating plate underneath the toaster To disconnect make sure that the toaster is not runnin...

Page 13: ...r 1 is used to heat bread croissants or other types of buns make sure that you place the bun warmer 1 correctly and stably on the top of the toaster body 4 Put the food on the bun warmer 1 and use the...

Page 14: ...onic card 4 When the reheat function has finished Volo emits three beep tones and the carriage holding the bread slices or the sandwich cages 2 slowly ascends automatically The red light on the Go Sto...

Page 15: ...ide is soft 2 Insert the buns bread slices into the slots 3 of the toaster or put them into the sandwich cages 2 and position the two sandwich cages 2 in the slots 3 3 Press the bagel button 16 to sel...

Page 16: ...tray 5 just carry out the following steps a Remove the crumb tray 5 from the toaster body 4 by pulling it out of its recess b Wash all the surfaces by hand and with neutral detergents c Make sure that...

Page 17: ...ure to abide by the instructions on installation use and maintenance of the toaster 6 Replacement or repair shall not extend the warranty period The warranty does not cover the replacement of consumab...

Page 18: ...reserva se a faculdade de efetuar modifica es sem pr aviso A prospetiva a forma e a cor do produto foram inspiradas no produto real padr o NL Alle details van deze tekst zijn zorgvuldig gecontroleerd...

Page 19: ......

Page 20: ......

Page 21: ......

Page 22: ......

Reviews: