


Name
Description
Open Remote Desktop
Opens Windows Storage Server in remote desktop.
Configure
Opens the properties page that lets you configure
the Buffalo NAS device’s IP address or open Windows
Storage Server in remote desktop.
Label Color
Selects the color of the name displayed below the icon.
View Options
Lets you choose icon size, position, and view mode.
Auto Power Mode
Auto power mode can turn supported Buffalo NAS
devices on the network on and off automatically.
To display these options,
hold down the control
key and click your
device’s icon.
Open Folder
Opens the Buffalo NAS device’s shared folders.
Open Remote Desktop
Opens Windows Storage Server in remote desktop.
Configure
Opens the properties page that lets you configure
the Buffalo NAS device’s IP address or open Windows
Storage Server in remote desktop.
I’m here
Causes your Buffalo NAS device to beep.
Label Color
Selects the color of the name displayed below the icon.
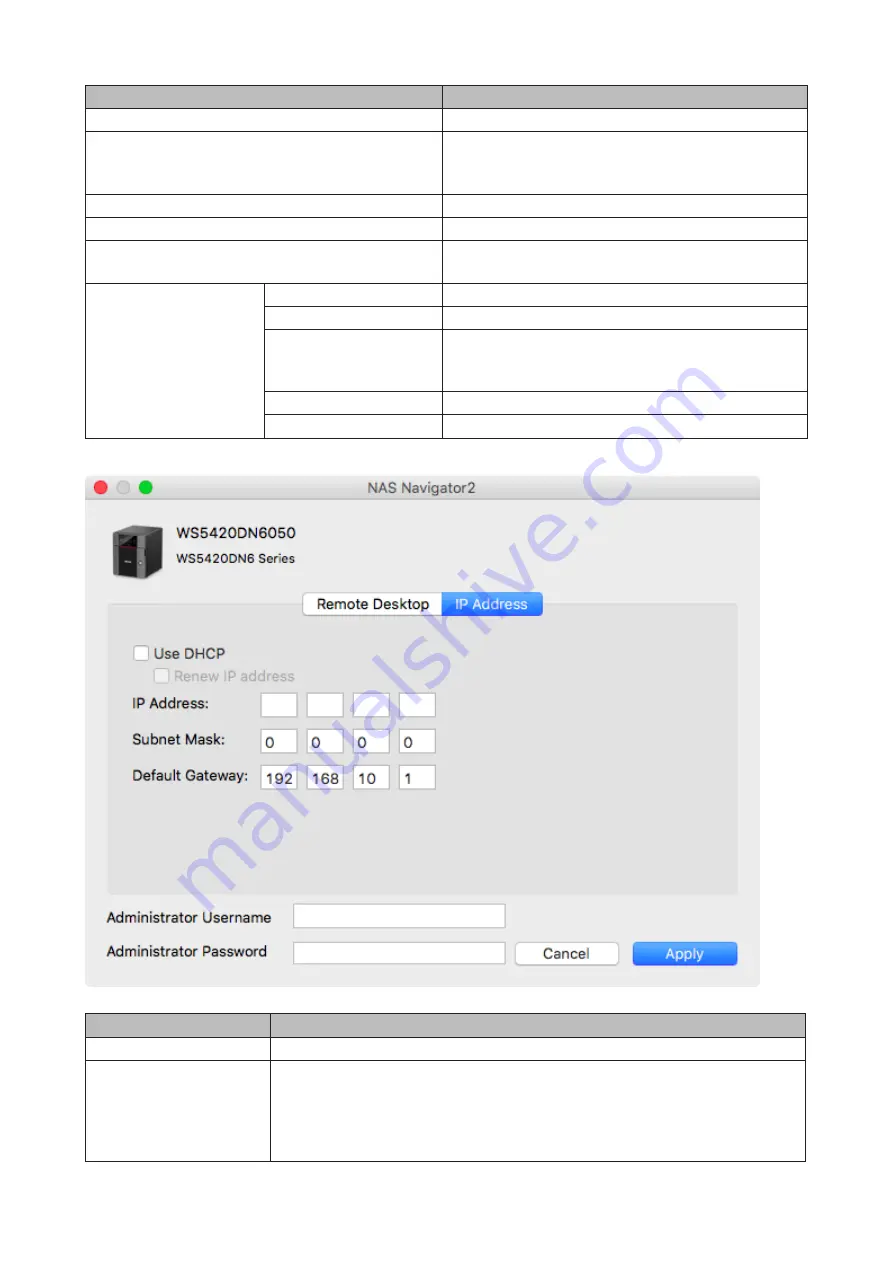
The following tasks may be performed from the Buffalo NAS device’s properties page.
Name
Description
Remote Desktop
Click
Open Remote Desktop
to open Windows Storage Server.
IP Address
Select the “Use DHCP” checkbox to assign an IP address from the DHCP server
automatically. If there is no DHCP server on the network, you cannot use this
function. Select the “Renew IP address” checkbox to obtain an IP address from
the DHCP server. You can manually enter an IP address, subnet mask, and default
gateway.
102
Summary of Contents for TeraStation WSS WS5020N6
Page 29: ...1 From Server Manager click Tools Computer Management 2 Click Disk Management 26 ...
Page 31: ...2 Click Disk Management 3 Right click the volume that you want to format and select Format 28 ...
Page 35: ...3 Select General purpose file server to the right of Data deduplication and click OK 32 ...
Page 38: ...5 Select Custom and click Next 6 Click Add Items 35 ...
Page 39: ...7 Select the backup source folders or drives and click OK 8 Click Next 36 ...
Page 40: ...9 Specify the schedule to run the backup and click Next 37 ...
Page 44: ...5 Select the date when a data backup occurred and click Next 41 ...
Page 55: ...3 Enter a hostname for the namespace server and click Next 52 ...
Page 56: ...4 Enter a name for the namespace and click Next 53 ...
Page 61: ...4 Enter a name for the replication group and click Next 58 ...
Page 63: ...7 Enter the path or select the replication source folder and click OK 8 Click Next 60 ...
Page 64: ...9 Enter the hostname of the file server for the replication destination and click Next 61 ...
Page 73: ...3 Double click Remote Desktop Users 4 Click Add 5 Click Advanced 6 Click Find Now 70 ...
Page 76: ...4 Enter a group name and click Add 5 Click Advanced 6 Click Find Now 73 ...
Page 85: ...3 From the TEAMS field click TASKS then select New Team 82 ...
Page 87: ...1 From Server Manager click Tools Computer Management 2 Click Device Manager 84 ...


