12
◗
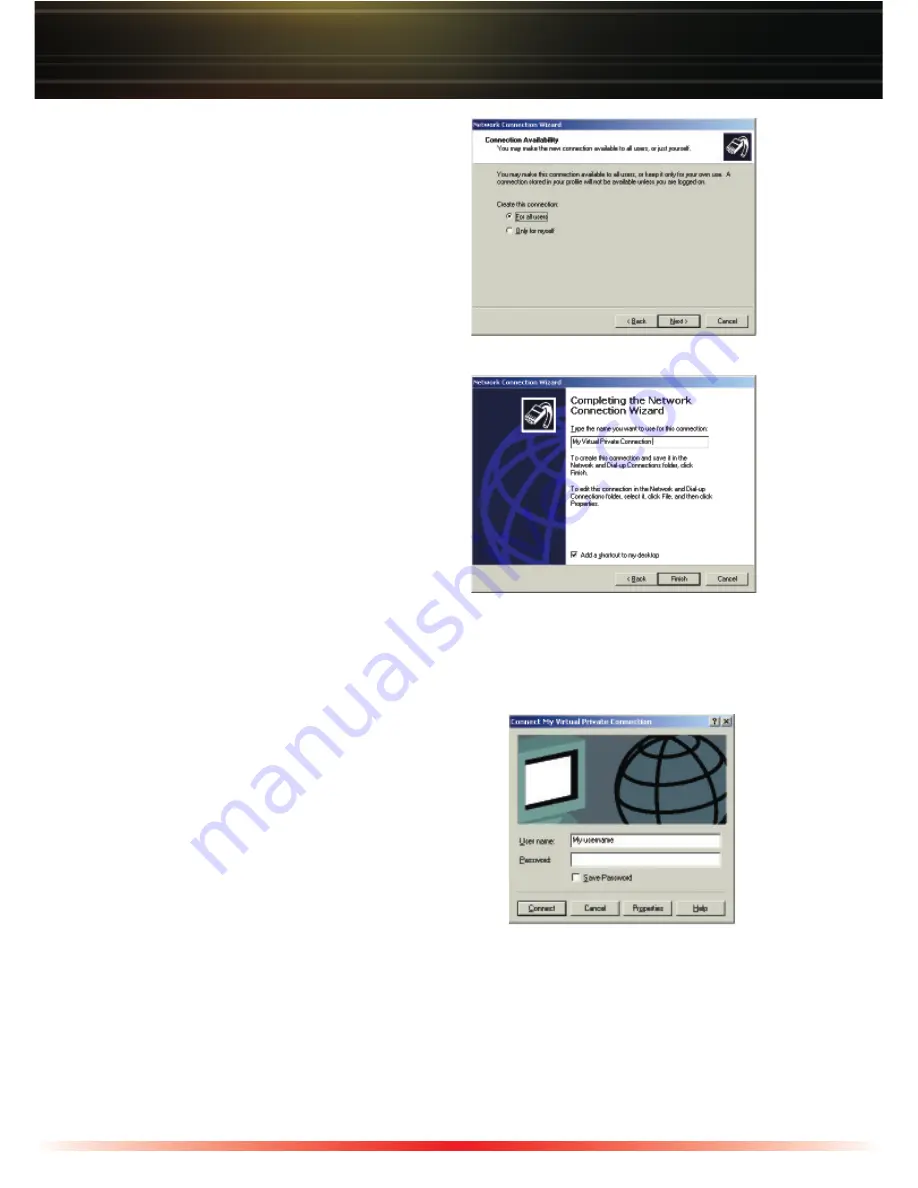
Depending on your computer
configuration, select either
‘For all
users’
or
‘Only for myself’
. Selecting
'For all users' gurantees the connection
will work on all profiles on your system.
'Only for myself' specifies that the
connection will only be available on your
Window's profile.
◗
Press the
‘Next’
button.
◗
Type a name you wish to use to identify
the VPN connection. This name will
be used to identify the connection;
something like 'Home VPN' would be an
acceptable name.
◗
Leave the check box checked if you
wish for a shortcut to be created on your
desktop for this connection. Otherwise
un-check the box.
◗
Press the
‘Finish’
button.
Windows 2000
(Windows XP turn to Page 13)
◗
A window will pop up so you can initiate
the VPN connection. You can press the
‘Connect’
button to dial the connection after
inputting your user name and password
(Specified in the PPTP Server setup) or press
the
‘Cancel’
button to close the window and
dial the connection later. Click the 'Save
Password' option if you would like Windows
to not prompt you for the password everytime you start the VPN connection.
NOTE:
It is not recommended to use the save password feature for your VPN Client. If
your computer were to be stolen, then an unauthorized user may gain access to your
network.
This completes the setup of the VPN Client on your Windows 2000 computer. Please
skip to the middle of the next page to continue the setup.


