


Operation
- 3.12 -
SMART 200 TTS
Preliminary operations for using the SMART 200 TTS terminal
Just after installation and before beginning to use the system, check that all
the connectors are plugged in properly.
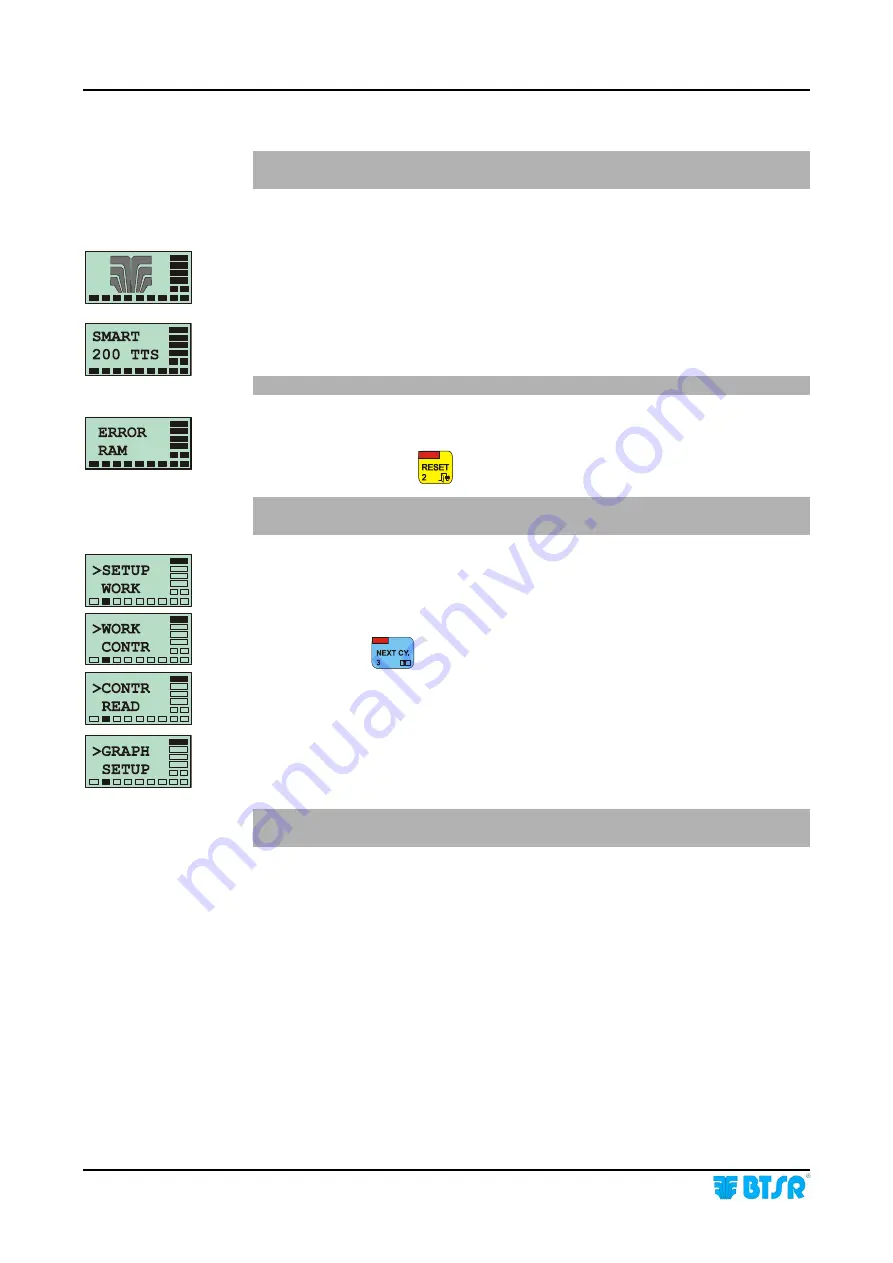
Power-on the system and check that the graphic display shows sequentially, for a
few seconds, the two screens shown on the left side of this page:
(BTSR Logo)
(Type of SMART system)
If the display is blank please refer to “Troubleshooting” chapter.
If the ERROR RAM message appears on the screen, it means that the self
diagnostics performed at power on has detected an error in the memory of the
SMART terminal. Press
to reset the error.
The system will erase all settings entered by the user and will reload the
default values!!
If the error persists, please refer to “Troubleshooting” chapter.
If the system displays one of the messages that you can see on the left hand side of
this page, it means that the terminal is working correctly and that it is possible to
activate one of the four options of the main menu.
If required, press
to select the desired function:
> SETUP
to run the configuration/programming of the system.
> WORK
to load the article values into the sensors.
> CONTROL
to enable automatic monitoring.
> GRAPH
to activate the graphic visualisation mode
Pressing the Reset button when the system displays any of the main menu
items, the current software version (BTSR VER. X.X) will be displayed.
System
start up
Summary of Contents for IS3W/TTS
Page 1: ...SMART 200 TTS IS3W TTS YARN CONTROL SYSTEM Operating Manual Rev 2 0 August 2003 ENGLISH ...
Page 26: ...Operation 3 14 SMART 200 TTS Enabling the SETUP Menu Functions CONFIG ...
Page 27: ...Operation SMART 200 TTS 3 15 Enabling the SETUP Menu Functions NEW MODIFY ERASE ...
Page 59: ...Operation SMART 200 TTS 3 47 Production Report Example ...
Page 60: ...Operation 3 48 SMART 200 TTS Page intentionally left blank ...
Page 66: ...Troubleshooting and Maintenance 4 6 SMART 200 TTS Page intentionally left blank ...
Page 68: ...Appendix A Quick Reference Symbols Key A 2 SMART 200 TTS ...
Page 69: ...Appendix A Quick Reference Symbols Key SMART 200 TTS A 3 ...
Page 70: ...Appendix A Quick Reference Symbols Key A 4 SMART 200 TTS ...
Page 71: ...Appendix A Quick Reference Symbols Key SMART 200 TTS A 5 ...
Page 72: ...Appendix A Quick Reference Symbols Key A 6 SMART 200 TTS ...
Page 73: ...Appendix A Quick Reference Symbols Key SMART 200 TTS A 7 ...
Page 74: ...Appendix A Quick Reference Symbols Key A 8 SMART 200 TTS ...
Page 75: ...Appendix A Quick Reference Symbols Key SMART 200 TTS A 9 ...
Page 76: ...Appendix A Quick Reference Symbols Key A 10 SMART 200 TTS ...
Page 77: ...Appendix A Quick Reference Symbols Key SMART 200 TTS A 11 ...
Page 78: ...Appendix A Quick Reference Symbols Key A 12 SMART 200 TTS ...
Page 79: ...Appendix A Quick Reference SMART 200 TTS A 13 Notes ...
Page 80: ...Appendix A Quick Reference A 14 SMART 200 TTS Page intentionally left blank ...


