


III-46
[ 16 ]
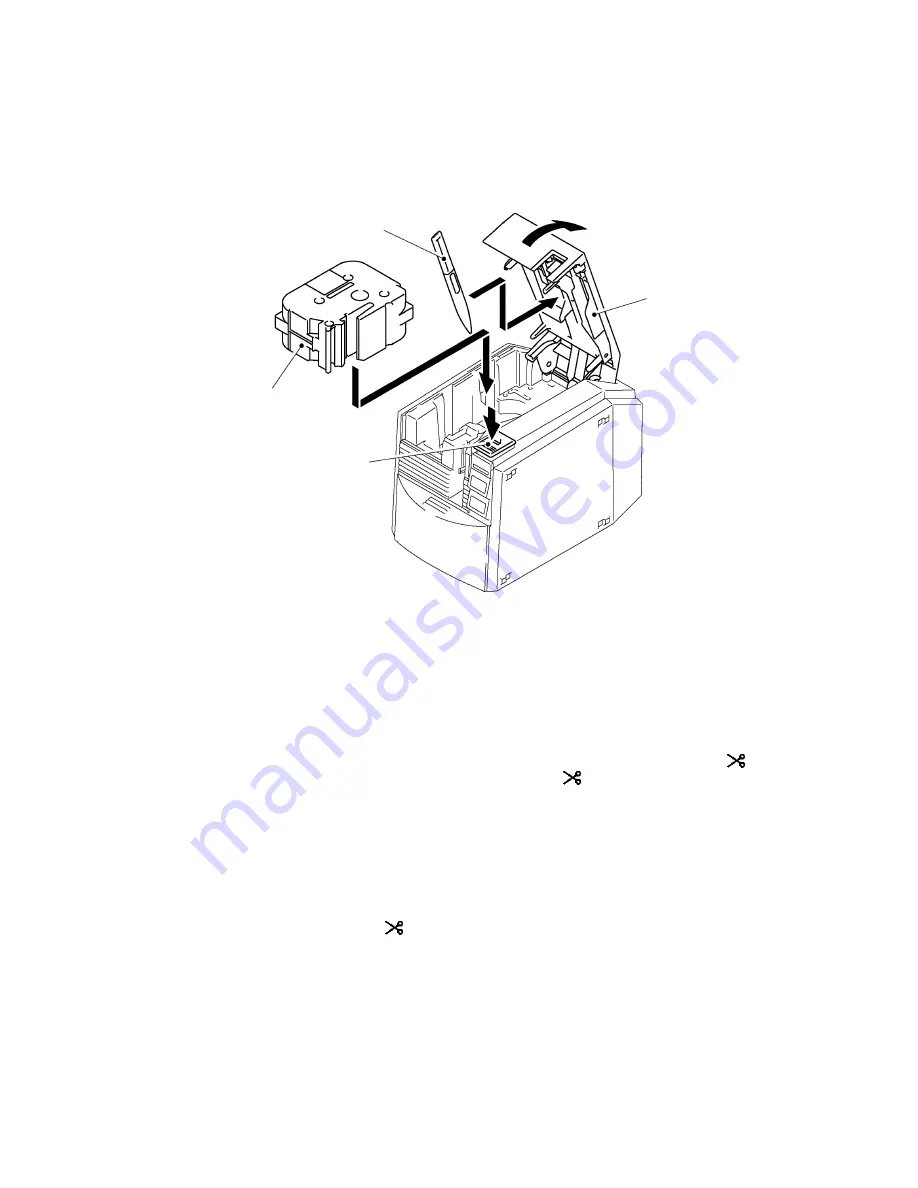
Reassembling the Tape Cassette
(1)
Press the cover open button and open the cassette cover fully.
(2)
Set the lettering stick in the cassette cover.
(3)
Mount the tape cassette approaching from the overhead and close the cover.
Fig. 3.1-78 Reassembling the Tape Cassette
[ 17 ]
Demonstration Print and Final Check
(1)
Connect the AC adapter to the machine.
(2)
Mount the 36mm laminated tape cassette.
(3)
Error (Red) LED and power supply (Green) LED will flash alternately after pressing and
holding the ON/OFF key for 5 seconds and more when pressing the FEED/CUT (
) key.
When the LED starts to flash, release the FEED/CUT (
) key and repeat the press/release
of the button once more, then release the ON/OFF key. Now the demo printing starts.
(4)
Verify whether the tape feed is proper; printing is correct; tape cutting is correct, during the
demo printing.
If any fault is found, execute the troubleshooting referring to “Chapter 4 Troubleshooting &
Error Message”.
(5)
Verify that the roller holder ASSY is released from thermal head when opening the cassette
cover.
(6)
Very that the FEED/CUT (
) key works properly.
(7)
Very that the ON/OFF key works properly.
Cassette cover
Cover open button
Tape cassette
Lettering stick
1
2
3
Summary of Contents for PT-9500PC - P-Touch 9500pc B/W Thermal Transfer Printer
Page 1: ...SERVICE MANUAL MODEL PT 9500PC ...
Page 2: ...SERVICE MANUAL MODEL PT 9500PC ...
Page 86: ...IV 10 3 The LED does not turn on 4 No printing is performed ...
Page 87: ...IV 11 5 The interface malfunction 6 The tape is not cut ...
Page 88: ...IV 12 7 The tape is not fed correctly ...
Page 89: ...IV 13 ...
Page 90: ...IV 14 8 Half cut failure ...
Page 91: ...IV 15 9 Forced tape eject failure ...
Page 92: ...IV 16 10 The failure of pressure contact release of the roller holder ...
Page 103: ......
Page 104: ......
Page 105: ......