SELECTING/EDITING/SAVING PATTERNS
—————————————————————————————————————————————
122
2
Touch the keys to adjust the pattern to the
desired size.
Each touch of a key slightly enlarges or reduces
the pattern.
The size of the pattern is displayed after a key
is touched to change it.
1
Vertical length
2
Horizontal width
• The size that the pattern can be enlarged
depending on the pattern or character.
• Depending on the pattern or character, if it is
rotated 90 degrees it may be enlarged even
more.
• If the pattern is rotated, the vertical and
horizontal directions may be reversed.
• To return the pattern to its original size,
touch
so that it changes to
.
3
If necessary, touch the arrow keys to adjust
the position of the pattern.
For more details, refer to page 120.
4
After making the desired changes, touch
.
X
The pattern editing screen appears again.
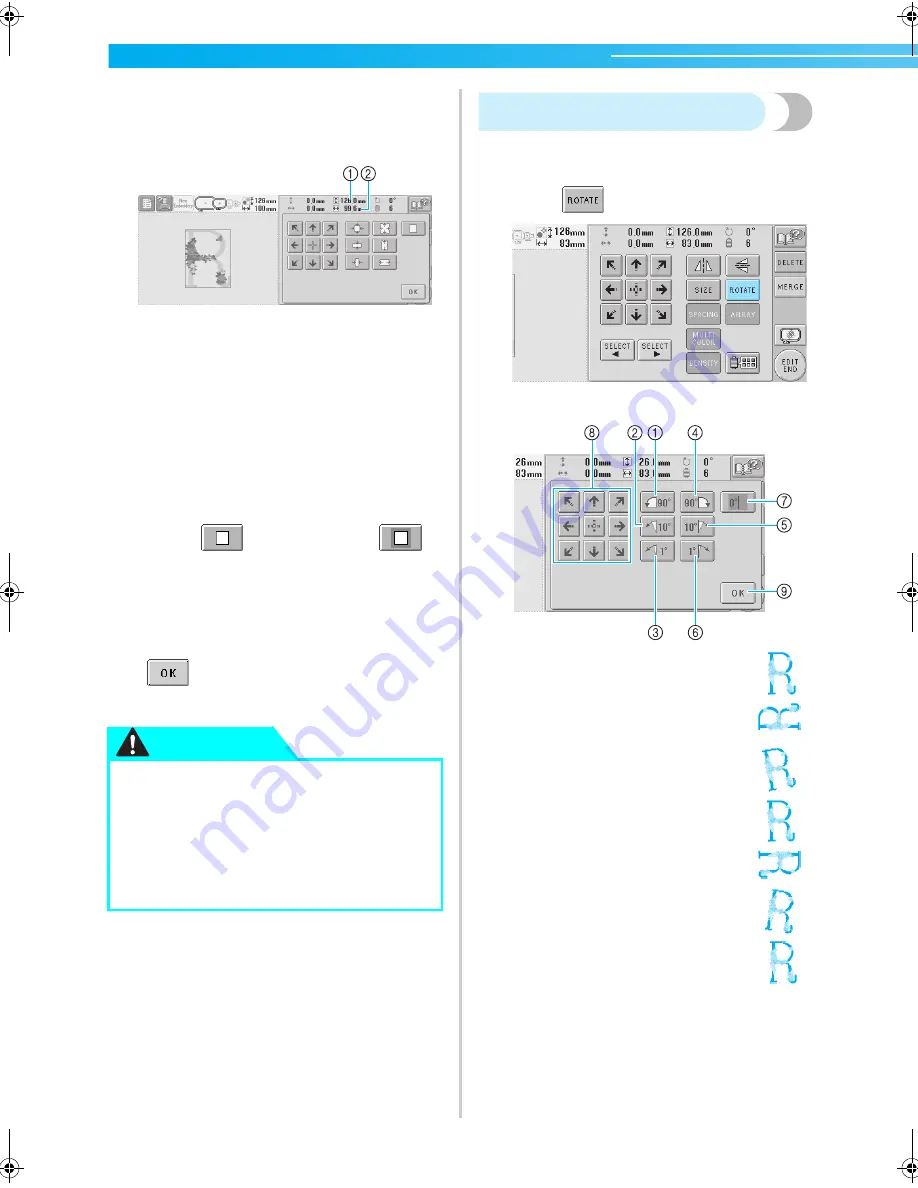
Rotating a pattern
The pattern can be rotated between 1 and 359
degrees either clockwise or counterclockwise.
1
Touch .
X
The screen shown below appears.
●
After changing the size of the pattern,
check the icons for the embroidery
frames that can be used and use only the
indicated frames. If a frame other than
those indicated are used, the presser foot
may hit the embroidery frame and cause
injuries.
CAUTION
Example: Original angle
1
Rotates 90 degrees to the left
2
Rotates 10 degrees to the left
3
Rotates 1 degree to the left
4
Rotates 90 degrees to the right
5
Rotates 10 degrees to the right
6
Rotates 1 degree to the right
7
Touch this key to return the pattern to its original
angle.
8
Moves the pattern in the direction of the arrow on
the key.
9
Touch this key to close this screen.
Sapphire_brother.book Page 122 Thursday, November 17, 2005 3:00 PM
Summary of Contents for PR-600II
Page 1: ...EMBROIDERY MACHINE PR 600 O P E R A T I O N M A N U A L ...
Page 77: ...EMBROIDERING TUTORIAL 60 ...
Page 115: ...EMBROIDERING SETTINGS 98 ...
Page 171: ...BASIC SETTINGS AND HELP FEATURE 154 ...
Page 229: ...APPENDIX 212 ...
Page 236: ...Index 219 7 ...
Page 237: ......


