S E T T I N G U P B R O T H E R M F C A N D P C T O W O R K T O G E T H E R
11 - 2
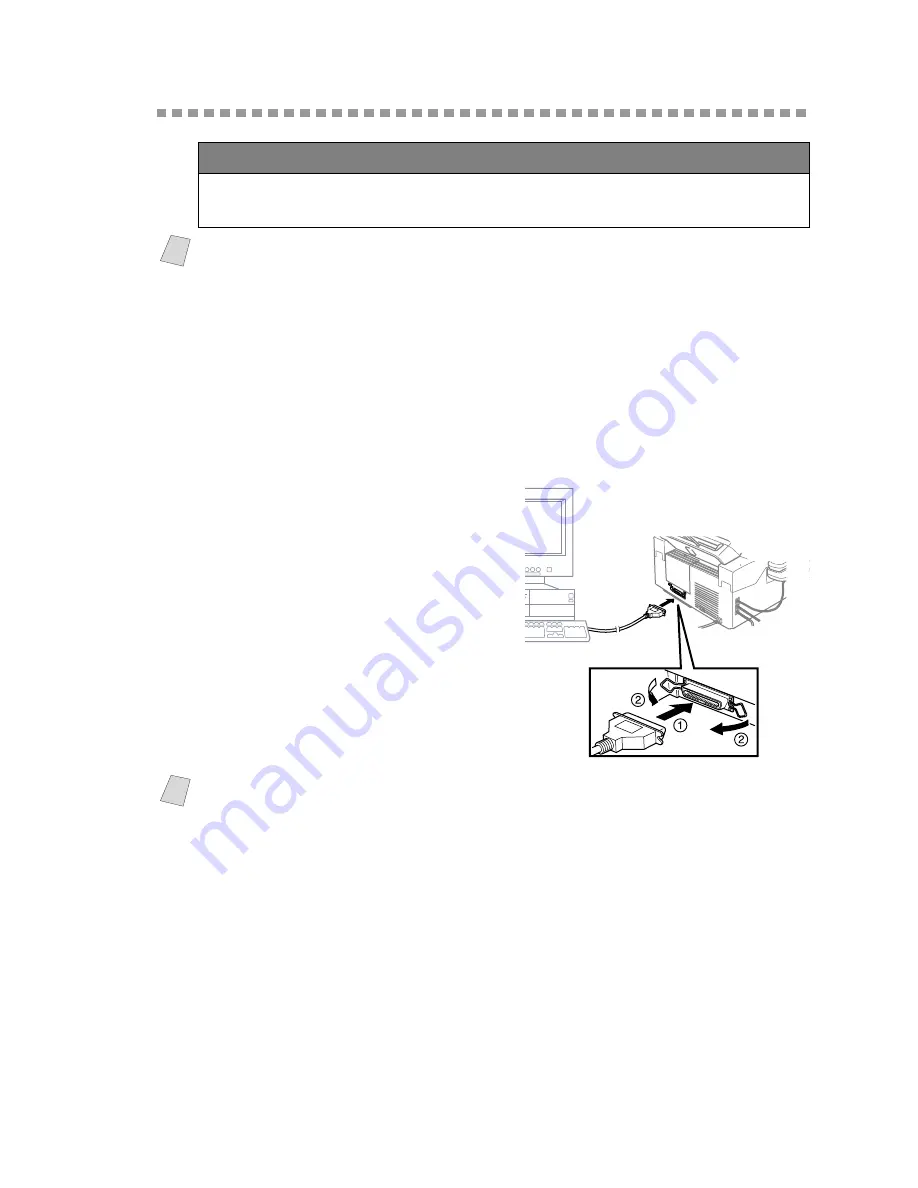
Connecting the Brother Machine to Your PC
1
Make sure to unplug the machine’s power cord from the electrical outlet before
connecting the parallel interface cable.
Also, make sure the computer is turned off and unplugged from the electrical
power before you connect the interface cable.
2
Connect the parallel interface cable to the parallel interface port of the machine,
and then secure the connection with the wire clips.
3
Connect the interface cable to the
printer port of the computer, and
then secure it with the two screws.
For the location of your computer’s
parallel printer port, see the User’s
Guide for your computer.
4
Before plugging in your computer
and turning it on, plug in the
electrical cord of the Brother
machine.
5
Turn on the PC.
IMPORTANT
To install the software using Windows NT
®
Workstation Version 4.0 or
Windows
®
2000 Professional, you must be logged on as the Administrator.
Note
Before you can connect the MFC to your computer, you must purchase a bi-
directional IEEE 1284-compliant parallel cable that is no longer than 6 feet (1.8
meters).
Note
To continue, you must install the Brother Printer Driver before you install the
Brother Software. Be sure to follow the instructions for the operating
system you are using:
1. For Brother Printer Driver, look for your operating system on pages 11-3 to
11-14.
2. For Brother Software, look for your operating system on pages 11-15 to
11-18.


