CHAPTER 4 OPTIONS
4-59
☛
☛
☛
☛
4.
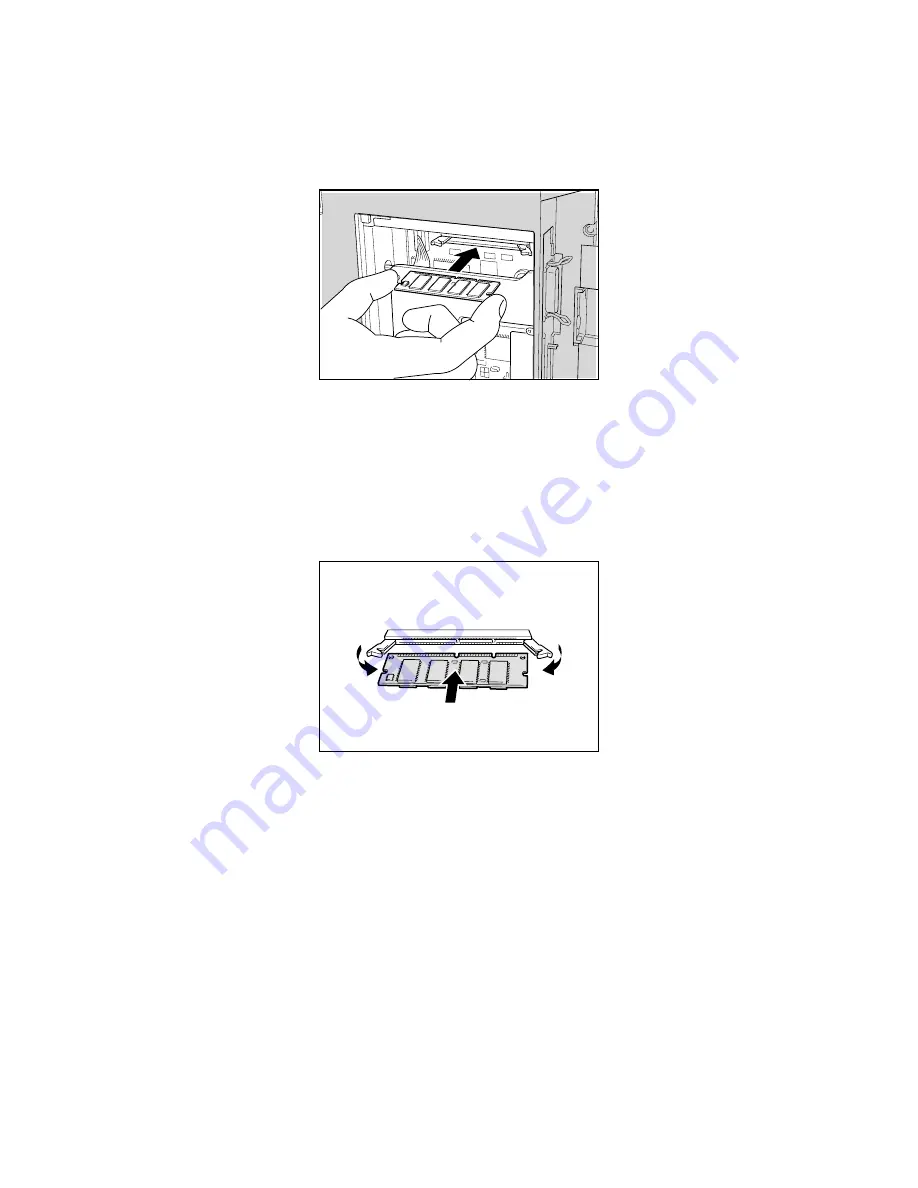
Hold the DIMM with your fingers against the side edges and thumb against
the back edge. Align the notches on the DIMM with the DIMM slot. (Check
that the locks on each side of the DIMM slot are open, or outward.).
Fig. 4-97
☛
☛
☛
☛
5.
Press the DIMM straight into the slot (press firmly). Make sure the locks on
each side of the DIMM snap inwards into place. (To remove a DIMM, the
locks must be released.)
Fig. 4-98
Summary of Contents for HL-3260N
Page 4: ...IV ...
Page 27: ...CHAPTER 1 ABOUT THIS PRINTER 1 3 What is on the CD ROM Fig 1 2 ...
Page 36: ... ...
Page 52: ...1 28 5 Choose the Media Type Fig 1 25 6 Click OK 5 ...
Page 56: ... ...
Page 70: ...CHAPTER 2 BEFORE WORKING WITH THE PRINTER 2 11 Graphics Set the print quality etc Fig 2 9 ...
Page 84: ...CHAPTER 3 CONTROL PANEL 3 3 C CH HA AP PT TE ER R 3 3 C CO ON NT TR RO OL L P PA AN NE EL L ...
Page 85: ...CHAPTER 3 CONTROL PANEL 3 1 C Co on nt tr ro ol l p pa an ne el l Fig 3 1 ...
Page 88: ...USER S GUIDE 3 4 NO DATA JOB CANCELLING READY ...
Page 123: ...CHAPTER 4 OPTIONS 4 4 C CH HA AP PT TE ER R 4 4 O OP PT TI IO ON NS S ...
Page 124: ...CHAPTER 4 OPTIONS 4 1 0 0 1 2 3 G F H C D E Fig 4 1 ...
Page 135: ...4 12 0 1 2 0 1 2 3 4 5 6 0 6 7 6 2 ...
Page 151: ...4 28 0 12 3 45 2 6 0 5 0 5 2 6 6 6 0 7RESOLUTION ADAPT8 5 ...
Page 158: ...CHAPTER 4 OPTIONS 4 35 0 1 2 3 4 0 1 2 3 0 1 0 5 1 6 6 5 3 DX 5000 MX 5000 FS 5050 ...
Page 166: ...CHAPTER 4 OPTIONS 4 43 0 0 1 0 2 ...
Page 188: ...CHAPTER 5 MAINTENANCE 5 5 C CH HA AP PT TE ER R 5 5 M MA AI IN NT TE EN NA AN NC CE E ...
Page 189: ...CHAPTER 5 MAINTENANCE 5 1 Fig 5 1 ...
Page 210: ...5 22 ZAEH200E Fig 5 40 Fig 5 41 ...
Page 233: ...6 22 C CO OV VE ER R O OP PE EN N m me es ss sa ag ge e Fig 6 35 ...
Page 242: ...APPENDICES A AP PP PE EN ND DI IC CE ES S ...
Page 253: ...APPENDICES Appendix 11 0 1 0 2 3 4 42 5 5 4 5 25 0 1 0 2 ...
Page 260: ...Appendix 18 I IB BM M M Mo od de e H HP P G GL L M Mo od de e ...
Page 274: ...INDEX I IN ND DE EX X ...


