background image

Wireless configuration for Windows

®

 using the Brother automatic installer application (For HL-3070CW)

39

4

r

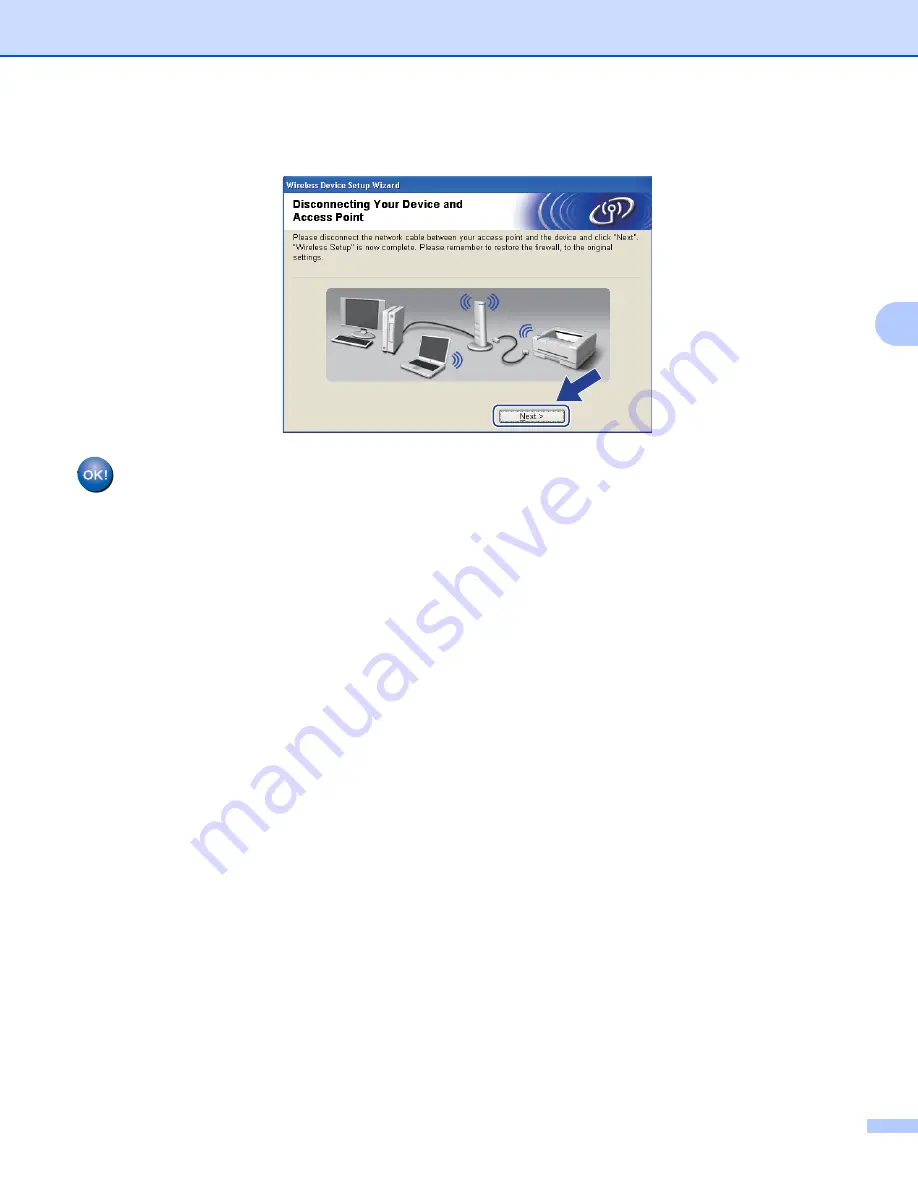
Disconnect the network cable between your access point (hub or router) and the machine, and click 

Next


or 

Finish

.


You have completed the wireless setup. If you chose to install the printer driver in step 

g

, Go 

to 

Installing the printer driver

 on page 57.

Summary of Contents for HL-3040CN

Page 1: ...oughly before using the machine Keep the CD ROM in a convenient place so you can use it quickly if you need to Please visit us at http solutions brother com where you can get product support the latest driver updates and utilities and answers to frequently asked questions FAQs and technical questions Note Not all models are available in all countries Version 0 ENG ...

Page 2: ...Script and PostScript3 are either registered trademarks or trademarks of Adobe Systems Incorporated in the United States and or other countries BROADCOM SecureEasySetup and the SecureEasySetup logo are trademarks or registered trademarks of Broadcom Corporation in the United States and or other countries Wi Fi Wi Fi Alliance WPA WPA2 Wi Fi Protected Access and Wi Fi Protected Setup are either trad...

Page 3: ...terials presented including but not limited to typographical and other errors relating to the publication 2009 Brother Industries Ltd IMPORTANT NOTE This product is approved for use in the country of purchase only Do not use this product outside the country of purchase as it may violate the wireless telecommunication and power regulations of that country Windows XP in this document represents Wind...

Page 4: ...please write to us at In USA 1 877 BROTHER 1 877 276 8437 In Canada 1 877 BROTHER In Brazil helpline brother com br In Europe Visit http www brother com for contact information on your local Brother office In USA Printer Customer Support Brother International Corporation 7905 North Brother Boulevard Bartlett TN 38133 In Canada Brother International Corporation Canada Ltd Marketing Dept 1 Hôtel de ...

Page 5: ...For Frequently Asked Questions FAQs Product Support Driver Updates and Utilities http solutions brother com Ordering accessories and supplies In USA 1 877 552 MALL 1 877 552 6255 1 800 947 1445 fax http www brothermall com In Canada 1 877 BROTHER http www brother ca ...

Page 6: ...l to configure your machine for a network 15 Using other methods to configure your machine for a network 15 Changing the print server settings 16 Using the BRAdmin Light utility to change the print server settings 16 Using the BRAdmin Professional 3 utility to change the print server settings For Windows 16 Using Web Based Management web browser to change the print server settings 17 Using the con...

Page 7: ...28 Using the PIN Method of Wi Fi Protected Setup to configure your machine for a wireless network 28 4 Wireless configuration for Windows using the Brother automatic installer application For HL 3070CW 29 Configuration in Infrastructure mode 29 Before configuring the wireless settings 29 Configure the wireless settings 31 Configuration in Infrastructure mode using SES WPS or AOSS from the control ...

Page 8: ...l panel features 107 Overview 107 Network menu 108 TCP IP 108 Ethernet wired network only 116 Factory Reset 116 Set to Default For HL 3070CW 116 Wired Enable For HL 3070CW wired network only 117 WLAN Enable For HL 3070CW wireless network only 117 SES WPS or AOSS For HL 3070CW wireless network only 117 WPS w PIN Code For HL 3070CW wireless network only 118 WLAN Status For HL 3070CW wireless network...

Page 9: ...ation 140 13 Network printing from Macintosh using the BR Script 3 driver For HL 3070CW 141 Overview 141 How to choose the printer driver TCP IP 141 14 Security features 145 Overview 145 Security terms 145 Security protocols 146 Security methods for E mail notification 146 Configuring the protocol settings 147 Managing your network printer securely 148 Secure Management using Web Based Management ...

Page 10: ...CP to configure the IP address 185 Using BOOTP to configure the IP address 186 Using RARP to configure the IP address 187 Using APIPA to configure the IP address 187 Using ARP to configure the IP address 188 Using the TELNET console to configure the IP address 189 Using the Brother Web BRAdmin server software for IIS to configure the IP address 190 Installation when using a Network Print Queue or ...

Page 11: ...nd BRPrint Auditor are available as a download from http solutions brother com 3 Available when using BRAdmin Professional 3 or Web BRAdmin with devices that are connected to your client PC via USB 4 For more information see the User s Guide on the CD ROM To use the Brother machine through a network you need to configure the print server and set up the computers you use Introduction 1 Operating Sy...

Page 12: ...ally when you install the printer driver If you have already installed the printer driver you don t have to install it again For more information on BRAdmin Light visit us at http solutions brother com BRAdmin Professional 3 for Windows 1 BRAdmin Professional 3 is a utility for more advanced management of network connected Brother devices This utility can search for Brother products on your networ...

Page 13: ...mation from a machine connected via the USB interface The BRPrint Auditor can then pass this information to another computer on the network running BRAdmin Professional 3 or Web BRAdmin 1 45 or greater This allows the administrator to check items such as page counts toner and drum status and the firmware version In addition to reporting to Brother network management applications this utility can E...

Page 14: ...twork printer your machine In a smaller network of 2 or 3 computers we recommend the Peer to Peer printing method as it is easier to configure than the Network Shared printing method See Network Shared printing on page 5 Each computer must use the TCP IP Protocol The Brother machine needs to have an appropriate IP address configuration If you are using a router the Gateway address must be configur...

Page 15: ...l print jobs 1 Client computer 2 Also known as Server or Print server 3 TCP IP or USB 4 Printer your machine In a larger network we recommend a Network Shared printing environment The Server or the Print server must use the TCP IP print protocol The Brother machine needs to have an appropriate IP address configuration unless the machine is connected via the USB interface at the server 3 2 TCP IP W...

Page 16: ...reless network printer your machine 3 Wireless capable computer communicating with the access point 4 Wired computer which is not wireless capable connected to the access point with the Ethernet cable Connected to a wireless capable computer without an access point on the network Ad hoc mode 1 This type of network does not have a central access point Each wireless client communicates directly with...

Page 17: ...ecurity protocols see Security protocols on page 146 DHCP BOOTP RARP 1 By using the DHCP BOOTP RARP protocols the IP address can be automatically configured Note To use the DHCP BOOTP RARP protocols please contact your network administrator APIPA 1 If you do not assign an IP address manually using the control panel of the machine or the BRAdmin applications or automatically using a DHCP BOOTP RARP...

Page 18: ... see Security protocols on page 146 mDNS 1 mDNS allows the Brother print server to automatically configure itself to work in a Mac OS X Simple Network Configured system Mac OS X 10 3 9 or greater Telnet 1 The Brother print server supports Telnet server for command line configuration SNMP 1 The Simple Network Management Protocol SNMP is used to manage network devices including computers routers and...

Page 19: ...r Macintosh Please also make sure that JavaScript and Cookies are always enabled in whichever browser you use If a different web browser is used make sure it is compatible with HTTP 1 0 and HTTP 1 1 For the HTTPS protocol see Security protocols on page 146 IPv6 1 This machine is compatible with the IPv6 the next generation internet protocol For more information on the IPv6 protocol visit http solu...

Page 20: ...he machine in a networked TCP IP environment you need to configure its IP address and subnet mask The IP address you assign to the print server must be on the same logical network as your host computers If it is not you must properly configure the subnet mask and the gateway address IP address 2 An IP address is a series of numbers that identifies each device connected to a network An IP address c...

Page 21: ...etwork communication Example Computer 1 can talk to Computer 2 Computer 1 IP Address 192 168 1 2 Subnet Mask 255 255 255 000 Computer 2 IP Address 192 168 1 3 Subnet Mask 255 255 255 000 Where the 0 is in the Subnet mask there is no limit to communication at this part of the address What this means in the above example is we can communicate with any device that has an IP address that begins with 1...

Page 22: ...he IP address i See page 13 o Configure the subnet mask i See page 13 o Configure the gateway i See page 13 o Using the BRAdmin Light utility i See page 16 o Using the BRAdmin Professional 3 utility i See page 16 o Using the Web Based Management web browser i See page 17 o Using the control panel i See page 17 o Using other methods i See page 17 ...

Page 23: ...the latest BRAdmin Professional 3 utility that is available as a download from http solutions brother com This utility is only available for Windows users If you are using a firewall function of anti spyware or antivirus applications temporarily disable them Once you are sure that you can print configure the software settings following the instructions Node name Node name appears in the current BR...

Page 24: ...in Light utility screen You can find the node name and MAC Address Ethernet Address by printing out the Network Configuration page See Printing the Network Configuration page on page 123 d Choose STATIC from Boot Method Enter the IP Address Subnet Mask and Gateway if needed of your print server e Click OK f With the correctly programmed IP address you will see the Brother print server in the devic...

Page 25: ...n configure your machine for a network using the control panel Network menu See Network menu on page 108 Using other methods to configure your machine for a network 2 You can configure your machine for a network using other methods See Other ways to set the IP address For advanced users and administrators on page 185 ...

Page 26: ...rd The default password is access e You can now change the print server settings Note If you want to change more advanced settings use the BRAdmin Professional 3 utility that is available as a download from http solutions brother com For Windows only Using the BRAdmin Professional 3 utility to change the print server settings For Windows 2 Note Please use the latest version of the BRAdmin Professi...

Page 27: ...ssional 3 utility screen You can find the node name and MAC Address Ethernet Address IP Address above by printing out the Network Configuration page See Printing the Network Configuration page on page 123 Using Web Based Management web browser to change the print server settings 2 A standard web browser can be used to change your print server settings using the HTTP Hyper Text Transfer Protocol Se...

Page 28: ...ddress and subnet mask on page 13 For Wireless configuration using the SecureEasySetup Wi Fi Protected Setup or AOSS from the control panel menu see Chapter 6 For Wireless configuration using the PIN Method of Wi Fi Protected Setup see Chapter 7 Note To achieve optimum results with normal every day document printing place the Brother machine as close to the network access point router as possible ...

Page 29: ... enough for the radio waves to reach your device Channels 3 Wireless networks use channels Each wireless channel is on a different frequency There are up to 14 different channels that can be used when using a wireless network However in many countries the number of channels available are restricted For more information see Wireless network for HL 3070CW on page 194 Authentication and encryption 3 ...

Page 30: ...hine supports the following inner authentications EAP FAST NONE EAP FAST authentication for CCXv3 networks Does not use an inner authentication method EAP FAST MS CHAPv2 EAP FAST authentication for CCXv4 networks Uses MS CHAPv2 for the inner authentication method EAP FAST GTC EAP FAST authentication for CCXv4 networks Uses GTC for the inner authentication method Encryption methods 3 Encryption is ...

Page 31: ...adecimal data e g 71f2234aba 128 104 bit ASCII Uses 13 text characters e g Wirelesscomms this is case sensitive 128 104 bit hexadecimal Uses 26 digits of hexadecimal data e g 71f2234ab56cd709e5412aa2ba WPA PSK WPA2 PSK and TKIP or AES Uses a Pre Shared Key PSK that is 8 or more characters in length up to a maximum of 63 characters LEAP Uses User ID and Password User ID less than 64 characters in l...

Page 32: ...access point Using the Brother installer application Recommended Using the SES WPS AOSS control panel menu if your wireless access point supports either SecureEasySetup Wi Fi Protected Setup or AOSS Using the PIN Method of Wi Fi Protected Setup if your wireless access point supports Wi Fi Protected Setup Temporarily using a network cable Using the SES WPS AOSS control panel menu Configuring your m...

Page 33: ...k See page 28 Wireless configuration and installing printer driver have been completed o Ad hoc mode Connected to a wireless capable computer without an access point or o Infrastructure mode See page 22 Connected to a computer with an access point Using the Brother installer application Recommended Configuring your machine for a wireless network For Windows See page 46 For Macintosh See page 76 In...

Page 34: ...point with an Ethernet cable Connected to a wireless capable computer without an access point in the network Ad hoc mode 3 This type of network does not have a central access point Each wireless client communicates directly with each other When the Brother wireless machine your machine is part of this network it receives all print jobs directly from the computer sending the print data 1 Wireless n...

Page 35: ...ave provided with the machine By using this application you can easily connect your machine to your wireless network and install the network software and printer driver which you need to complete the configuration of your machine for a wireless network You will be guided by the on screen instructions until you are able to use your Brother wireless network machine You must know your wireless networ...

Page 36: ...PS or AOSS from the control panel menu to configure your machine for a wireless network Infrastructure mode only 3 If your wireless access point A supports either SecureEasySetup Wi Fi Protected Setup PBC 1 or AOSS you can configure the machine without a computer 1 Push Button Configuration A ...

Page 37: ...s point A supports Wi Fi Protected Setup you can also configure using the PIN Method of Wi Fi Protected Setup See Wireless configuration using the PIN Method of Wi Fi Protected Setup For HL 3070CW in Chapter 7 Connection when the wireless access point router A doubles as a Registrar 1 Connection when another device C such as a computer is used as a Registrar 1 1 The Registrar is a device that mana...

Page 38: ...W in Chapter 4 or Wireless Configuration for Macintosh using the Brother installer application For HL 3070CW in Chapter 5 Using SES WPS or AOSS from the control panel menu to configure your machine for a wireless network 3 For installation see Wireless configuration using SES WPS or AOSS from the control panel For HL 3070CW in Chapter 6 Using the PIN Method of Wi Fi Protected Setup to configure yo...

Page 39: ... encrypted networks or 128 bit encrypted networks and can contain both numbers and letters If you do not know this information you should see the documentation provided with your access point or wireless router This key is a 64 bit or 128 bit value that must be entered in an ASCII or HEXADECIMAL format For example If you have previously configured the wireless settings of the printer you must rese...

Page 40: ...70CW 30 4 If you are using Windows Firewall or a firewall function of anti spyware or antivirus applications temporarily disable them Once you are sure that you can print configure the software settings following the instructions You need to temporarily use an Ethernet cable during configuration ...

Page 41: ...chine is in the Ready state c Turn on your computer You must be logged on with Administrator rights Close any applications running before configuration d Put the supplied CD ROM into your CD ROM drive The opening screen will appear automatically Choose your printer model and the language e Click Install Printer Driver on the menu screen Note Choose the Install Printer Driver icon for your region f...

Page 42: ...r application For HL 3070CW 32 4 Note For Windows Vista when the User Account Control screen appears click Allow g Choose Wireless Setup and Driver Install Recommended or Wireless Setup Only and then click Next h Choose Step by Step install Recommended and then click Next ...

Page 43: ...r Windows using the Brother automatic installer application For HL 3070CW 33 4 i Choose With cable Recommended and then click Next j Connect the Brother wireless device to your access point using a network cable and click Next ...

Page 44: ... Address and the IP Address by printing out the Network Configuration page See Printing the Network Configuration page on page 123 l The wizard will search for wireless networks available from your machine Choose the access point you wish to associate the machine with and then click Next Note SETUP is the default SSID of the machine Do not choose this SSID If the list is blank check that the acces...

Page 45: ...point is set to not broadcast the SSID you can manually add it by clicking the Add button Follow the on screen instructions for entering the Name SSID and then click Next m If your network is not configured for Authentication and Encryption the following screen will appear To continue configuration click OK and go to o ...

Page 46: ...d and Encryption Mode from the pull down menu in each setting box Then enter the Network Key and Confirm Network Key and then click Next Note If you want to setup or configure additional WEP key indexes other than WEP key1 click Advanced If you do not know the Authentication or Encryption settings for your network contact your network administrator or the manufacturer of your access point router I...

Page 47: ... will remain unchanged if you click Cancel The Network Configuration page will be printed Note If you want to manually enter the IP address settings of your machine click Change IP Address and enter the necessary IP address settings for your network The control panel settings will be automatically changed to WLAN Enable when the wireless settings are sent to your machine ...

Page 48: ...ion page Click Next If your status is Link OK go to r If your status is Failed To Associate go to q q Click Finish Wireless setup was unable to associate with a wireless network This is probably due to incorrect security settings Reset the print server back to its factory default settings see Reset the network settings to the factory default on page 122 Confirm the security settings of your wirele...

Page 49: ...lication For HL 3070CW 39 4 r Disconnect the network cable between your access point hub or router and the machine and click Next or Finish You have completed the wireless setup If you chose to install the printer driver in step g Go to Installing the printer driver on page 57 ...

Page 50: ... to access one push mode 1 Push Button Configuration Note Routers or access points that support SecureEasySetup Wi Fi Protected Setup or AOSS have the symbols shown below Before configuring the wireless settings 4 IMPORTANT The following instructions will install your Brother machine in a network environment using the Brother installer application for Windows found on the CD ROM we have provided w...

Page 51: ...chine is in the Ready state c Turn on your computer You must be logged on with Administrator rights Close any applications running before configuration d Put the supplied CD ROM into your CD ROM drive The opening screen will appear automatically Choose your printer model and the language e Click Install Printer Driver on the menu screen Note Choose the Install Printer Driver icon for your region f...

Page 52: ...staller application For HL 3070CW 42 4 Note For Windows Vista when the User Account Control screen appears click Allow g Choose Wireless Setup and Driver Install Recommended or Wireless Setup Only and then click Next h Choose Automatic install Advanced and click Next ...

Page 53: ...int supports Wi Fi Protected Setup PIN Method and you want to configure your machine using the PIN Personal Identification Number Method see Wireless configuration using the PIN Method of Wi Fi Protected Setup For HL 3070CW in Chapter 7 n The machine will search for an access point that supports SecureEasySetup Wi Fi Protected Setup or AOSS for 2 minutes o Put your access point in the SecureEasySe...

Page 54: ...onnected to your access point router Try starting from j again If the same message is indicated again reset the print server back to its factory default settings and try again For resetting see Reset the network settings to the factory default on page 122 LCD messages when using the SES WPS AOSS control panel menu LCD shows Connection status Action Setting WLAN Searching or accessing the access po...

Page 55: ... 3070CW 45 4 q Click Next or Finish You have completed the wireless setup If you chose to install the printer driver in step g Go to the next step r Check the box after you confirm that you have completed the wireless settings and then click Next Go to Installing the printer driver on page 57 ...

Page 56: ...ss router This key is a 64 bit or 128 bit value that must be entered in an ASCII or HEXADECIMAL format For example If you have previously configured the wireless settings of the printer you must reset the print server back to its factory default settings see Reset the network settings to the factory default on page 122 If you are using Windows Firewall or a firewall function of anti spyware or ant...

Page 57: ...l panel on your machine Press or to choose Network press OK Press or to choose WLAN press OK Press or to choose WLAN Enable press OK Choose On d Turn on your computer You must be logged on with Administrator rights Close any applications running before configuration e Put the supplied CD ROM into your CD ROM drive The opening screen will appear automatically Choose your printer model and the langu...

Page 58: ...tomatic installer application For HL 3070CW 48 4 g Click Wireless Network users Note For Windows Vista when the User Account Control screen appears click Allow h Choose Wireless Setup and Driver Install Recommended or Wireless Setup Only and then click Next ...

Page 59: ...tion For HL 3070CW 49 4 i Choose Step by Step install Recommended and then click Next j Choose Without cable Advanced and then click Next k Read the Important Notice to enable the wireless interface Check the box after you confirm the wireless setting is enabled and then click Next ...

Page 60: ...ttings such as SSID channel authentication and encryption of your computer See your note on page 46 You will need them to return your computer back to its original wireless settings and then click Next m To communicate with the un configured wireless machine temporarily change the wireless settings on your computer to match the machine s default settings shown on this screen Check the box after yo...

Page 61: ...9 254 x x IP address to be shown on screen where x x are numbers between 1 and 254 For Windows XP SP2 users You can temporarily change the wireless settings on your computer following the steps below 1 Click the Start button and then Control Panel 2 Click the Network and Internet Connections icon 3 Click the Network Connections icon 4 Choose and right click Wireless Network Connection Click View A...

Page 62: ...is blank check if the machine is within range for wireless communication Then click Refresh If your target Ad hoc network does not appear on the list you can manually add it by clicking the Add button Check This is an Ad hoc network and there is no access point and then enter the Name SSID and the Channel number and then click Next p If your network is not configured for Authentication and Encrypt...

Page 63: ... the Authentication Method and Encryption Mode from the pull down list in each setting box Then enter the Network Key and Confirm Network Key and then click Next Note If you want to setup or configure an additional WEP key indexes other than WEP key1 click Advanced If you do not know the Authentication or Encryption settings for your network contact your network administrator If you are using WEP ...

Page 64: ...ck Next The settings will be sent to your machine The settings will remain unchanged if you click Cancel The Network Configuration page will be printed Note If you want to manually enter the IP address settings of your machine click Change IP Address and enter the necessary IP address settings for your network ...

Page 65: ...is shown for the Wireless Link Status on the Network Configuration page Click Next If your status is Link OK go to u If your status is Failed To Associate go to t t Click Finish Wireless setup was unable to associate with a wireless network This is probably due to incorrect security settings Confirm the security settings of your wireless network and try starting from g again ...

Page 66: ...s Manually change the wireless settings on your computer to match the machine s wireless settings shown on this screen Check the box after you confirm these settings and then click Next or Finish The settings shown on this screen are for example only Your settings will not be the same You have completed the wireless setup If you chose to install the printer driver in step h Go to Installing the pr...

Page 67: ...f your wireless settings fail an error message will appear during the installation of the printer driver and the installation will be terminated If you encounter this failure please go back to step 1 and setup the wireless connection again a The driver installation starts When the License Agreement window appears click Yes if you agree to the License Agreement b Choose Standard Installation and th...

Page 68: ... your printer s IP address and the node name by printing out the Network Configuration page See Printing the Network Configuration page on page 123 d Choose your printer and then click Next Note If your printer takes a long time to appear on the list 1 minute or more then click Refresh If your printer still fails to appear reset the print server back to its factory default settings see Reset the n...

Page 69: ... want to register your product on line check On Line Registration If you do not want to set your printer as Default printer uncheck Set as Default Printer If you want to disable the Status Monitor uncheck Enable Status Monitor If you disable your Personal Firewall software e g Windows Firewall turn it back on Setup is now complete ...

Page 70: ...bit encrypted networks or 128 bit encrypted networks and can contain both numbers and letters If you do not know this information you should see the documentation provided with your access point or wireless router This key is a 64 bit or 128 bit value that must be entered in an ASCII or HEXADECIMAL format For example If you have previously configured the wireless settings of the printer you must r...

Page 71: ... HL 3070CW 61 5 If you are using a firewall function of anti spyware or antivirus applications temporarily disable them Once you are sure that you can print configure the software settings following the instructions You need to temporarily use an Ethernet cable during configuration ...

Page 72: ...d is plugged in b Turn on the machine and wait until the machine is in the Ready state c Turn on your Macintosh d Put the supplied CD ROM into your CD ROM drive Double click the HL3000 icon on your desktop Double click the Start Here icon Choose your printer model and the language e Click Install Printer Driver on the menu screen f Click Wireless Network users ...

Page 73: ...r installer application For HL 3070CW 63 5 g Choose Wireless Setup and Driver Install Recommended or Wireless Setup Only and then click Next h Choose Step by Step install Recommended and then click Next i Choose With cable Recommended and then click Next ...

Page 74: ...Next k Choose the machine you wish to configure and click Next If the list is blank check if the access point and the machine are powered on and then click Refresh Note The default node name is BRNxxxxxxxxxxxx You can find your printer s MAC Address Ethernet Address and the IP Address by printing out the Network Configuration page See Printing the Network Configuration page on page 123 ...

Page 75: ...Note SETUP is the default SSID of the machine Do not choose this SSID If the list is blank check that the access point has power and is broadcasting the SSID and then see if the machine and the access point are within range for wireless communication Then click Refresh If your access point is set to not broadcast the SSID you can manually add it by clicking the Add button Follow the on screen inst...

Page 76: ...e 60 for your existing wireless network Choose the Authentication Method and Encryption Mode from the pop up menu in each setting box Then enter the Network Key and Confirm Network Key and then click Next Note If you want to setup or configure an additional WEP key indexes other than WEP key1 click Advanced If you do not know the Authentication or Encryption settings for your network contact your ...

Page 77: ...l remain unchanged if you click Cancel The Network Configuration page will be printed Note If you want to manually enter the IP address settings of your machine click Change IP Address and enter the necessary IP address settings for your network The control panel settings will be automatically changed to WLAN Enable when the wireless settings are sent to your machine ...

Page 78: ...page Click Next If your status is Link OK go to r If your status is Failed To Associate go to q q Click Finish Wireless setup was unable to associate with a wireless network This is probably due to incorrect security settings Reset the print server back to its factory default settings see Reset the network settings to the factory default on page 122 Confirm the security settings of your wireless n...

Page 79: ...tion For HL 3070CW 69 5 r Disconnect the network cable between your access point hub or router and the machine and click Next or Finish You have completed the wireless setup If you chose to install the printer driver in step g Go to Installing the printer driver on page 86 ...

Page 80: ...n how to access one push mode 1 Push Button Configuration Note Routers or access points that support SecureEasySetup Wi Fi Protected Setup or AOSS have the symbols shown below Before configuring the wireless settings 5 IMPORTANT The following instructions will install your Brother machine in a network environment using the Brother installer application for Macintosh found on the CD ROM we have pro...

Page 81: ...d is plugged in b Turn on the machine and wait until the machine is in the Ready state c Turn on your Macintosh d Put the supplied CD ROM into your CD ROM drive Double click the HL3000 icon on your desktop Double click the Start Here icon Choose your printer model and the language e Click Install Printer Driver on the menu screen f Click Wireless Network users ...

Page 82: ...070CW 72 5 g Choose Wireless Setup and Driver Install Recommended or Wireless Setup Only and then click Next h Choose Automatic install Advanced and click Next i Confirm the on screen message and click Next j Press any of the Menu buttons OK or Back of the control panel on your machine ...

Page 83: ...ess or to choose SES WPS AOSS Press OK n The machine will search for an access point that supports SecureEasySetup Wi Fi Protected Setup or AOSS for 2 minutes o Put your access point in the SecureEasySetup mode Wi Fi Protected Setup mode or AOSS mode depending on what is supported by your access point Please refer to the instruction manual that came with your access point ...

Page 84: ...cted to your access point router Try starting from j again If the same message is indicated again reset the print server back to its factory default settings and try again For resetting see Reset the network settings to the factory default on page 122 LCD messages when using the SES WPS AOSS control panel menu LCD shows Connection status Action Setting WLAN Searching or accessing the access point ...

Page 85: ...0CW 75 5 q Click Next or Finish You have completed the wireless setup If you chose to install the printer driver in step g Go to the next step r Check the box after you confirm that you have completed the wireless settings and then click Next Go to Installing the printer driver on page 86 ...

Page 86: ... wireless router This key is a 64 bit or 128 bit value that must be entered in an ASCII or HEXADECIMAL format For example If you have previously configured the wireless settings of the printer you must reset the print server back to its factory default settings see Reset the network settings to the factory default on page 122 If you are using a firewall function of anti spyware or antivirus applic...

Page 87: ...f the Menu buttons OK or Back of the control panel on your machine Press or to choose Network press OK Press or to choose WLAN press OK Press or to choose WLAN Enable press OK Choose On d Turn on your Macintosh e Put the supplied CD ROM into your CD ROM drive Double click the HL3000 icon on your desktop Double click the Start Here icon Choose your printer model and the language f Click Install Pri...

Page 88: ...r installer application For HL 3070CW 78 5 h Choose Wireless Setup and Driver Install Recommended or Wireless Setup Only and then click Next i Choose Step by Step install Recommended and then click Next j Choose Without cable Advanced and then click Next ...

Page 89: ... wireless setting is enabled and then click Next l You need to temporarily change your computer s wireless settings Follow the on screen instructions Make sure you take notes on all the settings such as the SSID channel authentication and encryption of your computer See your note on page 76 You will need them to return your computer back to its original wireless settings and then click Next ...

Page 90: ...ps below 1 Click the AirPort status icon and choose Open Internet Connect 2 Click the Network tab to see the available wireless devices You can see the Brother wireless print server in the Network option Choose SETUP 3 Your wireless network is connected successfully n Choose the machine you wish to configure and click Next If the list is blank check if the machine is powered on and then click Refr...

Page 91: ...lank check if the machine is within range for wireless communication Then click Refresh If your target Ad hoc network does not appear on the list you can manually add it by clicking the Add button Check This is an Ad hoc network and there is no access point and then enter the Name SSID and the Channel number and then click Next p If your network is not configured for Authentication and Encryption ...

Page 92: ...he Authentication Method and Encryption Mode from the pop up menu in each setting box Then enter the Network Key and Confirm Network Key and then click Next Note If you want to setup or configure an additional WEP key indexes other than WEP key1 click Advanced If you do not know the Authentication or Encryption settings for your network contact your network administrator If you are using WEP and t...

Page 93: ...ext The settings will be sent to your machine The settings will remain unchanged if you click Cancel The Network Configuration page will be printed Note If you want to manually enter the IP address settings of your machine click Change IP Address and enter the necessary IP address settings for your network ...

Page 94: ...hown for the Wireless Link Status on the Network Configuration page Click Next If your status is Link OK go to u If your status is Failed To Associate go to t t Click Finish Wireless setup was unable to associate with a wireless network This is probably due to incorrect security settings Confirm the security settings of your wireless network and try starting from g again ...

Page 95: ...nually change the wireless settings on your computer to match the machine s wireless settings shown on this screen Check the box after you confirm these settings and then click Next or Finish The settings shown on this screen are for example only Your settings will not be the same You have completed the wireless setup If you chose to install the printer driver in step h Go to Installing the printe...

Page 96: ... software will search for the Brother printer During this time the following screen will appear c Choose the printer you wish to connect and then click OK Note If there is more than one of the same printer model connected on your network the MAC Address Ethernet Address will be displayed after the model name You can also confirm your IP Address by scrolling to the right You can find your printer s...

Page 97: ...Wireless Configuration for Macintosh using the Brother installer application For HL 3070CW 87 5 d When this screen appears click OK Setup is now complete ...

Page 98: ...is feature automatically detects which mode your access point uses SecureEasySetup Wi Fi Protected Setup or AOSS By pushing a button on the wireless access point router you can setup the wireless network and security settings See the user s guide for your wireless access point router for instructions on how to access one push mode 1 Push Button Configuration Note Routers or access points that supp...

Page 99: ...fault settings see Reset the network settings to the factory default on page 122 a Press any of the Menu buttons OK or Back of the control panel on your machine b Press or to choose Network Press OK c Press or to choose WLAN Press OK d Press or to choose SES WPS AOSS Press OK Note If your wireless access point supports Wi Fi Protected Setup PIN Method and you want to configure your machine using t...

Page 100: ...to your access point router Try starting from a again If the same message is indicated again reset the print server back to its factory default settings and try again For resetting see Reset the network settings to the factory default on page 122 LCD messages when using the SES WPS AOSS control panel menu LCD shows Connection status Action Setting WLAN Searching or accessing the access point and d...

Page 101: ... your computer You must be logged on with Administrator rights Close any applications running before configuration b Put the supplied CD ROM into your CD ROM drive The opening screen will appear automatically Choose your printer model and the language c Click Install Printer Driver on the menu screen Note Choose the Install Printer Driver icon for your region d Click Wireless Network users ...

Page 102: ... control panel For HL 3070CW 92 6 Note For Windows Vista when the User Account Control screen appears click Allow e Choose Driver Install Only and then click Next f When the License Agreement window appears click Yes if you agree to the License Agreement ...

Page 103: ...ck Next h Choose Search the network for devices and choose from a list of discovered devices Recommended Or enter your printer s IP address or its node name Click Next Note You can find your printer s IP address and the node name by printing out the Network Configuration page See Printing the Network Configuration page on page 123 ...

Page 104: ... minute or more then click Refresh j Click Finish Note If you want to register your product on line check On Line Registration If you do not want to set your printer as Default printer uncheck Set as Default Printer If you want to disable the Status Monitor uncheck Enable Status Monitor If you disable the Personal Firewall software e g Windows Firewall turn it back on Setup is now complete ...

Page 105: ... to cancel any of the screens during this installation a Turn on your Macintosh b Put the supplied CD ROM into your CD ROM drive Double click the HL3000 icon on your desktop Double click the Start Here icon Choose your printer model and the language c Click Install Printer Driver on the menu screen d Click Wireless Network users ...

Page 106: ...llowing screen will appear g Choose the printer you wish to connect and then click OK Note If there is more than one of the same printer model connected on your network the MAC Address Ethernet Address will be displayed after the model name You can also confirm your IP Address by scrolling to the right You can find your printer s MAC Address Ethernet Address and the IP Address by printing out the ...

Page 107: ...Wireless configuration using SES WPS or AOSS from the control panel For HL 3070CW 97 6 h When this screen appears click OK Setup is now complete ...

Page 108: ...ote Routers or access points that support Wi Fi Protected Setup have a symbol as shown below How to configure your wireless machine using the PIN Method of Wi Fi Protected Setup 7 IMPORTANT If you are going to connect the Brother machine to your network we recommend that you contact your system administrator prior to installation a Make sure that the power cord is plugged in b Turn on the machine ...

Page 109: ... and then click Next 5 Choose your network that you want to connect to and then click Next 6 Click Close i If the LCD shows Connected the machine has successfully connected to your access point router You can now use your machine in a wireless network If the LCD shows Connection Fail the machine has not successfully connected to your access point router or the entered PIN code is invalid Make sure...

Page 110: ...n your computer You must be logged on with Administrator rights Close any applications running before configuration b Put the supplied CD ROM into your CD ROM drive The opening screen will appear automatically Choose your printer model and the language c Click Install Printer Driver on the menu screen Note Choose the Install Printer Driver icon for your region d Click Wireless Network users ...

Page 111: ...rotected Setup For HL 3070CW 101 7 Note For Windows Vista when the User Account Control screen appears click Allow e Choose Driver Install Only and then click Next f When the License Agreement window appears click Yes if you agree to the License Agreement ...

Page 112: ...ick Next h Choose Search the network for devices and choose from a list of discovered devices Recommended Or enter your printer s IP address or its node name Click Next Note You can find your printer s IP address and the node name by printing out the Network Configuration page See Printing the Network Configuration page on page 123 ...

Page 113: ...r takes a long time to appear on the list 1 minute or more then click Refresh j Click Finish Note If you want to register your product on line check On Line Registration If you do not want to set your printer as Default printer uncheck Set as Default Printer If you want to disable the Status Monitor uncheck Enable Status Monitor Setup is now complete ...

Page 114: ...y to cancel any of the screens during this installation a Turn on your Macintosh b Put the supplied CD ROM into your CD ROM drive Double click the HL3000 icon on your desktop Double click the Start Here icon Choose your printer model and the language c Click Install Printer Driver on the menu screen d Click Wireless Network users ...

Page 115: ...ollowing screen will appear g Choose the printer you wish to connect and then click OK Note If there is more than one of the same printer model connected on your network the MAC Address Ethernet Address will be displayed after the model name You can also confirm your IP Address by scrolling to the right You can find your printer s MAC Address Ethernet Address and the IP Address by printing out the...

Page 116: ...Wireless configuration using the PIN Method of Wi Fi Protected Setup For HL 3070CW 106 7 h When this screen appears click OK Setup is now complete ...

Page 117: ...cter single line display With the control panel you can do the following Change the print server settings using the control panel See Network menu on page 108 Print the Network Configuration page See Printing the Network Configuration page on page 123 Reset the network settings to the factory default See Reset the network settings to the factory default on page 122 Control panel features 8 ...

Page 118: ...sed to configure many aspects of the network See Changing the print server settings on page 16 TCP IP 8 This menu has 7 sections Boot Method IP Address Subnet Mask Gateway IP Boot Tries APIPA and IPv6 Boot Method 8 This selection controls how the machine obtains an IP address The default setting is Auto Note If you do not want your print server configured via DHCP BOOTP or RARP you must set the Bo...

Page 119: ...Brother print server IP address can be configured using the Reverse ARP RARP service on your host computer For more information on RARP see Using RARP to configure the IP address on page 187 4 BOOTP mode BOOTP is an alternative to RARP that has the advantage of allowing configuration of the subnet mask and gateway For more information on BOOTP see Using BOOTP to configure the IP address on page 18...

Page 120: ...scheme of your network We recommend that you contact your network administrator for an IP address for the network the unit will be connected on a Press any of the Menu buttons OK or Back of the control panel on your machine b Press or to choose Network Press OK c For HL 3070CW For wired Press or to choose Wired LAN For wireless Press or to choose WLAN Press OK d Press or to choose TCP IP Press OK ...

Page 121: ...l panel on your machine b Press or to choose Network Press OK c For HL 3070CW For wired Press or to choose Wired LAN For wireless Press or to choose WLAN Press OK d Press or to choose TCP IP Press OK e Press or to choose Subnet Mask Press OK The first part of the number will be blinking f Press or to increase or decrease the number Press OK to go to the next number g Repeat this process until you ...

Page 122: ...any of the Menu buttons OK or Back of the control panel on your machine b Press or to choose Network Press OK c For HL 3070CW For wired Press or to choose Wired LAN For wireless Press or to choose WLAN Press OK d Press or to choose TCP IP Press OK e Press or to choose Gateway Press OK The first part of the number will be blinking f Press or to increase or decrease the number Press OK to go to the ...

Page 123: ...The default setting is 3 a Press any of the Menu buttons OK or Back of the control panel on your machine b Press or to choose Network Press OK c For HL 3070CW For wired Press or to choose Wired LAN For wireless Press or to choose WLAN Press OK d Press or to choose TCP IP Press OK e Press or to choose IP Boot Tries Press OK f Press or to set the number of times you wish to try to obtain the IP addr...

Page 124: ...ng Off means the IP address doesn t change when the print server cannot obtain an IP address through the Boot Method you have set The default setting for APIPA is On a Press any of the Menu buttons OK or Back of the control panel on your machine b Press or to choose Network Press OK c For HL 3070CW For wired Press or to choose Wired LAN For wireless Press or to choose WLAN Press OK d Press or to c...

Page 125: ...utions brother com a Press any of the Menu buttons OK or Back of the control panel on your machine b Press or to choose Network Press OK c For HL 3070CW For wired Press or to choose Wired LAN For wireless Press or to choose WLAN Press OK d Press or to choose TCP IP Press OK e Press or to choose IPv6 Press OK f Press or to choose On or Off Press OK Note If you set IPv6 to On turn off the power swit...

Page 126: ...hine b Press or to choose Network Press OK c Press or to choose Wired LAN Press OK d Press or to choose Ethernet Press OK e Press or to choose Auto 100B FD 100B HD 10B FD or 10B HD Press OK Factory Reset 8 The Factory Reset allows you to reset the print server back to its factory default settings For more information and resetting see Reset the network settings to the factory default on page 122 S...

Page 127: ...to choose WLAN Press OK d Press or to choose WLAN Enable Press OK e Press or to choose On Press OK SES WPS or AOSS For HL 3070CW wireless network only 8 If your wireless access point router supports either SecureEasySetup Wi Fi Protected Setup PBC 1 or AOSS you can configure the machine easily without a computer Your Brother machine has the SES WPS AOSS menu on the control panel This feature autom...

Page 128: ...r for instructions on how to access the Wi Fi Protected Setup mode See Wireless configuration using the PIN Method of Wi Fi Protected Setup For HL 3070CW in Chapter 7 WLAN Status For HL 3070CW wireless network only 8 Status 8 This field displays the current wireless network status Active 11b Active 11g Wired LAN Active WLAN OFF Connection Fail or AOSS Active a Press any of the Menu buttons OK or B...

Page 129: ... OK e Press or to choose Signal Press OK f The current wireless network status will be displayed Strong Medium Weak or None g Press OK again Channel 8 This field displays the current wireless network channel a Press any of the Menu buttons OK or Back of the control panel on your machine b Press or to choose Network Press OK c Press or to choose WLAN Press OK d Press or to choose WLAN Status Press ...

Page 130: ...se Speed Press OK f The current wireless network speed will be displayed g Press OK again SSID 8 This field displays the current wireless network SSID The display shows up to 32 characters of the SSID name a Press any of the Menu buttons OK or Back of the control panel on your machine b Press or to choose Network Press OK c Press or to choose WLAN Press OK d Press or to choose WLAN Status Press OK...

Page 131: ...ess any of the Menu buttons OK or Back of the control panel on your machine b Press or to choose Network Press OK c Press or to choose WLAN Press OK d Press or to choose WLAN Status Press OK e Press or to choose Comm Mode Press OK f The current wireless network communication mode will be displayed Ad hoc or Infrastructure g Press OK again ...

Page 132: ...he BRAdmin applications or Web Based Management web browser For more information see Changing the print server settings on page 16 a Make sure that the power cord is plugged in b Turn on the machine and wait until the machine is in the Ready state c Press any of the Menu buttons OK or Back of the control panel on your machine to take the machine off line d Press or to choose Network Press OK e Pre...

Page 133: ...ort listing all the current network settings You can print the Network Configuration page using the control panel a Make sure that the power cord is plugged in b Turn on the machine and wait until the machine is in the Ready state c Press any of the Menu buttons OK or Back of the control panel on your machine to take the machine off line d Press or to choose Machine Info Press OK e Press or to cho...

Page 134: ... which when run on a remote PC completely automates the installation of a printer driver The remote PC does not have to be connected to a network Connection methods 9 The Driver Deployment Wizard supports the three connection methods Peer to peer 9 The device is connected to the network but each user prints directly to the printer WITHOUT printing through a central queue 1 Client computer 2 Networ...

Page 135: ...is used to manage all print jobs 1 Client computer 2 Also known as Server or Print server 3 TCP IP or USB 4 Printer your machine Local Printer USB 9 The device is connected to the computer using an USB cable 1 Client computer 2 Printer your machine 3 USB 3 2 TCP IP Windows R WindowsR WindowsR WindowsR 1 1 1 4 2 3 1 WindowsR ...

Page 136: ...ose your language b The CD ROM main menu will appear Click Install Other Drivers or Utilities c Choose the Driver Deployment Wizard installation program Note For Windows Vista when the User Account Control screen appears click Continue d Click Next in response to the Welcome message e Read the license agreement carefully Then follow the on screen instructions f Click Finish Now the Driver Deployme...

Page 137: ...ill allow you to change the IP address by choosing the machine from the list and by choosing the Configure IP option A dialog box then appears which allows you to specify information such as the IP address subnet mask and also the gateway address e Choose the machine you wish to install If the printer driver you wish to use is installed on your computer Check the box of Currently installed drivers...

Page 138: ...files can be saved to the network copied to a CD ROM USB memory or even E mailed to another user Once run the driver and its settings are automatically installed without any user intervention Copy the Driver files to this PC and create an installation program for other users Choose this option if you wish to install the driver onto your computer and also create a self running executable file for u...

Page 139: ... the same printer queue that you define into the executable file the driver when installed on the remote computer will default to LPT1 printing If you check the box of Currently installed drivers in e you can change the default settings of the printer driver such as paper size by clicking Custom h Click Finish The driver is automatically installed to your computer ...

Page 140: ...JavaScript and Cookies are always enabled in whichever browser you use If a different web browser is used make sure it is compatible with HTTP 1 0 and HTTP 1 1 You must use the TCP IP protocol on your network and have a valid IP address programmed into the print server and your computer Note To learn how to configure the IP address on your machine see Setting the IP address and subnet mask on page...

Page 141: ...ou can also enter the NetBIOS name of the print server The NetBIOS name can be seen on the Network Configuration page To learn how to print the Network Configuration page see Printing the Network Configuration page on page 123 The NetBIOS name assigned is the first 15 characters of the node name and by default it will appear as BRNxxxxxxxxxxxx for a wired network or BRWxxxxxxxxxxxx for a wireless ...

Page 142: ...ing the Brother installer application use the TCP IP protocol in a Peer to Peer environment Please follow the instructions in this chapter This chapter explains how to install the network software and the printer driver which you will need to be able to print using your network machine Note You must configure the IP address on your machine before you proceed with this chapter If you need to config...

Page 143: ...ows Vista and Windows Server 2008 will now contact the printer that you specified If you did not specify the correct IP address or name then an error dialog will appear g Now that you have configured the port you must specify which printer driver you wish to use Choose the appropriate driver from the list of supported printers If you are using a driver supplied with the machine on the CD ROM then ...

Page 144: ... The Add Standard TCP IP Printer Port Wizard will now appear Click Next g Enter the IP address or the node name you wish to configure The Wizard will automatically enter the Port name information for you then click Next h Windows 2000 XP and Windows Server 2003 will now contact the machine that you specified If you did not specify the correct IP address or name then an error dialog will appear i C...

Page 145: ... and Faxes windows For Windows 2000 Click the Start button and choose Settings and then Printers b Right click on the printer driver you wish to configure and then choose Properties c Click the Ports tab and click Add Port d Choose the port that you wish to use Typically this would be Standard TCP IP Port Then click the New Port button e The Standard TCP IP Port Wizard will start Click Next f Ente...

Page 146: ... use the IPP printing capabilities of Windows 2000 XP Windows Vista and Windows Server 2003 2008 For Windows Vista and Windows Server 2008 12 a For Windows Vista Click the button Control Panel Hardware and Sound and then Printers For Windows Server 2008 Click the Start button Control Panel Hardware and Sound and then Printers b Click Add a printer c Choose Add a network wireless or Bluetooth print...

Page 147: ...ally This means that you do not need to inform Windows Vista and Windows Server 2008 about the type of printer driver to be used Go to g g If your printer is not in the list of supported printers click Have Disk You will then be asked to insert the driver disk h Click Browse and choose the appropriate Brother printer driver that is contained in the CD ROM or in the network share Click Open For exa...

Page 148: ...twork and then enter the following in the URL field http printer s IP address 631 ipp where printer s IP address is the printer s IP address or the node name For Windows 2000 Choose Connect to a printer on the Internet or on your intranet and then enter the following in the URL field http printer s IP address 631 ipp Where printer s IP address is the printer s IP address or the node name Note If y...

Page 149: ...the printer automatically This means that you do not need to inform Windows 2000 about the type of printer driver to be used Go to h h The driver installation starts automatically Note If the printer driver that you are installing does not have a Digital Certificate you will see a warning message Click Continue Anyway 1 to continue with the installation 1 Yes for Windows 2000 users i Click OK when...

Page 150: ...p port1 This is for HP Jetdirect compatibility http printer s IP address 631 Note If you forget the URL details you can simply enter the above text http printer s IP address and the printer will still receive and process data Where printer s IP address is the printer s IP address or the node name For example http 192 168 1 2 http BRN123456765432 Other sources of information 12 For how to configure...

Page 151: ...k How to choose the printer driver TCP IP 13 For Mac OS X 10 3 9 to 10 4 x users 13 a Turn on your Macintosh b From the Go menu choose Applications c Open the Utilities folder d Double click the Printer Setup Utility icon e Click Add f Mac OS X 10 3 9 Choose IP Printing Mac OS X 10 4 x Choose IP Printer Network printing from Macintosh using the BR Script 3 driver For HL 3070CW 13 Mac OS X 10 3 9 M...

Page 152: ...int the Network Configuration page see Printing the Network Configuration page on page 123 When specifying the Queue Name Queue use the PostScript service BRNxxxxxxxxxxxx_AT for Macintosh Where xxxxxxxxxxxx is your machine s MAC Address Ethernet Address h From the Printer Model Print Using pop up menu choose your model For example choose Brother HL 3070CW BR Script3 i Click Add and the printer wil...

Page 153: ...menu c Choose Print Fax d Click which is located below the Printers section e Choose IP f Choose Line Printer Daemon LPD from the Protocol list g Enter the TCP IP address or DNS Name of the printer into the Address box Note When specifying the Queue use the PostScript service BRNxxxxxxxxxxxx_AT for Macintosh Where xxxxxxxxxxxx is your machine s MAC Address Ethernet Address ...

Page 154: ...he BR Script 3 driver For HL 3070CW 144 13 h From the Print Using pop up menu choose your model For example choose Brother HL 3070CW BR Script3 i Click Add and the printer will be available from the Printers The printer is now ready to print ...

Page 155: ...formation identifying the applicant the public key generated by the applicant and the digital signature of the applicant Certificate A Certificate is the information that binds together a public key with an identity The certificate can be used to verify that a public key belongs to an individual The format is defined by the x 509 standard Digital signature A Digital signature is a value computed w...

Page 156: ...on to manage network devices securely Security methods for E mail notification 14 The Brother print server supports the following security methods for E mail notification Note How to configure the settings of security methods see How to configure the print server settings using Web Based Management web browser on page 131 POP before SMTP PbS 14 The user authentication method for sending E mail fro...

Page 157: ... have edited the hosts file on your computer or are using a Domain Name System you can also enter the DNS name of the print server For Windows users as the print server supports TCP IP and NetBIOS names you can also enter the NetBIOS name of the print server The NetBIOS name can be seen on the Network Configuration page To learn how to print the Network Configuration page see Printing the Network ...

Page 158: ...fferent web browser is used make sure it is compatible with HTTP 1 0 and HTTP 1 1 To use a web browser you will need to know the IP address of the print server We recommend to disable the Telnet FTP and TFTP protocols Accessing the machine using these protocols is not secure See Configuring the protocol settings on page 147 a Start your web browser b Type https Common Name into your browser Where ...

Page 159: ...ser name and a password The default User Name is admin and the default Password is access f Click Configure Protocol g Make sure that the SNMP setting is enabled and then click Advanced Setting of SNMP h You can configure the SNMP settings from the screen below We have three SNMP modes of operation SNMPv3 read write access With this mode the print server uses version 3 of the SNMP protocol If you ...

Page 160: ...of version 3 and the read only access of version 1 and version 2c of the SNMP protocol Note When you use the SNMPv3 read write access and v1 v2c read only access mode some of Brother applications e g BRAdmin Light that access to the print server do not work properly since they authorize the read only access of version 1 and version 2c If you want to use all applications use the SNMPv1 v2c read wri...

Page 161: ...net FTP and TFTP protocols Accessing the machine using these protocols is not secure For how to configure the protocol settings see How to configure the print server settings using Web Based Management web browser on page 131 If you use BRAdmin Professional 3 and Web Based Management web browser together use Web Based Management with the HTTPS protocol See Secure Management using Web Based Managem...

Page 162: ...e can use them You can configure and change the following Secure Function Lock settings using a web browser PC print 1 USB Direct Print Color Print Page limit Page Counter Only for reference 1 If you register the PC user login names you can restrict PC print without the user entering a password For more detail see Restricting PC print by PC user login name on page 153 How to configure the Secure F...

Page 163: ... 14 By configuring this setting the printer can authenticate by PC user login name to allow a print job from a registered computer a Click PC Print Restriction by Login Name The PC Print Restriction by Login Name screen will appear b Choose On from PC Print Restriction c Enter the PC user login name in the Login Name box and then choose the ID Number you set in the ID Number Name in step c in Basi...

Page 164: ...strict in the Public Mode box b Click Submit Other features 14 You can set up the following features in the Secure Function Lock 2 0 All Counter Reset You can reset the page counter by clicking All Counter Reset Export to CSV file You can export the current page counter including ID Number Name information as a CSV file Last Counter Record The machine retains the page count after the counter has b...

Page 165: ...ow to access the Configure Protocol page see Configuring the protocol settings on page 147 The basic steps for IPPS printing are the same as IPP printing For detailed information see Internet printing for Windows in Chapter 12 Specifying a different URL 14 Please note that there are several possible entries that you can enter for the URL field https Common Name ipp This is the default URL and we r...

Page 166: ... browser where printer s IP address is the printer s IP address For example http 192 168 1 2 Note If you have edited the hosts file on your computer or are using a Domain Name System you can also enter the DNS name of the print server For Windows users as the print server supports TCP IP and NetBIOS names you can also enter the NetBIOS name of the print server The NetBIOS name can be seen on the N...

Page 167: ...check SMTP AUTH of SMTP Server Authentication Method to enable the SMTP server authentication If you can use both POP before SMTP and SMTP AUTH we recommend choosing SMTP AUTH If you choose POP before SMTP for the SMTP Server Authentication Method you need to configure the POP3 settings You can also use the APOP method For more information see the Help text in the Web Based Management You can also...

Page 168: ... installed or previously imported This printer overwrites the certificate and the private key if you install a new one When you reset the print server back to its factory default settings the certificate and the private key that are installed will be deleted If you want to keep the same certificate and the private key after resetting the print server export them before resetting and re install the...

Page 169: ...s admin and the default Password is access e Click OK f Click Configure Certificate g You can configure the certificate settings from the screen below Note The functions that are grayed and unlinked indicate they are not available For more information on configuration see the Help text in the Web Based Management ...

Page 170: ...nter through SSL TLS communication The node name is displayed by default A warning will pop up if you use the IPPS or HTTPS protocol and enter a different name in the URL than the Common Name that was used for the self signed certificate c Now the self signed certificate is created successfully d Follow the on screen instructions to configure the other security settings e Restart the printer to ac...

Page 171: ...wing steps are for Microsoft Internet Explorer 6 0 If you use another web browser follow the help text of the web browser itself For Windows Vista users that have administrator rights 14 a Click the button and All Programs b Right click Internet Explorer and then click Run as administrator c Click Allow ...

Page 172: ...r to access your printer where printer s IP address is the printer s IP address or the node name Then click Continue to this website not recommended e Click Certificate Error and then click View certificates For the rest of the instructions follow the steps from d on page 169 ...

Page 173: ...t do not have administrator rights 14 a Click the button and All Programs b Right click Internet Explorer and then click Run as administrator c Choose the Administrator that you want to install with and enter the administrator password and then click OK ...

Page 174: ...r browser to access your printer where printer s IP address is the printer s IP address or the node name Then click Continue to this website not recommended e Click Certificate Error and then click View certificates f Choose the Details tab and then click Copy to File ...

Page 175: ...Security features 165 14 g Click Next h Make sure that DER encoded binary X 509 CER is chosen and then click Next i Click Browse ...

Page 176: ...rowse Folders k Choose a folder you want to save the certificate file in and enter a file name and then click Save Note If you choose Desktop the certificate file is saved to the Desktop of the Administrator that you chose l Click Next ...

Page 177: ...Security features 167 14 m Click Finish n Click OK o Click OK ...

Page 178: ...Security features 168 14 p Open the folder that you saved the certificate file in k and double click the certificate file For the rest of the instructions follow the steps from d on page 164 ...

Page 179: ...r web browser b Type https printer s IP address into your browser to access your printer where printer s IP address is the IP address or the node name that you assigned for the certificate c When the following dialog appears click View Certificate d Click Install Certificate from the General tab ...

Page 180: ...atures 170 14 e When the Certificate Import Wizard appears click Next f Choose Place all certificates in the following store and then click Browse g Choose Trusted Root Certification Authorities and then click OK ...

Page 181: ...Security features 171 14 h Click Next i Click Finish j Click Yes if the fingerprint thumbprint is correct ...

Page 182: ...nted on the Network Configuration page To learn how to print the Network Configuration page see Printing the Network Configuration page on page 123 k Click OK l Now the self signed certificate is installed on your computer and the SSL TLS communication is available ...

Page 183: ...by default The Common Name is required A warning will pop up if you enter a different name in the URL than the Common Name that was used for the certificate The length of the Organization the Organization Unit the City Locality and the State Province is less than 64 bytes The Country Region should be an ISO 3166 country code composed of two characters c When the contents of the CSR appear click Sa...

Page 184: ...figure Certificate page b Specify the file of the certificate that has been issued by a CA and then click Submit c Now the certificate is created successfully d Follow the on screen instructions to configure the other security settings e Restart the printer to activate the configuration f Now the certificate is saved in your printer To use SSL TLS communication the Root Certificate from the CA nee...

Page 185: ...n g Now the certificate and private key are imported to your printer To use SSL TLS communication the Root Certificate from the CA needs to also be installed on your computer Contact your network administrator about the installation How to export the certificate and private key 14 a Click Export Certificate and Private Key on the Configure Certificate page b Enter the password if you want to encry...

Page 186: ...the print server back to its factory default settings resetting all information such as the password and IP address information See Reset the network settings to the factory default on page 122 My computer cannot find the machine print server I cannot make a necessary connection to the machine print server My machine print server does not appear in the window of Remote Setup BRAdmin Light or BRAdm...

Page 187: ...ll back on Windows XP SP2 SP3 users 15 1 Click the Start button Control Panel Network and Internet Connections 2 Double click Windows Firewall 3 Click the General tab Make sure that Off not recommended is selected 4 Click OK Note After the Brother software package is installed turn your Firewall back on ...

Page 188: ... 3 of this User s Guide before installing the network print software or printer driver Check the following a Make sure that the machine is powered on is on line and ready to print b Check the connection status for your network For wired network users Check to see if there is any LED activity Brother print server has two LEDs on the back panel of the machine The upper orange LED shows Speed status ...

Page 189: ...make sure that no other nodes on the network have this IP address For information on how to print the Network Configuration page see Printing the Network Configuration page on page 123 d Verify that the print server is on your network as follows For Windows 1 Click Start All Programs 1 Accessories then choose Command Prompt 1 Programs for Windows 2000 users 2 Try pinging the print server from the ...

Page 190: ...ssary network connection to the machine In this case you will need to disable the Firewall on your computer and re install the drivers For more information see General problems on page 176 If you are using personal Firewall software see the User s Guide for your software or contact the software manufacturer ...

Page 191: ... setting the IP address 3 If a successful response is received then proceed to Windows 2000 XP Windows Vista and Windows Server 2003 2008 IPP troubleshooting on page 182 Otherwise proceed to d For Mac OS X 10 3 9 or greater 1 From the Go menu choose Applications 2 Open the Utilities folder 3 Double click the Terminal icon 4 Try pinging the print server from the Terminal window ping ipaddress Where...

Page 192: ... option in Windows 2000 XP Windows Vista and Windows Server 2003 2008 will not function if you wish to use the Get More Info option use the following URL http ipaddress This will then force Windows 2000 XP Windows Vista and Windows Server 2003 2008 to use Port 80 to communicate with the Brother print server Web Based Management web browser troubleshooting TCP IP 15 a If you cannot connect to the p...

Page 193: ...o setup Wireless LAN 15 If you are using Windows 2000 Mac OS X 10 3 9 or greater your computer is connected to the wireless network using a network cable it is recommended you temporarily connect the machine to your access point router hub or router using a network cable You will also need to change your machine s network setting to wired LAN temporarily Your machine s network setting will be chan...

Page 194: ...onditions may cause connection problems A concrete or metal framed wall is installed between the Brother machine and the access point router Electric appliances such as televisions computer appliances microwave ovens intercoms mobile cellular phones and the battery chargers and AC power adapters are installed close to your network A broadcast station or high tension wire is located close to your n...

Page 195: ...everal automated mechanisms for IP address allocation If you have a DHCP server in your network the print server will automatically obtain its IP address from DHCP server and register its name with any RFC 1001 and 1002 compliant dynamic name services Note If you do not want your print server configured via DHCP BOOTP or RARP you must set the Boot Method to static so that the print server has a st...

Page 196: ...nabled Then edit the BOOTP configuration file usually etc bootptab and enter the name network type 1 for Ethernet MAC Address Ethernet Address and the IP address subnet mask and gateway of the print server Unfortunately the exact format for doing this is not standardized so you will need to refer to your system documentation to determine how to enter this information many UNIX systems also have te...

Page 197: ...s running on a Berkeley UNIX based system type the following command ps ax grep v grep grep rarpd For AT T UNIX based systems type ps ef grep v grep grep rarpd The Brother print server will get the IP address from the RARP daemon when the printer is powered on Using APIPA to configure the IP address 0 The Brother print server supports the Automatic Private IP Addressing APIPA protocol With APIPA D...

Page 198: ...e a router between the print server and operating system to use the arp s command If there is a router you may use BOOTP or other methods described in this chapter to enter the IP address If your Administrator has configured the system to deliver IP addresses using BOOTP DHCP or RARP your Brother print server can receive an IP address from any one of these IP address allocation systems In which ca...

Page 199: ...here subnet mask is the desired subnet mask you wish to assign to the print server check with your network administrator for the subnet mask to use For example Local SET IP SUBNET 255 255 255 0 If you do not have any subnets use one of the following default subnet masks 255 0 0 0 for class A networks 255 255 0 0 for class B networks 255 255 255 0 for class C networks The leftmost group of digits i...

Page 200: ...RAdmin server which then communicates with the device itself Unlike the BRAdmin Professional 3 utility which is designed for Windows systems only the Web BRAdmin server software can be accessed from any client computer with a web browser that supports Java Please note this software is not included on the CD ROM that was supplied with your Brother product Please visit http solutions brother com to ...

Page 201: ...guage c Click Install Printer Driver on the menu screen Note Choose the Install Printer Driver icon for your region d Click Network cable users Note For Windows Vista when the User Account Control screen appears click Continue e When the License Agreement window appears click Yes if you agree to the License Agreement f Choose Network Shared Printer and then click Next g Choose your printer s queue...

Page 202: ...l Note The Web Services Name for the Brother machine is your model name and the MAC Address Ethernet Address of your machine e g Brother HL XXXX XXXXXXXXXXXX c Click Install d When the User Account Control screen appears do the following Users who have administrator rights Click Continue For users who do not have administrator rights Enter the administrator password and click OK e Choose Locate an...

Page 203: ...nting Support for Windows 2000 Professional Windows XP Windows XP Professional x64 Edition Windows Vista Windows Server 2003 Windows Server 2003 x64 Edition and Windows Server 2008 Mac OS X 10 3 9 or greater 1 Protocols IPv4 ARP RARP BOOTP DHCP APIPA Auto IP WINS NetBIOS name resolution DNS resolver mDNS LLMNR responder LPR LPD Custom Raw Port Port9100 IPP IPPS FTP Server SSL TLS POP before SMTP S...

Page 204: ... WebServicesPrint LLTD responder IPv6 2 Turned off as default NDP RA DNS resolver mDNS LLMNR responder LPR LPD Custom Raw Port Port9100 IPP IPPS FTP server SSL TLS POP before SMTP SMTP AUTH APOP TELNET server SNMPv1 SNMPv2c SNMPv3 HTTP HTTPS server TFTP client and server SMTP client ICMPv6 WebServicesPrint LLTD responder Network type IEEE 802 11 b g Wireless LAN Management utilities BRAdmin Light ...

Page 205: ...erisks HL 3040CN HL 3070CW Level one Level two Level three Options Network TCP IP Boot Method Auto Static RARP BOOTP DHCP IP Address 000 255 000 255 000 255 000 255 000 000 000 000 000 000 000 000 Subnet Mask 000 255 000 255 000 255 000 255 000 000 000 000 000 000 000 000 Gateway 000 255 000 255 000 255 000 255 000 000 000 000 000 000 000 000 IP Boot Tries 0 to 32767 3 APIPA On Off IPv6 On Off Eth...

Page 206: ...0 000 000 000 000 000 000 000 IP Boot Tries 0 to 32767 3 APIPA On Off IPv6 On Off SES WPS AOSS See Wireless configuration using SES WPS or AOSS from the control panel For HL 3070CW in Chapter 6 WPS w PIN Code See Wireless configuration using the PIN Method of Wi Fi Protected Setup For HL 3070CW in Chapter 7 WLAN Status Status See Status on page 118 Signal See Signal on page 119 Channel See Channel...

Page 207: ...re openssl org 5 Products derived from this software may not be called OpenSSL nor may OpenSSL appear in their names without prior written permission of the OpenSSL Project 6 Redistributions of any form whatsoever must retain the following acknowledgment This product includes software developed by the OpenSSL Project for use in the OpenSSL Toolkit http www openssl org THIS SOFTWARE IS PROVIDED BY ...

Page 208: ...nd the following disclaimer in the documentation and or other materials provided with the distribution 3 All advertising materials mentioning features or use of this software must display the following acknowledgement This product includes cryptographic software written by Eric Young eay cryptsoft com The word cryptographic can be left out if the rouines from the library being used are not cryptog...

Page 209: ... PROCUREMENT OF SUBSTITUTE GOODS OR SERVICES LOSS OF USE DATA OR PROFITS OR BUSINESS INTERRUPTION HOWEVER CAUSED AND ON ANY THEORY OF LIABILITY WHETHER IN CONTRACT STRICT LIABILITY OR TORT INCLUDING NEGLIGENCE OR OTHERWISE ARISING IN ANYWAY OUT OF THE USE OF THIS SOFTWARE EVEN IF ADVISED OF THE POSSIBILITY OF SUCH DAMAGE This product includes SNMP software from WestHawk Ltd 0 Copyright C 2000 2001...

Page 210: ...al signature 145 DNS 7 147 148 156 158 Driver Deployment Wizard 1 124 E EAP FAST 20 Encryption 19 Ethernet 116 F Factory default 122 Factory Reset 116 Firewall 176 180 G Gateway 112 H HTTP 9 HTTPS 148 I Infrastructure mode 6 22 24 Internet printing 1 136 IP address 10 IP Boot Tries 113 IPP 8 136 IPPS 146 155 IPv6 9 115 L LEAP 20 LLMNR 8 LLTD 9 LPR LPD 8 M MAC Address 123 mDNS 8 N Network Configura...

Page 211: ...ared key cryptosystem 145 SMTP client 8 SMTP AUTH 146 156 SNMP 8 SNMPv3 146 Specifications 193 SSID Service Set Identifier 19 SSL TLS 146 158 Status Monitor 1 Subnet mask 11 111 T TCP IP 7 108 TCP IP printing 132 Telnet 8 189 TEXT_P1 185 TKIP 20 Trademarks i W Web Based Management web browser 3 147 148 Web BRAdmin 3 Web browser HTTP 17 Web server HTTP 9 Web server HTTPS 146 Web services 9 WEP 20 W...

Reviews: