background image

Instructions for Installation & Use

 - Series No. BS4900A-020130

Instructions for Installation & Use

 - Series No. BS4900A-020130

49

48

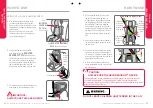
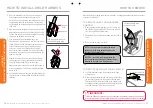
ONLY USE A 5/16 UNC GRADE 5 BOLT. IF THE 
BOLT IS NOT THE CORRECT LENGTH THE CAR 
MANUFACTURER’S HAND BOOK CAN PROVIDE 
ADVICE ON THE CORRECT LENGTH BOLT.

NOTE: Marking on 
the top of a Grade 5 
Bolt. Do not use any bolt 
without these marks.

Front of Vehicle

CHILD RESTRAINTS MUST NOT BE ATTACHED TO 
UNSOUND METAL OR TO WOOD, OR SYNTHETIC 
STRUCTURES. WHEN DRILLING 9 MM HOLE DO 
NOT DRILL THROUGH FUEL LINES, FUEL TANKS, 
ELECTRICAL WIRING, OR RADIO SPEAKERS. 
WEBBING STRAPS MUST BE PROTECTED FROM 
SHARP CORNERS AND EDGES. THE ANCHOR FITTING 
MUST BE USED ONLY AS DESCRIBED ABOVE. IT 
MUST NOT BE HOOKED ONTO ANY OTHER OBJECT.  

Centre line of 
seating position

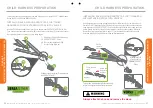
CAR INSTALLATION ACCESSORIES 

(From retailers of Britax Safe-n-Sound products)

EXTRA ANCHOR KITS: Available for using the restraint in additional cars.
Re-order no: 0038
EXTENSION STRAPS: May be required for cars without a fixed parcel shelf.
Re-order no: 0035 (length 300mm) or 
                     0036 (length 600mm)
GATED 3-BAR SLIDE (Locking clip): For converting lap-sash seatbelt to lap belt, for use with 
a Child Harness. May be required for a second car. Re-order no: 0215.

200mm 
min.

Fig.3.

INSTALLATION OF CAR                                          

UPPER ANCHORAGE POINT

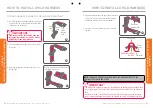
If your restraint has been involved in a severe crash, you should destroy the restraint even 
if no damage is obvious. Some insurance companies offer vehicle insurance which covers 
or partially covers the replacement of your child restraint. Contact your insurance company 
for further details. Your insurance company may require you to keep the child restraint for 
assessment, 

but do not use the child restraint after a severe crash. 

To assist you in making an 

accident insurance claim cut the following statement and include it with your claim.

All Britax Safe-n-Sound child restraints are manufactured to Australian/New Zealand 
Standards AS/NZS1754-2013 which require us to advise users of child restraints to 
"Destroy the entire restraint if it has been in use in a severe crash, even if no damage 
is obvious". The joint Australian/New Zealand Standards committee CS/85, advise 
that this statement applies whether a child was in the child restraint or not. A severe 
crash, we consider as being one where the main body structure of the vehicle is 
distorted.
There is no method of determining if the restraint has been damaged and we concur 
with the Australian/New Zealand Standards in recommending destruction of the child 
restraint.
This notice is to advise you of the requirements of the Australian/New Zealand 
Standards and our obligation in complying with the standards.
Please assist the owner of this restraint in their claim.

NOTICE TO INSURANCE COMPANY CHILD 

RESTRAINT INVOLVED IN AN ACCIDENT

New Zealand Office: 
Britax Childcare NZ Limited.
PO Box 100-247 Auckland 9
Telephone:  0508 688 822

Britax Childcare Pty. Ltd.

(Incorporated in Victoria)
A.B.N 55 006 773 600
Head office and registered address:
99 Derby Road  Sunshine  Victoria  3020
PO Box 147  Sunshine  Victoria  3020
Telephone:  1300 303 330

IN CASE OF CRASH

Summary of Contents for Safe-n-Sound BS4900A-020130 Series

Page 1: ...tion Use Series No BS4900A 020130 1 Instructions for Installation Use Series No BS4900A 020130 FORWARD FACING 4 years to 8 10 years approx BOOSTER SEAT IMPORTANT KEEP THIS BOOKLET IN THE PLACE PROVIDE...

Page 2: ...lengthen base Unfold Seat Risk of trapping hand finger Raise Lower headrest Check and adjust SecureGuard Device Check and adjust headrest 30 mm 2 Lift 1 Push down and out 3 Push back TO SHORTEN TO LE...

Page 3: ...ai c a em cao t i v ch ghi cao c a vai tr n c ng c a gh tr em Kh ng s d ng gh tr em booster n y cho n khi vai c a em tr n v ch ghi cao c a vai d i c ng 4 8 10 Da utilizzare con un cintura di sicurezza...

Page 4: ...l marcador superior de la altura de los hombros con el reposacabezas en la posici n m s alta aproximadamente de 8 a 10 a os de edad Tambi n se puede utilizar con el arn s para ni os cuyo uso con este...

Page 5: ...child seat It may be suitable for a child of approx 4 yrs old progressing from rearward facing child restraint Ensure the child s shoulders are above the lower height marker of this booster seat to e...

Page 6: ...ears of age in a correctly fitted and approved ISOFIX compatible child restraint This child restraint is not approved for use with the car s ISOFIX low anchorages IMPORTANT Protect all webbing from ab...

Page 7: ...ll have their shoulders in line or above the lowest shoulder height marker label A of this booster seat with the headrest in the lowest position If the child s shoulders are below this marker the chil...

Page 8: ...h side of headrest 10 Shoulder slots for use with Child Harness 1 Side Impact Cushion Technology Headrest SICT 2 Adjustable Height Headrest 3 Adjustable Side Wings 4 Padded cover for comfort 5 Booster...

Page 9: ...shown on pages 17 to 19 Extend seatbelt if required Check and adjust SecureGuard Check headrest position ADJUSTING THE HEADREST A The headrest can be adjusted to lock into different height locations...

Page 10: ...1 Lift 2 Push back ADJUSTING THE SECUREGUARD DEVICE The SecureGuard Device crotch strap must be adjusted so that it fits the seatbelt correctly to the child The crotch strap length adjuster can be fo...

Page 11: ...e Point B A Fully press Adjuster Button A while pulling top tether strap B to lengthen Pull to remove slack Always attach the hook and remove slack C Tighten adjustable top tether strap by pulling adj...

Page 12: ...t G A loose or poorly fitted seatbelt may cause preventable injuries if instructions are not followed HOW TO USE Lap part of seat belt in recess area B Position the lap sash belt over the child follow...

Page 13: ...must be positioned on the lap belt so that the child cannot slump or slouch Feed all the lap belt slack and sash belt slack back to retractor Adjust headrest so it is close to the shoulders Seatbelt a...

Page 14: ...NSTALLING SAFE N SOUND PROTECTA PLUS HARNESS WITH EXTENSION STRAP INTO VEHICLE An adjustable extension strap is supplied with the Child Harness Hook the Safe n Sound Protecta PLUS Harness clip first o...

Page 15: ...eft hand Harness Strap Cross Strap through the shoulder slots that are just above the child s shoulders Make sure that the Attachment Clip also feeds through to the back of the restraint Feed left han...

Page 16: ...in a crash CAUTION ALWAYS FOLLOW THE CHILD HARNESS INSTRUCTIONS HOW TO INSTALL CHILD HARNESS HOW TO INSTALL CHILD HARNESS CONVERTING A LAP SASH SEATBELT FOR USE WITH THE CHILD HARNESS With the booste...

Page 17: ...Slide slot B C Ensure the lap portion of the seatbelt is nearest to the child FITTING THE GATED SLIDE TO THE LAP SASH SEATBELT D Feed the straps through the gated slide to remove any slack This has no...

Page 18: ...he shoulder straps must be in the slots which are nearest to the child s shoulders the headrest should be adjusted to suit the child but shoulder straps should not be lower than the child s shoulders...

Page 19: ...lt is not lifted off the child s lap when the harness is adjusted Once adjusted further adjustments are necessary only to accommodate the growth of the child G Finally roll up the free end of the harn...

Page 20: ...parts on this booster seat that require user maintenance ONLY USE BRITAX SAFE N SOUND SEAT COVERS AND ACCESSORIES THAT ARE DESIGNED AND TESTED FOR USE WITH THIS PRODUCT TO CLEAN THE COVER The restrain...

Page 21: ...ok the elastic from behind the red sash guides at headrest rear see illustration Peel away from headrest C Remove seat base cover by releasing elastic loops from rear of seat base Feed through the Sec...

Page 22: ...shions and tuck behind Attach the elastic loops to the hooks at the back of the red sash guides Refit cover around headrest Ensure that the headrest is tucked in the channel around the red sash guides...

Page 23: ...nt of purchase A variety of Britax Safe n Sound accessories are available from various retailers of Britax Safe n Sound products INSTALLATION OF CAR UPPER ANCHORAGE POINT Consult the vehicle owner s h...

Page 24: ...ING MAY FRACTURE OR BREAK BOLT MAXIMUM TORQUE IS 20 Nm 14 75 ft lb Note Minimum of five full turns of attachment bolt is required before tightening force is applied IF THE CAR IS NOT FITTED WITH CHILD...

Page 25: ...h covers or partially covers the replacement of your child restraint Contact your insurance company for further details Your insurance company may require you to keep the child restraint for assessmen...

Page 26: ...hat any seat that may have experienced a severe crash is taken out of the market There is no method of determining if the restraint has been damaged in a severe crash so the restraint should be destro...

Page 27: ...hildcare Pty Ltd Australia The BRITAX trademark are the property of Britax Childcare Holdings Ltd UK We reserve the right to alter this product without notice 2012 2016 Britax Childcare Pty Ltd This p...

Reviews: