Not for
Reproduction
42
www.SnapperPro.com
Maintenance
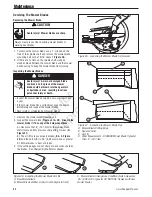
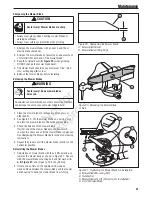
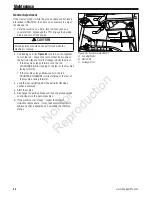
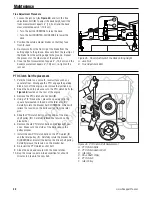
Figures 48
). Carefully rotate the breaker bar COUNTER-
CLOCKWISE, which will relieve the tension on the belt
exerted from the idler arm.
4. Slide the drive belt over the edge of the right side
stationary idler pulley (
B
). Carefully release the tension
on the breaker bar.
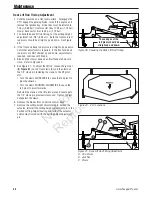
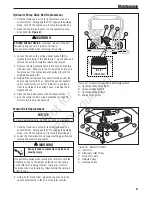
5. Remove the old belt and replace with a new one. Make
sure the V-side of the belt runs in the pulley grooves.
6. Install the drive belt on the gear box pulley, the spindle
pulleys and all idler pulleys except the stationary
pulley (
B
). Carefully rotate the breaker bar COUNTER-
CLOCKWISE and install the belt on the stationary idler
pulley (
B
). Carefully release the tension on the breaker
bar.
7. Reinstall the mower deck guards.
8. Run the mower under no-load condition for about 5
minutes to break-in the new belt.
Check the Mower Belt Idler Tensioning Spring
Length (72” Models Only)
1. Remove the mower deck guards.
2. Set the mower deck to the 3-1/2” (8.9 cm) cutting
height.
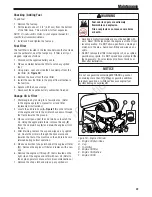
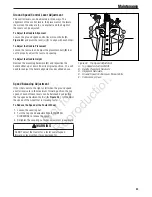
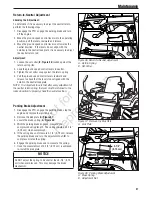
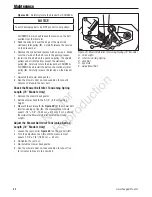
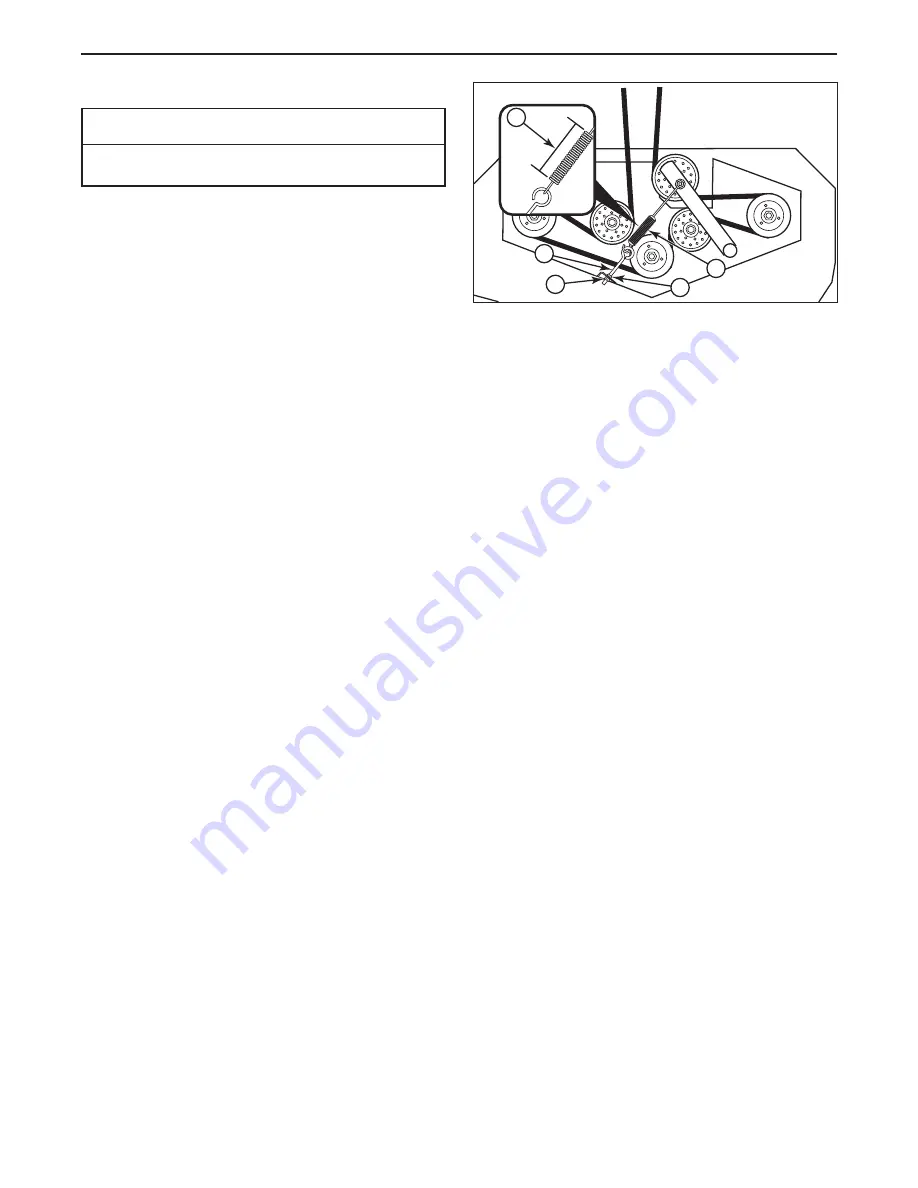
3. Measure the coil length (
A, Figure 49
) of the mower belt
idler tensioning spring (
B
). The measurement should
equal 7-1/4” ± 1/8” (18.42 cm ± .32 cm). If not, perform
the
Adjust the Mower Belt Idler Tensioning Spring
Length
.
Adjust the Mower Belt Idler Tensioning Spring
Length (72” Models Only)
1. Loosen the jam nut (
C, Figure 49
) on the eye bolt (
D
).
2. Turn the adjustment nut (
E
) until the measurement
equals 7-1/4” ± 1/8” (18.42 cm ± .32 cm).
3. Re-tighten the jam nut.
4. Re-install the mower deck guards.
5. Run the mower under no-load condition for about five
(5) minutes to break in the new belt.
NOTICE
To avoid damaging belts, do NOT pry belts over pulleys.
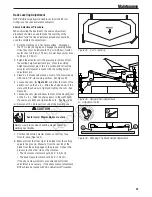
A
E
C
B
D
Figure 49. Mower Belt Idler Tensioning Spring (72” Models)
A. Coil Length
B. Idler Tensioning Spring
C. Jam Nut
D. Eye Bolt
E. Adjustment
Nut

