Not for
Reproduction
26
www.SnapperPro.com
Attachment Removal and Installation Procedure
Positioning the Mower Deck for Service
1. Park the machine on a smooth, level surface such as a
concrete floor. Engage the parking brake, disengage the
PTO, and turn off the ignition key.
2. Turn the ignition key to the RUN position and push the
mower deck lift actuator switch forward (away from the
operator’s position) to extend the actuator until you hear
a ratcheting noise.
3. Move the cutting height adjustment pin to the lowest
cutting position.
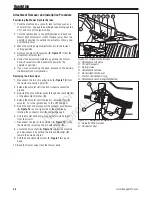
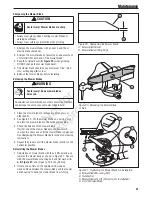
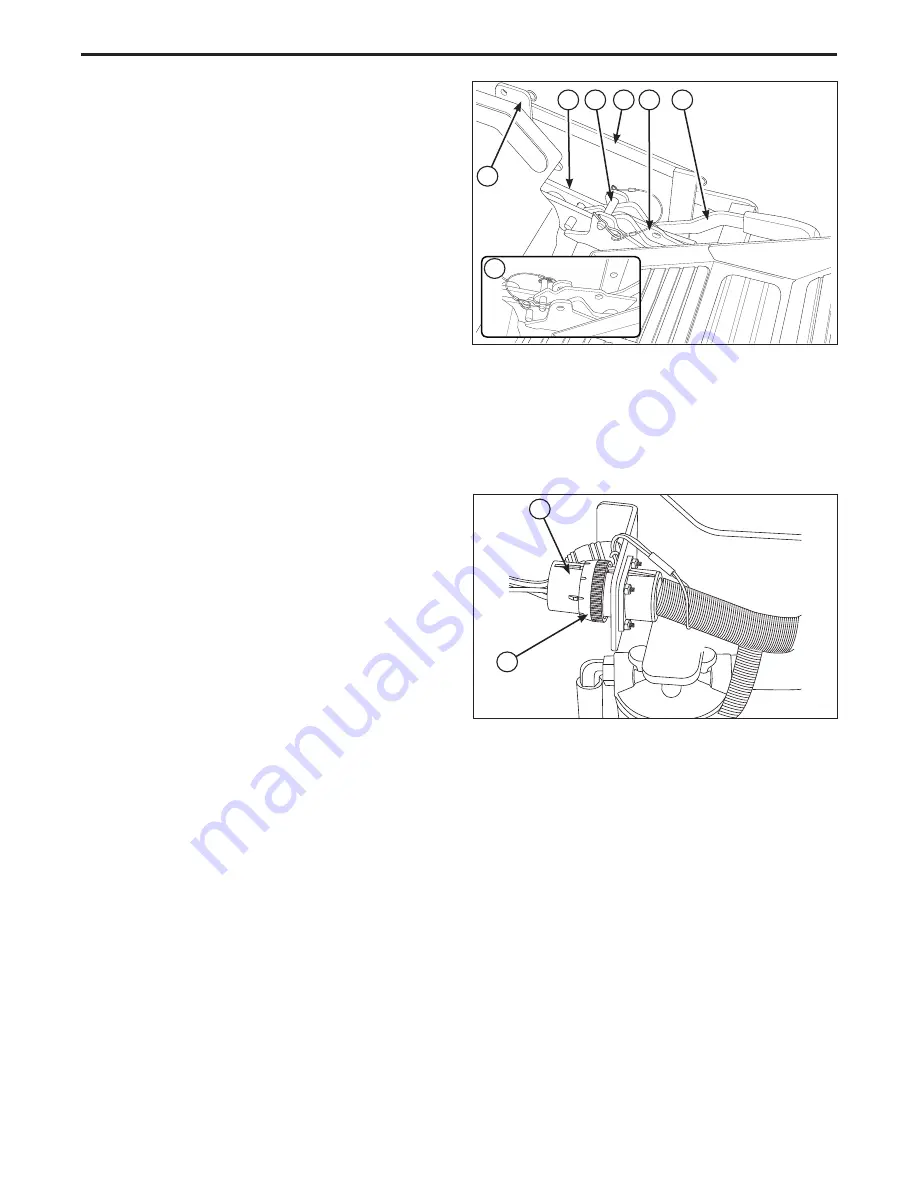
4. Remove the pins with lanyards (
B, Figure 13
) from the
attachment lift arms (
A
).
5. Retract the actuator completely by pulling the mower
deck lift actuator switch backwards (towards the
operator’s position).
6. If you are not removing the deck, proceed to
Positioning
the Mower Deck for Operation.
Removing the Attachment
1. Disconnect the two (2) spring links (
C, Figure 13
) from
the tractor connection point (
F
).
2. Extend the actuator until the front wheels contact the
ground.
3. Reinstall the pins with lanyards through the rear hole (
G
)
of the attachment latches (
D
).
4. Extend the actuator until the load is removed from the
actuator. Turn the ignition key to the OFF position.
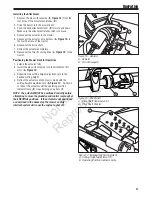
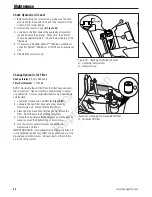
5. Raise the seat and disconnect the actuator wire harness
(
A, Figure 14
) on the right side of the machine by
rotating the connector dial (
B
) and pulling apart.
6. Pull the mower deck end of the actuator wire harness
from the tractor.
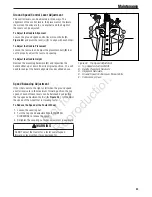
7. Disconnect the rear of the actuator (
A, Figure 15
) from
the tractor by removing the pin with lanyard (
B
).
8. Locate the drive shaft (
A, Figure 16
) under the machine
and disconnect it by pulling the drive shaft collar (
B
)
toward the universal joint.
9. Pull the deck attachment lever (
E, Figure 13
) up and
back.
10. Back the tractor away from the mower deck.
Figure 13. Attachment Lift Arms
A. Attachment Lift Arms
B. Pin with Lanyard
C. Spring Links
D. Attachment Latches
E. Deck
Attachment
Lever
F. Tractor
Connection
Point
G. Attachment Latch in Raised Position
C
A
B
D
E
F
A
B
Figure 14. Actuator Wire Harness
A. Actuator Wire Harness
B. Connector Dial
Operation
G

