background image

MAINTAINING THE TOOL

When  working  on  air  tools  note  the  warnings  in  this  manual  and  use  extra  care  when
evaluating problem tools.

SAFETY INSTRUCTIONS

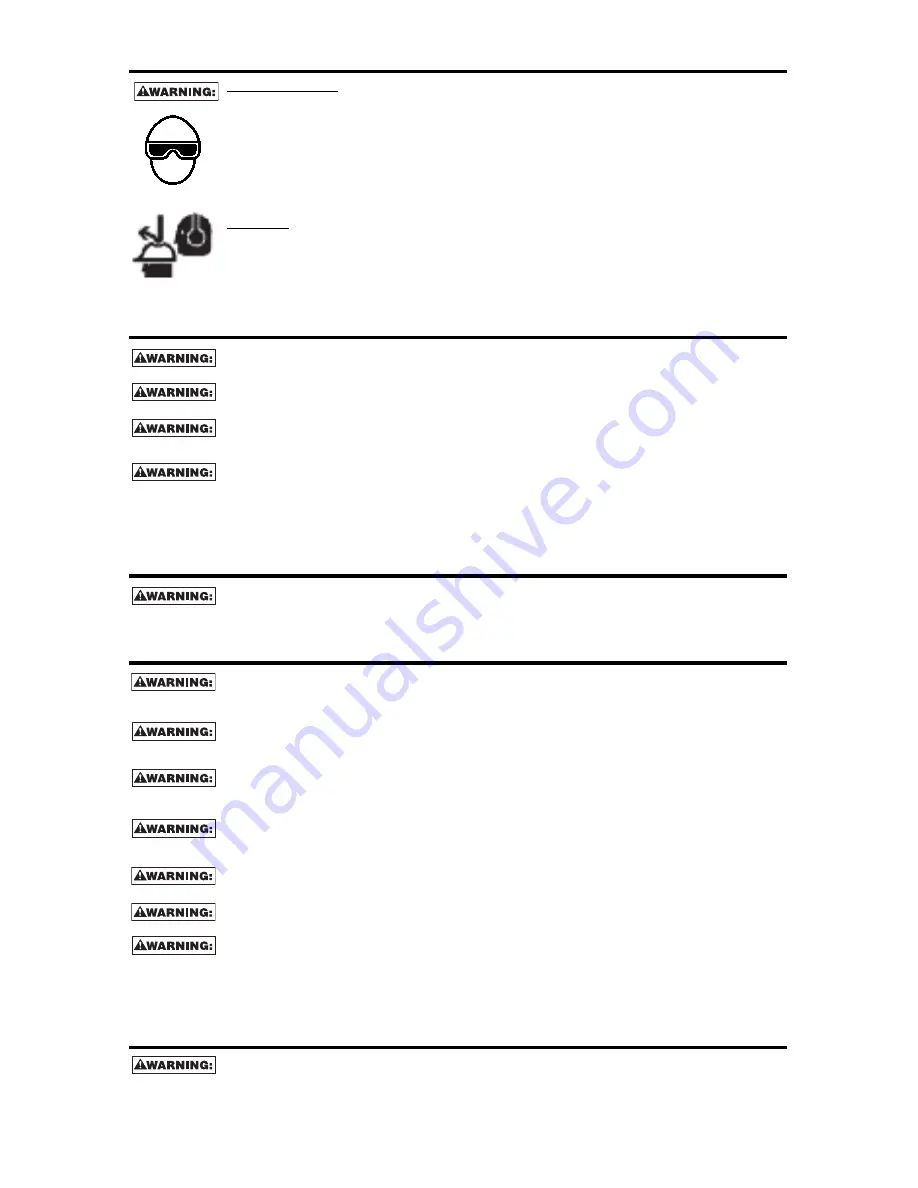
EYE PROTECTION which conforms to ANSI specifications and provides protection against
flying particles both from the FRONT and SIDE should ALWAYS be worn by the operator and
others in the work area when connecting to air supply, loading, operating or servicing this
tool.  Eye  protection  is  required  to  guard  against  flying  fasteners  and  debris,  which  could
cause severe eye injury.

The employer and/or user must ensure that proper eye protection is worn.  Eye protection
equipment must conform to the requirements of the American National Standards Institute,
ANSI  Z87.1  and  provide  both  frontal  and  side  protection.  NOTE:  Non-side  shielded
spectacles and face shields alone do not provide adequate protection.

CAUTION: Additional Safety Protection will be required in some environments. For example,
the working area may include exposure to noise level which can lead to hearing damage.
The employer and user must ensure that any necessary hearing protection is provided and
used by the operator and others in the work area. Some environments will require the use
of  head  protection  equipment. When  required,  the  employer  and  user  must  ensure  that
head protection conforming to ANSI Z89.1 is used.

AIR SUPPLY AND CONNECTIONS

Do not use oxygen, combustible gases, or bottled gases as a power source for this tool as
tool may explode, possibly causing injury.

Do  not  use  supply  sources  which  can  potentially  exceed  200  P.S.I.G.  as  tool  may  burst,
possibly causing injury.

The  connector  on  the  tool  must  not  hold  pressure  when  air  supply  is  disconnected.    If  a
wrong fitting is used, the tool can remain charged with air after disconnecting and thus will
be able to drive a fastener even after the air line is disconnected possibly causing injury.

Do not pull trigger or depress contact arm while connected to the air supply as the tool may
cycle, possibly causing injury.

Always disconnect air supply: 1.) Before making adjustments; 2.) When servicing the tool;
3.) When clearing a jam; 4.) When tool is not in use; 5.) When moving to a different work area,
as accidental actuation may occur, possibly causing injury.

LOADING TOOL

When loading tool:  1.) Never place a hand or any part of body in fastener discharge area of
tool;    2.)  Never  point  tool  at  anyone;    3.)  Do  not  pull  the  trigger  or  depress  the  trip  as
accidental actuation may occur, possibly causing injury.

OPERATION

Always handle the tool with care:  1.) Never engage in horseplay;  2.) Never pull the trigger
unless nose is directed toward the work;  3.) Keep others a safe distance from the tool while
tool is in operation as accidental actuation may occur, possibly causing injury.

The operator must not hold the trigger pulled on contact arm tools except during fastening
operation  as  serious  injury  could  result  if  the  trip  accidentally  contacted  someone  or
something, causing the tool to cycle.

Keep  hands  and  body  away  from  the  discharge  area  of  the  tool.   A  contact  arm  tool  may
bounce from the recoil of driving a fastener and an unwanted second fastener may be driven
possibly causing injury.

Check operation of the contact arm mechanism frequently.  Do not use the tool if the arm
is not working correctly as accidental driving of a fastener may result.  Do not interfere with
the proper operation of the contact arm mechanism.

Do not drive fasteners on top of other fasteners or with the tool at an overly steep angle as
this may cause deflection of fasteners which could cause injury. 

Do not drive fasteners close to the edge of the work piece as the wood may split, allowing
the fastener to be deflected possibly causing injury.

This nailer produces SPARKS during operation. NEVER use the nailer near flammable substances,
gases or vapors including lacquer, paint, benzine, thinner, gasoline, adhesives,  mastics, glues or
any  other  material  that  is  --  or  the  vapors,  fumes  or  by-products  of  which  are  --  flammable,
combustible or explosive. Using the nailer in any such environment could cause an EXPLOSION
resulting in personal injury or death to user and bystanders.

-3-

Summary of Contents for N62FNB

Page 1: ...MANUAL PARA PODER COMPRENDERY SEGUIR LAS ADVERTENCIAS SOBRE SEGURIDAD Y LAS INSTRUCCIONES MANTENGA ESTAS INSTRUCCIONES CON LA HERRAMIENTA PARA FUTURA REFERENCIA SI TIENE ALGUNA DUDA COMUNÍQUESE CON SU REPRESENTANTE DE BOSTITCH O CON SU DISTRIBUIDOR LIRE ATTENTIVEMENT LE PRÉSENT MANUEL AVANT D UTILISER L APPAREIL PRÉTER UNE ATTENTION TOUTE PARTICULIÈRE AUX CONSIGNES DE SÉCURITÉ ET AUX AVERTISSEMENT...

Page 2: ...stitch warrants to the original retail purchaser that the product purchased is free from defects in material and workmanship and agrees to repair or replace at Bostitch s option any defective Bostitch branded pneumatic stapler or nailer for a period of seven 7 years from date of purchase one 1 year from the date of purchase for compressors and tools used in production applications Warranty is not ...

Page 3: ... the tool may cycle possibly causing injury Always disconnect air supply 1 Before making adjustments 2 When servicing the tool 3 When clearing a jam 4 When tool is not in use 5 When moving to a different work area as accidental actuation may occur possibly causing injury LOADING TOOL When loading tool 1 Never place a hand or any part of body in fastener discharge area of tool 2 Never point tool at...

Page 4: ...o Mar Tip Light Button Jam Release Nose Cover LED Work Light Integrated Air Blower Button Over Molded Comfort Grip Dial A Depth Control Rear Exhaust Retaining Clip Swivel Air Fitting Pencil Sharpener Pusher Button 16 O C Gauge Belt Hook Trigger Lockout Frame Protector Spare No Mar Tip Storage 4 Trigger ...

Page 5: ... the tool at the rate of 100 fasteners per minute In this case be sure that your air compressor can deliver a minimum of 1 17 C F M 33 1 LT MIN at 80 PSI 5 6 kg cm2 for optimum performance FASTENER SPECIFICATIONS Stainless steel fasteners also available 1 1 4 2 and 2 1 2 Visit www BOSTITCH com for further details NOTE BOSTITCH tools have been engineered to provide superior customer satisfaction an...

Page 6: ...l the operating pressure for safe operation of this tool Do not connect this tool to air pressure which can potentially exceed 200 p s i 14 kg cm2 as tool may fracture or burst possibly causing injury OPERATING PRESSURE Do not exceed recommended maximum operating pressure as tool wear will be greatly increased The air supply must be capable of maintaining the operating pressure at the tool Pressur...

Page 7: ...ever point the tool at anyone else Never engage in horseplay Never pull the trigger unless nose is directed at the work Always handle the tool with care Do not pull the trigger or depress the trip mechanism while loading the tool LOADING THE N62FNB The N62FNB nailers are equipped with dual load purpose magazines Nails can be loaded in either method LOAD AND PULL PUSHER 1 Load nails through the slo...

Page 8: ...SEQUENTIAL TRIP The Sequential Trip requires the operator to hold the tool against the work before pulling the trigger This makes accurate fastener placement easier The Sequential Trip allows exact fastener location without the possibility if driving a second fastener on recoil as described under Contact Trip The Sequential Trip Tool has a positive advantage because it will not accidentally drive ...

Page 9: ...proval from BOSTITCH INC Always be aware that misuse and improper handling of this tool can cause injury to yourself and others Never clamp or tape the trigger or contact trip in an actuated position Never leave a tool unattended with the air hose attached Do not operate this tool if it does not contain a legible WARNING LABEL Do not continue to use a tool that leaks air or does not function prope...

Page 10: ... button on the cover REMOVE THE LIGHT LED work light can be easily removed or if needed 1 Pull up the nose cover to open 2 Press on the snap fitting hook to release LED work light 3 Take out the LED work light from the cover REPLACE THE LIGHT Insert a new LED work light 1 Align housing of the LED work light into nose cover until it snaps into position Make sure the button is placed through nose co...

Page 11: ...ss the tool against the work with extra force Instead allow the tool to recoil off the work surface to avoid a second unwanted fastener Remove your finger from the trigger after each operation B RAPID FASTENER OPERATION To operate the tool in this manner hold the tool with the contact trip pointing towards but not touching the work surface Pull the trigger and then tap the contact trip against the...

Page 12: ... feature open drive channel architecture for jam clearing To clear a jam follow this procedure 1 Disconnect the tool from the air supply 2 Release the pusher so it is no longer applying force to the nail sticks 3 Open the jam clearing nose door by pulling down and then up on the latch 4 Remove the jammed fastener In certain circumstances pliers may be required to remove the fastener 5 Close the ja...

Page 13: ...g constant force spring Caution must be used when working with the spring assembly The spring is wrapped around but not attached to a roller If the spring is extended beyond its length the end will come off the roller and the spring will roll up with a snap with a chance of pinching your hand Also the edges of the spring are very thin and could cut Care must also be taken to insure no permanent ki...

Page 14: ...cap and use compressed air blow gun to blow filter clean Replace filter as required 25 000 Fasteners or monthly if used in dusty location Replace no mar tip Prevents marks in softwood applications Remove worn no mar tip and replace with a new tip a spare tip is located on the magazine 25 000 Fasteners Replace swivel air fitting Maintains proper air flow to engine for peak performance Remove worn s...

Page 15: ...correct Air pressure too low Check air supply equipment Clogged air filter Clean or replace air filter Skipping fasteners intermittent feed Worn bumper Replace bumper Tar dirt in driver channel Disassemble and clean nose and driver Air restriction inadequate air flow through quick disconnect socket and plug Replace quick disconnect fittings Worn piston ring Replace ring check driver Damaged pusher...

Page 16: ...AVAILABLE ACCESSORIES FN SERIES 15 GAUGE ANGLED FINISH NAILS AVAILABLE IN BRITE OR STAINLESS STEEL 16 N62FNB RK N62FNB REBUILD KIT TVA 15 TRIGGER VALVE KIT ...

Page 17: ... FREE FINISH NAILER KIT HP118K 23 GAUGE MICRO PINNER KIT 17 BT1855K 18 GAUGE OIL FREE BRAD NAILER KIT SX1838K 18 GAUGE OIL FREE STAPLER KIT CAP1512 OF TRIM AIR HIGH OUTPUT COMPRESSOR PRO 1450 1 4 X 50 6 4mm X 15mm PREMIUM QUALITY POLYURETHANE AIR HOSE ...

Page 18: ...el 1 de diciembre de 2005 Stanley Fastening System L P Bostitch garantiza al comprador original al por menor que el producto comprado está exento de defectos de material y mano de obra y acepta reparar o reemplazar a opción de Bostitch cualquier engrapadora o clavadora neumática defectuosa de marca Bostitch por un período de siete 7 años desde la fecha de compra un 1 año desde la fecha de compra p...

Page 19: ...mienta 5 Al avanzar a otra área de trabajo porque puede activarse accidentalmente causando posibles lesiones CARGA DE LA HERRAMIENTA Al cargar la herramienta 1 Nunca ponga la mano ni ninguna otra parte del cuerpo en el área aplicadora de descarga de la herramienta 2 Nunca apunte la herramienta a ninguna persona 3 No accione el gatillo ni pulse el disparador porque puede activarse accidentalmente c...

Page 20: ...ción de una obstrucción Cubierta de la punta Lámpara LED de trabajo Botón del soplador de aire integrado Agarre cómodo sobremoldeado Control Dial A Depth Escape posterior Precinto de retención Conector de aire giratorio Sacapuntas Botón del impulsor Calibre 16 OC Gancho para el cinturón Bloqueo del gatillo Protector del armazón Almacenamiento del repuesto de la punta que no marca Gatillo ...

Page 21: ... se dispone de sujetadores de acero inoxidable 1 1 4 2 y 2 1 2 Si desea obtener más detalles visite www BOSTITCH com NOTA Las herramientas BOSTITCH se han diseñado para brindar una satisfacción excelente al cliente y lograr máximo rendimiento al utilizarse con fijaciones de precisión BOSTITCH diseñadas con las mismas normas estrictas BOSTITCH no puede asumir responsabilidad alguna por el rendimien...

Page 22: ...erramienta funcione en forma segura No conecte esta herramienta a la presión de aire que potencialmente pueda superar 14 kg cm2 200 p si porque la herramienta puede fracturarse o explotar causando posibles lesiones PRESIÓN OPERATIVA No supere la presión operativa máxima recomendada porque aumentará considerablemente el desgaste de la herramienta El suministro de aire debe ser capaz de mantener la ...

Page 23: ...nca accione el gatillo a menos que la punta esté dirigida hacia el trabajo Siempre maneje la herramienta con cuidado No accione el gatillo ni oprima el mecanismo de disparo mientras carga la herramienta CARGA DE LA N62FNB La clavadora N62FNB está equipada con cargadores de carga doble Los clavos se pueden cargar mediante cualquiera de los métodos CARGA Y EXTRACCIÓN DEL IMPULSOR 1 Cargue los clavos...

Page 24: ...e que el operador sostenga la herramienta contra la superficie de trabajo antes de accionar el gatillo Esto facilita la colocación de fijaciones en forma precisa El disparo secuencial permite la ubicación exacta de fijaciones sin posibilidad de aplicar otro al rebotar como se describe en Disparo de contacto La herramienta de disparo secuencia tiene una ventaja positiva porque no aplica accidentalm...

Page 25: ...resente que el uso indebido o la manipulación incorrecta de esta herramienta puede causarle lesiones a usted y a los demás Nunca use abrazaderas ni cinta para bloquear el gatillo o el disparo de contacto en la posición activada Nunca deje una herramienta sin supervisión con la manguera de aire conectada No opere esta herramienta si no cuenta con una ETIQUETA DE ADVERTENCIA legible Deje de usar la ...

Page 26: ...cesario la lámpara LED de trabajo se puede extraer fácilmente 1 Tire hacia arriba la cubierta de la punta para abrir 2 Presione el gancho de sujeción de accesorios para liberar la lámpara LED de trabajo 3 Quite la lámpara LED de la cubierta REEMPLAZO DE LA LÁMPARA Inserte una nueva lámpara led de trabajo 1 Alinee la carcasa de la lámpara LED con la cubierta de la punta hasta que quede sujetada en ...

Page 27: ... SOLA FIJACIÓN Para usar la herramienta de esta manera primero coloque el disparo de contacto sobre la superficie de trabajo SIN ACCIONAR ELGATILLO Oprima el disparo de contacto hasta que la punta toque la superficie de trabajo y luego accione el gatillo para aplicar una fijación No presione la herramienta contra el trabajo con más fuerza En cambio deje que la herramienta se separe de la superfici...

Page 28: ...anal abierto para solucionar los atascamientos Para solucionar los atascamientos siga este procedimiento 1 Desconecte la herramienta del suministro de aire 2 Suelte el empujador de modo que no siga oprimiendo las barras de clavos 3 Abra la boquilla de desatasco jalando el pestillo hacia abajo y luego hacia arriba 4 Retire el pasador atascado En ciertas circunstancias pueden necesitarse pinzas para...

Page 29: ...s con problemas PRECAUCIÓN Resorte de empuje resorte de fuerza constante Debe tenerse cuidado al trabajar con el ensamblaje del resorte El resorte va envuelto alrededor de un rodillo no conectado al mismo Si el resorte se extiende más allá de su longitud el extremo se saldrá del rodillo y el resorte se enrollará con un chasquido posiblemente pellizcándole la mano Los bordes del resorte también son...

Page 30: ... la pistola de aire comprimido para soplar el filtro y dejarlo limpio Reemplace el filtro según se requiera 25 000 fijaciones mensualmente si se utliza en lugares polvorientos Reemplace la punta que no marca Previene marcas en trabajo con madera blanda Retire la punta que no marca si está desgastada y cámbiela por otra nueva hay una punta de repuesto en el depósito 25 000 fijaciones Reemplace el c...

Page 31: ...inferior Desármelo para corregir esto La presión de aire está demasiado baja Revise el equipo de suministro de aire Filtro de aire obstruido Límpielo o reemplácelo Se saltan las fijaciones alimentación intermitente El tope está desgastado Cambie el tope Hay alquitrán o suciedad en el canal del impulsor Desarme y limpie la punta y el impulsor Restricción de aire flujo indebido de aire a través del ...

Page 32: ...ACCESORIOS DISPONIBLES 32 TIPPAK4 PAQUETE DE PUNTAS N62FNB INCLUYE 4 PUNTAS DE PERFIL Y 2 PUNTAS NO MAR N62FNB RK JUEGO PARA RECONSTRUCCIÓN N62FNB TVA 15 FN1664 PAQUETE DE VÁLVULA DEL GATILLO ...

Page 33: ...LIBRE 23 BT1855K PAQUETE DE CLAVADORA PARA CLAVILLOS CALIBRE 18 SX1838K PAQUETE DE ENGRAPADORA DE ACABADO CALIBRE 18 PRO 1450 1 4 50 6 4mm 15 m CALIDAD PREMIUM MANGUERA DE AIRE DE POLIURETANO FN1664K CALIBRE 16 SIN ACEITE KIT DE CLAVADORA NEUMÁTICA CAP1512 OF TRIM AIR COMPRESOR DE ALTA SALIDA ...

Page 34: ...nley SL Bostitch garantit à l acheteur au détail original que le produit est exempt de tout défaut de matériau et de main d œuvre et accepte de réparer ou de remplacer à la discrétion de Bostitch toute agrafeuse ou cloueuse pneumatique Bostitch pour une période de sept 7 ans à compter de la date d achat un 1 an à compter de la date d achat pour les compresseurs et les outils utilisés pour des appl...

Page 35: ...pas utilisé 5 Au moment de se déplacer vers une zone de travail différente puisque l outil pourrait être actionné accidentellement et causer des blessures CHARGEMENT DE L OUTIL Au moment de charger l outil 1 Ne placez jamais la main ou toute autre partie du corps dans la région de décharge d attache de l outil 2 Ne dirigez jamais l outil vers quelqu un 3 N appuyez pas sur la gâchette et n appuyez ...

Page 36: ...r de déblocage Couvercle du nez de pose Lampe de travail à DEL Bouton de soufflerie intégrée Poignée moulée confortable Commande Dial A Depth Échappement arrière Ressort de retenue Raccord d air à rotule Taille crayon Bouton poussoir Gabarit de 40 6 cm 16 po excentré Crochet de ceinture Blocage de gâchette Protecteur de bâti Logement d embout anti marques de rechange Gâchette ...

Page 37: ...ir un degré de satisfaction de la clientèle supérieur et sont conçus pour atteindre une performance maximale lorsqu utilisés avec les attaches BOSTITICH de précision fabriquées avec les mêmes normes élevées BOSTITCH ne garantit pas les performances de vos outils s ils sont utilisés avec des dispositifs de fixation ou accessoires ne répondant pas strictement aux exigences établies pour les clous at...

Page 38: ...ion de fonctionnement pour un fonctionnement sécuritaire de cet outil Ne connectez pas cet outil à une pression d air qui pourrait dépasser 14 kg cm2 200 psi car l outil pourrait se fracturer ou éclater et causer des blessures PRESSION DE FONCTIONNEMENT Ne dépassez pas la pression de fonctionnement maximale recommandée sinon l usure de l outil en sera grandement augmentée L alimentation d air doit...

Page 39: ...ne Ne chahutez jamais N appuyez jamais sur la gâchette sans que le nez de pose soit dirigé vers la surface de travail Veillez à toujours manipuler l outil avec précaution N appuyez pas sur la gâchette ou le déclencheur pendant le chargement de l outil CHARGEMENT DU MODÈLE N62FNB Les cloueuses N62FNB sont dotées de magasins mixtes Le chargement des clous se fait selon l une ou l autre des méthodes ...

Page 40: ... disparo secuencial exige que el operador sostenga la herramienta contra la superficie de trabajo antes de accionar el gatillo Esto facilita la colocación de fijaciones en forma precisa El disparo secuencial permite la ubicación exacta de fijaciones sin posibilidad de aplicar otro al rebotar como se describe en Disparo de contacto La herramienta de disparo secuencia tiene una ventaja positiva porq...

Page 41: ...correctement Avisez votre représentant Bostitch le plus proche si votre outil continue de mal fonctionner AJUSTEMENT DE LA COMMANDE D ATTACHE DIAL A DEPTH L ajustement de la commande d attache DIAL A DEPTH permet de contrôler précisément la profondeur d enfoncement de l attache depuis le même niveau que la surface de travail jusqu à un noyage plus ou moins profond Réglez d abord la pression d air ...

Page 42: ...ampe de travail est facile à installer ou à retirer 1 Soulevez et ouvrez le couvercle du nez de pose 2 Appuyez sur le crochet à enclenchement pour retirer la lampe de travail à DEL 3 Retirez la lampe de travail à DEL du couvercle REMPLACEMENT DE LA LAMPE Insérez une nouvelle lampe de travail à DEL 1 Alignez le logement de la lampe de travail à DEL avec le couvercle du nez de pose et enclenchez la ...

Page 43: ...tre la surface de travail avec une trop grande force Plutôt permettez à l outil d accuser le recul de la surface de travail afin d éviter une deuxième attache non désirée Retirez votre doigt de la gâchette après chaque opération B TIR D ATTACHE RAPIDE Pour faire fonctionner l outil de cette manière tenez le déclencheur de contact en direction de la surface de travail sans qu il y touche Appuyez su...

Page 44: ...ue du modèle N62FNB facilitant le déblocage des clous obstrués Suivez cette procédure pour dégager les clous coincés 1 Déconnectez l outil de l alimentation d air 2 Lâchez l éjecteur afin qu il n exerce plus de force sur les bâtons de clous 3 Ouvrez la porte du nez de dégagement de blocages en tirant vers le bas puis vers le haut sur le loquet 4 Enlevez l attache bloquée Dans certains cas il peut ...

Page 45: ...récautions possibles lorsque vous évaluez les outils à problèmes ATTENTION Ressort du pousseur ressort à force constante Faites preuve de prudence lorsque vous travaillez avec l assemblage du ressort Le ressort est embobiné autour d un rouleau mais sans y être attaché Si le ressort est détendu au delà de sa longueur le bout se décrochera du rouleau et le ressort se contractera d un coup et pourrai...

Page 46: ...le capuchon et utilisez un fusil à air comprimé afin de nettoyer le filtre Remplacez le filtre lorsque nécessaire 25 000 attaches tous les mois si utlisé dans des endroits poussiéreux Remplacez l embout anti marques Prévient les marques sur les applications en bois mou Enlevez l embout anti marques et remplacez le par un nouvel embout embout de rechange situé sur le magazine 25 000 attaches Rempla...

Page 47: ...d air Filtre à air obstrué Nettoyer ou remplacer le filtre à air L outil saute des attaches l alimentation est intermittente L amortisseur est usé Remplacez l amortisseur Du goudron des impuretés se sont accumulés Démontez le nez de pose et le mandrin afin de les nettoyer dans la rainure du mandrin Alimentation d air restreinte ou débit Remplacez les raccords de débranchement rapide d air inadéqua...

Page 48: ...OIRES DISPONIBLES 48 TVA 15 FN1664 ENSEMBLE DE SOUPAPE DE GÂCHETTE ÉRIES FN CLOUEUSE DE FINITION À ANGLE DE CALIBRE 15 OFFERTE AVEC FINI BRILLANT OU ACIER INOXYDABLE N62FNB RK ENSEMBLE DE RÉASSEMBLAGE N62FNB ...

Page 49: ...MBLE CLOUEUSE À TÊTE PERDUE DE CALIBRE 18 SX1838K ENSEMBLE AGRAFEUSE DE FINITION DE CALIBRE 18 PRO 1450 6 4 mm x 15 m 1 4 po x 50 p DE QUALITÉ SUPÉRIEURE TUYAU D AIR EN POLYURÉTHANE FN1664K ENSEMBLE DE CLOUEUSE DE FINITION INDUSTRIELLE SANS HUILE CALIBRE 15 CAP1512 OF TRIM AIR COMPRESSEUR À HAUT RENDEMENT ...

Page 50: ...NOTES AND RECORDS NOTAS Y REGISTROS REMARQUES ET RAPPORTS ...

Reviews: