63
Pattern editing (Pattern Edit)
Chap. 2
4.
To insert blank measures as you specified,
press [ENTER]. To cancel, press [EXIT].
The message “Now working...” will appear,
and the blank measures will be inserted.
When the operation has been completed, the
message will disappear.
* Since the insert operation will increase the number of
measures in the pattern, the Measures (p. 53) indication
in Patch Information will be updated automatically.
5.
If you want to save the pattern, proceed
to “Saving a pattern” (p. 65).
Erasing a portion of a
pattern (Erase)
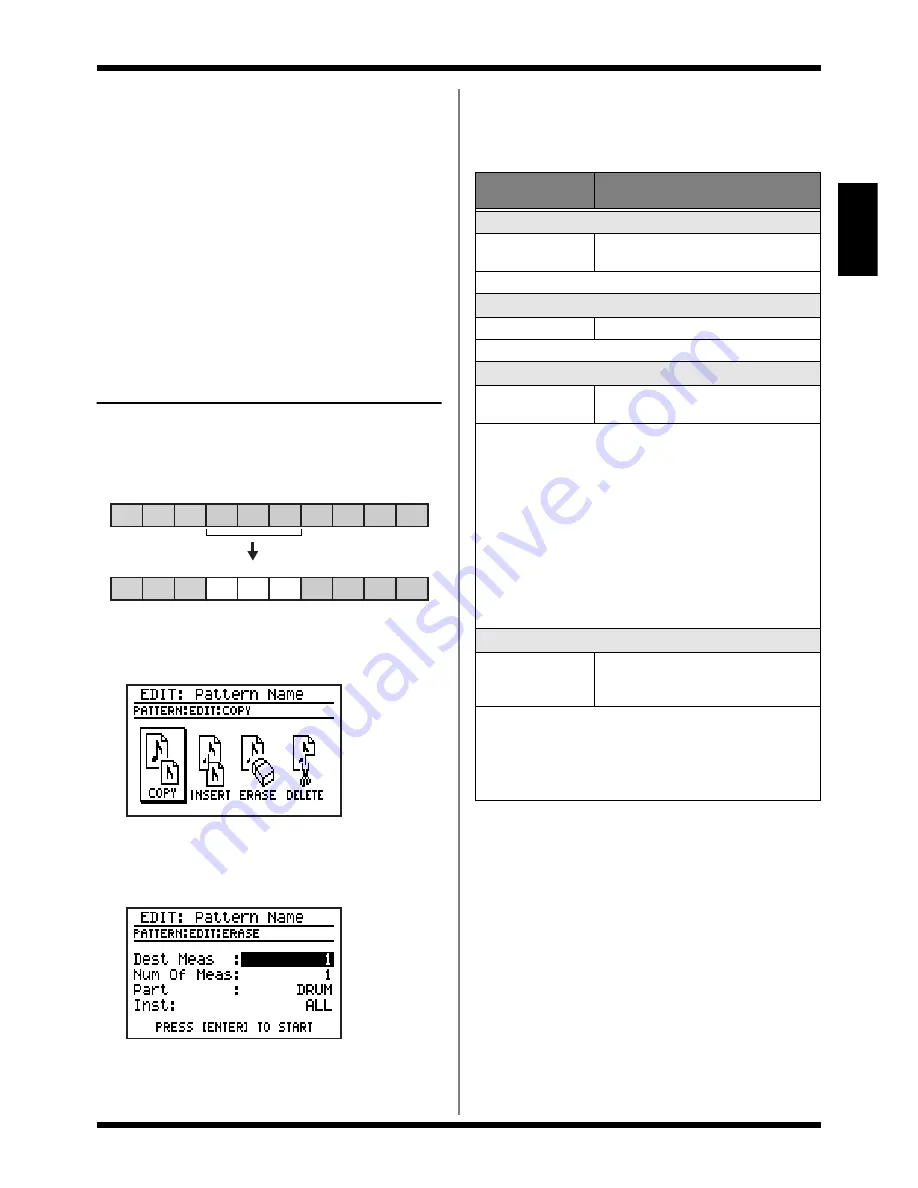
Here’s how you can erase performance data
from the specified portion of the currently
selected pattern.
fig.02-450
1.
In the pattern edit menu screen, move the
cursor to the “EDIT” icon and press [ENTER].
fig.02-410d
2.
Move the cursor to the “ERASE” icon and
press [ENTER].
The performance data Erase screen will appear.
fig.02-460d
3.
Move the cursor to the relevant item and
use the VALUE dial to specify the desired
value.
4.
To erase the data you’ve specified, press
[ENTER]. To cancel, press [EXIT].
The message “Now working...” will appear,
and the data will be erased.
When the erasure has been completed, the
message will disappear.
5.
If you want to save the pattern, proceed
to “Saving a pattern” (p. 65).
1
2
3
4
5
6
7
8
9
10
1
2
3
4
5
6
7
8
9
10
erase
Parameter/
Range
Explanation
Dest Meas
1–n
Measure at which you want to be-
gin erasing data
* “n” is the number of measures in the current pattern.
Num of Meas
1–n
Number of measures to erase
* “n” is the number of measures in the current pattern.
Part
See below
Type of data to be erased from the
specified measures
ALL:
Drum part and chord part performance data, and
chord progressions
DRUM:
Drum part performance data
BASS:
Bass part performance data
DRUM & BASS:
Drum part and bass part performance data
CHORD:
Chord progressions
Inst
ALL, 1-01–3-20
If you’ve set Part to DRUM, specify
the instruments whose data will be
erased.
Choose from the instruments in the currently selected
kit.
If you select ALL, data for all instruments in the cur-
rently selected kit will be erased.
* You can press a pad to specify the instrument.
Summary of Contents for Dr. Rhythm DR-880
Page 2: ......
Page 21: ...21 Quick Start ...
Page 48: ...48 ...
Page 74: ...74 ...
Page 84: ...84 ...
Page 115: ...115 Chapter 8 Convenient function System settings ...
Page 144: ...144 ...
Page 145: ...145 Appendices ...
Page 168: ......


