Material
Application
Grit
– Car paint
– Stone
– Marble
– Granite
– Ceramic
– Glass
– Perspex
– Fibreglass reinforced plastics
For pre-sanding
Coarse
80
For shaping and edge chamfering
Medium
100
120
For fine sanding during shaping
Fine
180
240
320
400
Buffing and edge rounding
Very fine
600
1200
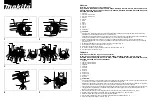
Changing the sanding sheet (see figure A)
To remove the sanding sheet
(6)
, lift it from the side and pull
it from the sanding pad
(5)
.
Remove dirt and dust from the sanding pad
(5)
, e.g. with a
paintbrush, before attaching a new sanding sheet.
The surface of the sanding pad
(5)
is fitted with a hook-and-
loop fastening, allowing sanding sheets with a similar back-
ing to be secured quickly and easily.
Press the sanding sheet
(6)
firmly onto the underside of the
sanding pad
(5)
.
To ensure optimum dust extraction, make sure that the
punched holes in the sanding sheet are aligned with the
drilled holes in the sanding pad.
The alignment aid that is in the tool box and shown in the fig-
ure enables easy alignment of the sanding sheet
(6)
on the
sanding pad
(5)
. Place the sanding sheet into the alignment
aid with the hook-and-loop fastening facing upwards and
press the power tool with the sanding pad firmly onto it.
Selection of the Sanding Plate
The power tool can be fitted with sanding pads of various
hardnesses, depending on the application:
– Extra soft sanding pad: Suitable for polishing and sensit-
ive sanding, even on curved surfaces.
– Medium hard sanding pad: Suitable for all sanding work,
universal application.
– Hard sanding pad: Suitable for heavy sanding on flat sur-
faces.
Changing the sanding pad (see figure B)
Note:
Replace damaged sanding pads
(5)
immediately.
Remove the sanding sheet or polishing tool. Unscrew the
four screws completely
(7)
and remove the sanding pad
(5)
.
Attach the new sanding pad
(5)
and retighten the screws.
Note:
When attaching the sanding pad, make sure that the
teeth of the catch mate with the recesses in the sanding pad.
Note:
Damaged sanding pads must only be replaced by an
after-sales service centre authorised to work with Bosch
power tools.
Dust/chip extraction
The dust from materials such as lead paint, some types of
wood, minerals and metal can be harmful to human health.
Touching or breathing in this dust can trigger allergic reac-
tions and/or cause respiratory illnesses in the user or in
people in the near vicinity.
Certain dusts, such as oak or beech dust, are classified as
carcinogenic, especially in conjunction with wood treatment
additives (chromate, wood preservative). Materials contain-
ing asbestos may only be machined by specialists.
– Use a dust extraction system that is suitable for the ma-
terial wherever possible.
– Provide good ventilation at the workplace.
– It is advisable to wear a P2 filter class breathing mask.
The regulations on the material being machined that apply in
the country of use must be observed.
u
Avoid dust accumulation at the workplace.
Dust can
easily ignite.
Self-generated dust extraction with dust box (see figure
C1–C4)
Place the dust box
(3)
onto the extraction outlet
(8)
until it
clicks into place.
You can easily check the filling level of the dust box
(3)
through the transparent container.
To empty the dust box
(3)
, rotate and pull it downwards.
Before opening the dust box
(3)
, knock the dust box against
a firm surface as shown in the figure to loosen the dust from
the filter element.
Holding the dust box
(3)
firmly, flap the filter element
(9)
upwards out of the way and empty the dust box. Use a soft
brush to clean the flaps of the filter element
(9)
.
English |
15
Bosch Power Tools
1 609 92A 4AG | (22.05.2018)


