How it works
en
33
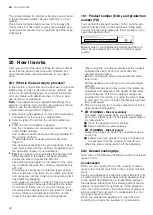
Both added-steam cooking and cooking with a type of
steam heating necessitate the production of large
amounts of steam in the cooking compartment. Wipe
the cooking compartment down once the appliance
has cooled down.
Baking tins
For best results, we recommend using dark-coloured
metal baking tins.
Tinplate baking tins, ceramic dishes and glass dishes
extend the baking time and prevent the baked item
from browning evenly.
If you are using silicone moulds, check the manufac-
turer's instructions to see whether they are suitable for
use with microwaves or steam-assisted cooking. Use
the manufacturer's instructions and recipes as a guide.
Silicone moulds are often smaller than normal tins. The
given quantities and recipes may vary.
Greaseproof paper
Only use greaseproof paper that is suitable for the se-
lected temperature. Always cut the greaseproof paper
to size.
WARNING ‒ Risk of fire!
Opening the appliance door creates a draught.
Greaseproof paper may come into contact with the
heating element and catch fire.
▶
Never place greaseproof paper loosely over ac-
cessories when preheating the appliance and while
cooking.
▶
Always cut greaseproof paper to size and use a
plate or baking tin to hold it down.
20.3 Tips for keeping acrylamide levels low
during cooking
Acrylamide is harmful to your health and is produced
when you cook cereal and potato products at very high
temperatures.
Dish
Tip
General
¡
Keep cooking times as
short as possible.
¡
Brown dishes until they
are golden brown and
not too dark.
¡
Use large, thick pieces
of food. These contain
less acrylamide.
Baked items and biscuits
¡
Set the temperature for
hot air to max. 180 °C.
¡
Brush baked items
and biscuits with egg
or egg yolk. This re-
duces the production
of acrylamide.
Oven chips
¡
Spread the chips out
evenly and in a single
layer on the baking
tray.
¡
Cook at least 400 g at
once on a baking tray
so that the chips do
not dry out.
20.4 Tips for defrosting and heating
Follow these tips for good results when defrosting and
heating.
Issue
Tip
The food should be de-
frosted, hot or cooked
once the time has
elapsed.
Set a longer cooking
time. Larger quantities
and food which is piled
high require longer times.
Once the time has
elapsed, the food should
not be overheated at the
edge and cooked in the
middle.
¡
Stir the food occasion-
ally.
¡
Set a lower microwave
power setting and a
longer cooking time.
After defrosting, poultry or
meat should not be de-
frosted on the outside
only but still frozen in the
middle.
¡
Set a lower microwave
power setting.
¡
If you are defrosting a
large quantity, turn it
several times.
The food should not be
too dry.
¡
Set a lower microwave
power setting.
¡
Set a shorter cooking
time.
¡
Cover the food.
¡
Add more liquid.
20.5 Defrosting
With your appliance you can defrost frozen food.
Defrosting food
1.
Place the frozen food in an uncovered container on
the bottom of the cooking compartment.
Delicate parts such as the drumsticks and wings of
chicken or fatty outer layers of roasts can be
covered with small pieces of aluminium foil. The foil
must not touch the walls of the appliance.
2.
Start the operation.
You can remove the foil halfway through the defrost-
ing time.
3. Note:
Liquid is produced when you defrost meat
and poultry.
Drain off any liquid when turning and under no cir-
cumstances use it for other purposes or allow it to
come into contact with other foods.
4.
Redistribute the food or turn it once or twice as it
defrosts.
Turn large pieces of food several times.
5.
To even out the temperature, leave the defrosted
food to stand at room temperature for approx. 10–
60 minutes.
You can remove the giblets from poultry at this
point. You can continue to cook the meat even if a
small section of it is still frozen in the centre.


