13
3.
Use RS485 Pelco-D can control up to 255 cameras, camera ID from 001 to 255 has to be set.
4.
Use RS422 VISCA protocol can control up to 7 cameras, camera ID from 1 to 7 has to be set.
5.
Supports baud rate of 2400bps, 4800bps, 9600bps and 38400bps.
6.
How to set up the address and baud rate of the camera for SDI, please see the Page18.
7.
On the keyboard side, for RS485 control, go into the camera setting menu, select the camera address/ID
you want to set up for, set the baud rate to match the same as the one has been set on camera side, select
protocol Pelco D for RS485 control. (How to set up the menu of the keyboard, please refer to the
instruction of the keyboard you are using.)
8.
On the keyboard side, for VISCA control, select RS232/RS422 control
method, set the baud rate to match the same as the one has been set on
camera side. (How to set up the VISCA keyboard, please refer to the
instruction of the keyboard you are using.)
9.
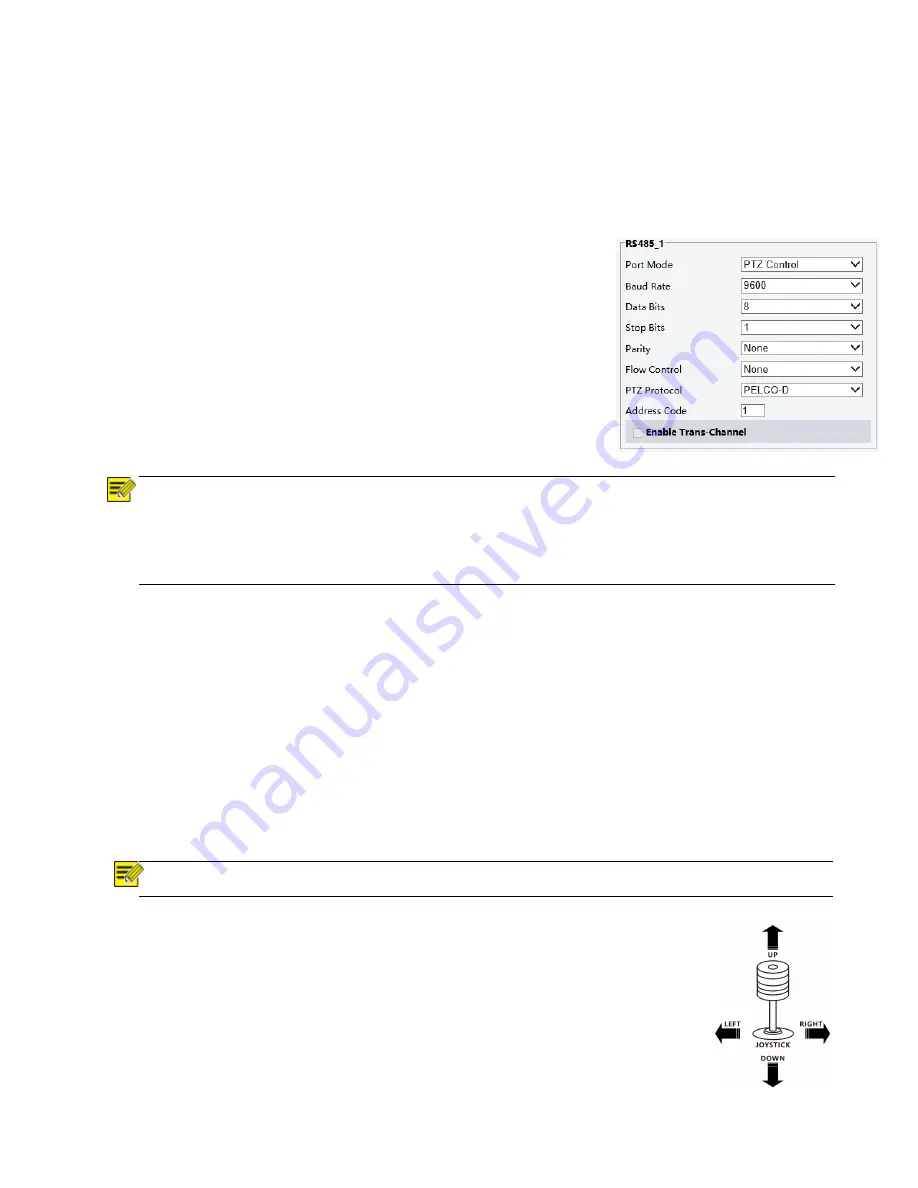
On IP control side, go into the camera IP web interface setting page by
using browser to login camera IP address (Default set to 192.168.0.13), go
to “Setup
System
Port&Devices” setting page, set the Baud Rate,
camera ID, Protocol to the same as the ones that have been set on the
camera side. (For detail, please refer to Part Two: Network Camera User
Manual Page 22.)
10.
SDI and IP video setting have to be matching with each other, if you change
any one of the settings on any sides of the SDI or IP.
NOTE!
Regarding the camera ID and Baud Rate setting, for the first communication setting, you must match the
control system (or keyboard) camera ID and Baud Rate setting to the cameras.
After communicating successfully in between the camera and the control, you can modify the ID and baud rate
of the camera using the keyboard.
By default, the camera Baud Rate
Controlling the Camera
The operation of the control systems or devices of different makers may be different. To operate the camera, please
refer to the manual of the control system or the device.
Adjusting and Setting with Menus
About On-Screen Menus
You can change various settings, such as shooting conditions and system setup of the camera, while observing
menus displayed on a connected computer screen.
This section explains how to read the on-screen menus before starting menu operations.
The menu parameters may vary according to the different product model numbers.
For a complete configurations menu, see “Menu Configuration” .
NOTE!
You cannot perform pan/tilt operations while the menu is displayed.
Run preset 95th using keyboard to call/display the On-Screen Menu, the main menu
will display on the screen.
How to run presets of cameras, please refer to the manual of the keyboard/control system that you
are using.
How to adjusting and setting by joystick of keyboard
1.
Push the joystick of the keyboard to the up or down: To select the menu that you want.
2.
Push the joystick of the keyboard to the right: To enter the menu that you want.
3.
Push the joystick of the keyboard to the right: To confirm the value that you want to set to.
Summary of Contents for SD5SN-M-10162017
Page 6: ...6 WHAT S IN THE BOX Accessories Optional ...
Page 24: ...24 Dimensions Unit mm ...
Page 25: ...25 Specifications ...
Page 26: ...26 ...
Page 27: ...27 www bolintechnology com 2082 TECHNOLOGY LLC dba BOLIN TECHNOLOGY ...


