


Adjusting damping on
rear wheel
The motorcycle's han-
dling will suffer if you do
not match the spring-preload
and damping-characteristic
settings.
Adjust the damping char-
acteristic to suit the spring
preload.
Make sure ground is level
and firm and park the mo-
torcycle.
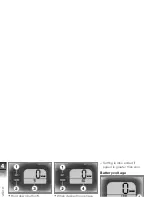
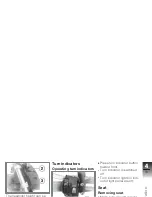
Adjust damping with nut
1
.
To increase damping, turn
nut
1
in direction
A
.
To decrease damping, turn
nut
1
in direction
B
.
Damping
Turn lower adjustment
wheel as far as possible
in direction A, then turn
13 clicks in direction B
(Full tank of gas, with rider
187 lbs (85 kg))
Tires
Checking tire pressures
Incorrect tire pressures
result in poorer handling
of the motorcycle and can
lead to accidents.
Ensure proper tire pressure.
At high road speeds, tire
valves have a tendency
to open as a result of centrifu-
gal force.
To avoid a sudden loss of tire
pressure, use a metal valve
cap with a rubber sealing ring
on the rear wheel and tighten
it securely.
Incorrect tire pressure
reduces the life of the
tires.
Ensure proper tire pressure.
Check tire pressure using
following data.
4
39
z
Operation
Summary of Contents for 2006 G 650 Xmoto
Page 1: ...Rider s Manual US Model G 650 Xmoto ...
Page 2: ...Motorcycle Retailer Data Motorcycle data Model Retailer Data Contact in Service ...
Page 6: ......
Page 10: ...1 8 tions ...
Page 12: ...2 10 iews ...
Page 14: ...2 12 iews ...
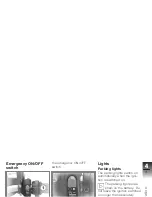
Page 18: ...Handlebar fitting right 1 Emergency ON OFF switch 31 2 Starter button 44 2 16 iews ...
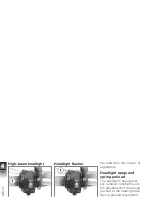
Page 20: ...Headlight 2 18 iews ...
Page 28: ...3 26 ators ...
Page 32: ...Setting is also ended if speed is greater than zero Battery voltage 4 30 ation ...
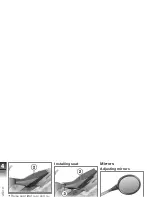
Page 36: ...Installing seat Mirrors Adjusting mirrors 4 34 ation ...
Page 56: ...5 54 iding ...
Page 57: ...Accessories General instructions 56 Onboard socketOE 56 6 55 ories ...
Page 60: ...6 58 ories ...
Page 77: ...Front axle clamping 7 lb ft 10 Nm with OE BMW Motorrad ABS 7 75 ance ...
Page 78: ...7 76 ance ...
Page 84: ...Replacing low beam and high beam bulb Removing headlight 80 Switch off ignition 7 82 ance ...
Page 92: ...Installing battery 7 90 ance ...
Page 93: ...Take off fairing side panel Installing right fairing side panel 7 91 ance ...
Page 95: ...7 93 ance ...
Page 96: ...7 94 ance ...
Page 114: ...9 112 data ...
Page 125: ...Work carried out Odometer reading Date 10 123 rvice ...


