Other Modes
Touch screen calibration
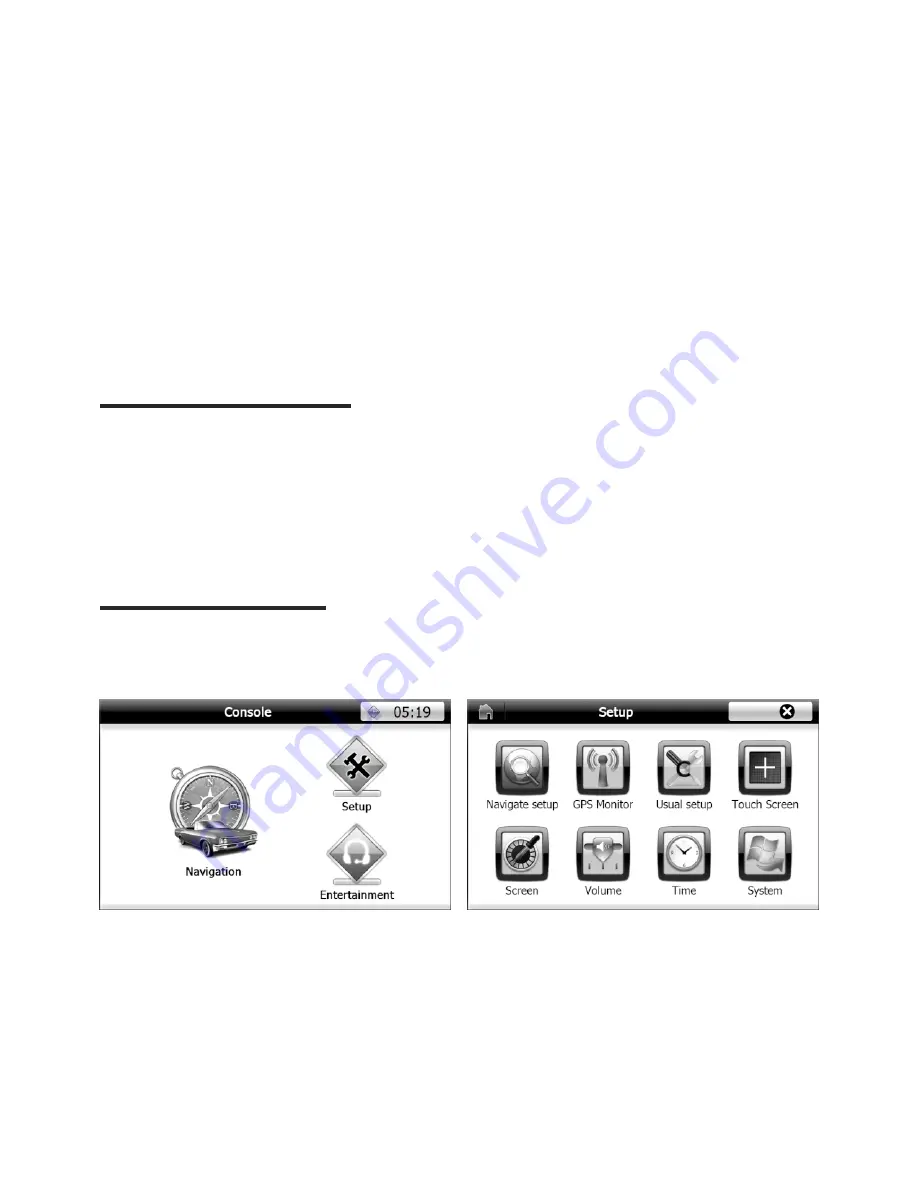
1. Touch “Navigation” on main source interface (see
). The navigatoin interface appears
(see
):
PIC 4, 5
PIC 20
You can mount the GPS antenna in the car or out of the car.
•
Fix the GPS antenna to a suitable position on the dashboard behind the windscreen, and
ensure no obstacles to receive GPS signals. When the satellites determine your position, the
navigation system can supply instruction information. At the time the satellites do not locate
your position completely, the navigation system can not supply instruction.
•
Place the GPS antenna on the top of the car outside, no obstacles on the receiving direction
Navigation Operation
AV mode
External peripheral devices with RCA audio andd video outputs can be connected with the unit.
For more details, please refer to < Electrical Connections Overall Diagram >.
Front Camera / Rear Camera
External camera devices with video output can be connected with the unit.
For more details, please refer to < Electrical Connections Overall Diagram >
NAV mode
External suited navigation devices can be connected with the unit by the MAP card slot.
For more details, please refer to <Navigation Operation>..
2. Touch “Setup” on above Console interface, the setup interface appears (see
)
3. Follow up hints on the screen, press center of the cursors, until the calibration cursor
automatically moves to up-left position, press in orders of lower-left position, lower-right
position, upper-right position.
4. If the calibration is unsuccessful, it will restart the calibration interface.
5. If the calibration is successful, “OK” will be shown on screen, touch any part of screen to
keep the calibration and retrea from the calibration interface
PIC 21
PIC 21
PIC 20
GPS Antenna Installation Guide
20
2. Touch
and then select the correct EXE
file from the navigaiton SD card.
3. Select “Start whether run navigation software
automatically” the navigation software will run
automatically when navigation is turned on.
4. After selecting the correct navigation software
from SD card, touch
to close navigaiton
setup
Navigation Operation
6. After completing the touch screen calibration, the system will memorize the calibration result
which would not lose even power off. It is unnecessary to calibrate every time power on.
7. Every product have already been calibrated before delivery.
GPS monitor
Touch “GPS Monitor” on the Setup intercace(see
). The following interface appears:.
PIC 21
Note
1. Touch for checking the received
satellite data stream;
2. Touch for checking numbers of received
satellites as well as the signal strength;
3. Touch for longitude, latitude and time
Usual Setup
Touch “Usual Setup” on the Setup interface(
). The usual setup interface will appear.
PIC 21
1. For changing language touch
or
to select desired language
2. For switching skin touch
or
untill
desired skin is found.
PIC 22
PIC 23
PIC 24
Navigation setup
1. Touch “Navigaiton Setup” in the setup interface. The navigation setup interface appears:
Run navigation software
1. Touch “Navigaiton” in the main interface.
21
Refer to navigaiton software operation instruction for exact nagvgation operation.
__________________________
__________________________
Summary of Contents for BLP-840
Page 1: ...INSTRUCTIONMANUAL BLP 890 BLP 840CUSTOMNAVIGATIONSYSTEM...
Page 2: ......
Page 9: ...7 ______________________ Location and function of controls...
Page 36: ......


