2 BBL Hybrid™ 2 Vessel Brewhouse V2
© Blichmann Engineering, LLC 2019
For replacement parts, visit: blichmannengineering.com/genuine-replacement-parts
8
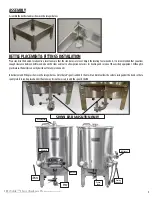
Reference the figures on pages 4 and 5 for locations of components.
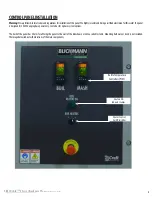
PID’s –
The PID controllers are pre-set for optimum heating rates and minimum overshoot. The corresponding large green lamp below the PID will indicate when
the control is powering the heating elements. As the temperature approaches the set point the controller will automatically begin to cycle the heating elements
on and off to maintain the set temperature. Typical stability is about +/- 1F. Note that the MASH PID is displaying temperature only and does not energize heating
elements.
To change the set point press the UP/DOWN arrows until you reach your desired setting.
To switch your kettle to Power Control Mode, press the F1 button. To change power % use the up and down arrows. To switch back to Temp Control Mode press the
F1 button again.
Heater Control Selector Switch –
there are two positions for the power selector switch on and off.
WARNING:
Energizing the heaters dry will cause the heaters to fail and potentially cause a fire. Boiling water unattended (if heaters left in the ON position) will
cause a similar failure if the water boils off.
WARNING:
Consult your local codes and regulations for unattended operation of your system.
Emergency Stop –
this switch disables all heater contactors in the panel and also can be used for ensuring your heaters do not inadvertently power on. For
safety, install a padlock through the hole in the switch to prevent unauthorized operation of the panel.
WARNING:
Pressing the emergency stop button does NOT cut power from the inside of the panel! All internal components will be live! To service the panel,
disconnect main power to the panel before opening the panel.
Sanitize the chiller by either pumping StarSan or similar copper friendly sanitizer through the chiller. Alternately the chiller may be submerged (fittings up) into a
pail of sanitizer. Drain the chiller after the recommended time with the fittings facing down. Connect the chiller per the instructions on the nameplate.
Drain off the first gallon or so of wort from the boil kettle to a waste drain to eject any solids in the piping and to ensure only clear wort flows through the chiller
to prevent plugging. Then divert the flow to the chiller. Adjust the wort flow and/or the cooling water flow to achieve the desired wort temperature to your
fermentor.
IMMEDIATELY after use back-flush the chiller with hot water to eject any solids and wort. IMMEDIATELY soak the chiller fittings up in PBW or other copper friendly
cleaning agents for 30 min or pump through the chiller. Rinse with hot water and then soak in sanitizer. Allow to drain fittings down, and then store with the
chiller horizontal. Following this procedure consistently will give you a very long service life for your chiller.
Pumps:
The pumps included with the system are seal-less magnetic drive pumps. They MUST NOT be run dry or the impeller bearing surface will be damaged!
This is NOT covered under warranty. Ensure the hoses and pump head are filled with liquid before turning on the pump. If you hear a loud squeal stop the pump
immediately!
Chiller
Sanitize the chiller by either pumping StarSan or similar copper friendly sanitizer through the chiller. Alternately the
chiller may be submerged (fittings up) into a pail of sanitizer. Drain the chiller after the recommended time with the
fittings facing down. Connect the chiller per the instructions on the nameplate.


