COMPRESSOR DISASSEMBLY
CB9A-030 page 14/28
Hazardous
machinery can
cause serious
personal injury.
Failure to disconnect and lockout
electrical power or engine drive before
attempting maintenance can cause
severe personal injury or death
Hazardous pressure
can cause serious
personal injury or
property damage
Failure to relieve system pressure prior
to performing compressor service or
maintenance can cause serious
personal injury or property damage.
Hazardous gases
can cause property
damage, personal
injury or death
Venting pressure from the compressor
piping could release explosive gas to
the atmosphere creating an explosion
hazard, possibly causing severe
personal injury or death.
NOTICE:
Before starting work on the compressor, make sure
all pressure is bled off on both the suction and
discharge.
1. Remove the head bolts from the head.
2. Remove the head and cylinder head O-rings from
the cylinder.
3. Remove the valves per the "Valve Replacement"
section.
4. PISTON
REMOVAL
a. Rotate the crankshaft by hand to bring a piston
to the top dead center position.
b. Remove the piston nut.
c. Remove the piston cap using the two 1/4"
threaded puller holes. (If two 1/4" bolts are not
readily available, the oil pump cover bolts may
be used.)
d. Remove the upper shims, the piston and the
lower shims. Keep the upper and lower shim
sets together to simplify reassembly.
e. Repeat these steps for the other piston.
5. Remove the cylinder capscrews and lift cylinder
from the crosshead guide. Do not allow the upper
packing boxes to be lifted off with the cylinder as
the packing will be damaged.
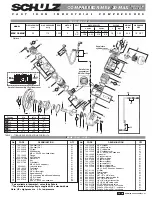
Figure 7 - Cylinder and Piston
6. PACKING BOX REMOVAL
a. Remove nameplate from the crosshead guide.
b. Lift the upper packing box assembly and
O-rings off the rod.
c. Remove oil deflector ring from the piston rod.
d. Remove the lower packing box hold-down ring
using a 3" adjustable spanner with ¼" pins
(Blackmer PN 790316).
e. Place a wooden block (or the end of a mallet
handle) through the nameplate opening on top
of the crosshead. Rotate the crankshaft by
hand until the crosshead pushes the wooden
block against the lower packing box, unseating
it.
DO NOT PLACE FINGERS INSIDE THE
NAMEPLATE OPENING!
f.
Lift the lower packing box assembly and O-ring
off the piston rod.
g. Repeat the above steps for the packing boxes
on the other rod.
h. For disassembly of the packing boxes, refer to
"Seal (Packing) Replacement."
7. Remove the crosshead guide capscrews, and lift off
the crosshead guide and gasket.
Summary of Contents for HD942A
Page 26: ...NOTES CB9A 030 page 26 28...
Page 28: ...1528 3 e 5...


